VMware Transit Connect makes connection and communication between different VMware Clouds on AWS SDDC environments easy. It uses a feature called SDDC Groups and leverages AWS Transit Gateway (TGW) construct under the hood to create fast and reliable connections. With this, you can link multiple SDDCs within a group and connect them to other VPCs in the same Region. Additionally, you can peer with AWS TGW within or across regions.
VTGW automatically sets up all the required routing policies without the user needing to worry about it. Since it is a VMware offering, it reduces the overhead of self-deploying and managing complex configurations to establish a connectivity fabric across VMware Cloud on AWS SDDCs, AWS, VPCs, and on-premises environments.
In this post, I will demonstrate the simple process of creating and establishing a connection between VTGW and DXGW. Let’s consider a scenario where the connectivity between an on-premises DC and 01-VPC via AWS Transit Gateway (TGW) is already established, and SDDC1 has been deployed successfully
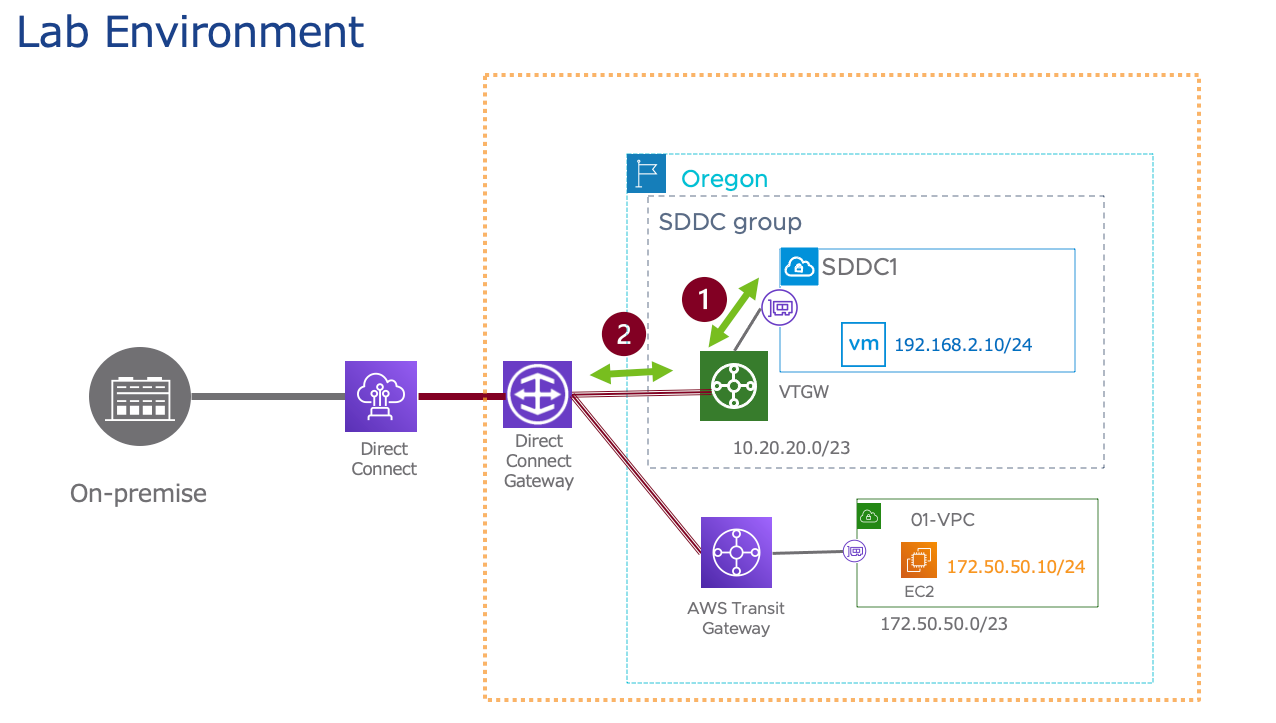
1st section creates VTGW and bind it with SDDC.
Go to ‘SDDC Groups’ on your VMConAWS console, click on ‘ACTIONS’ and Select ‘Create SDDC Group’

In the Name and Description section, provide the VGTW name (eg VTGW in my case), and provide description and click on ‘NEXT’

Select your SDDC that will be attached to VTGW (eg; SDDC1 in my case) and click on ‘NEXT’

In the Acknowledgement section click on Check Box (this means that you understand attachment and data transfer charges) and click on ‘CREATE GROUP’

In few minutes Connectivity status shows ‘CONNECTED’

2nd section connects VTGW with AWS DXGW
On AWS console go to ‘Direct Connection’ section and collect the DXGW information (DXGW id, AWS accountID). If you don’t have DXGW create a new one (In my case, it has already been Created)

Go to on your VMConAWS console, navigate ‘SDDC Groups’ and click on your VTGW

Go to ‘Direct Connect’ tab and click on ‘ADD ACCOUNT’
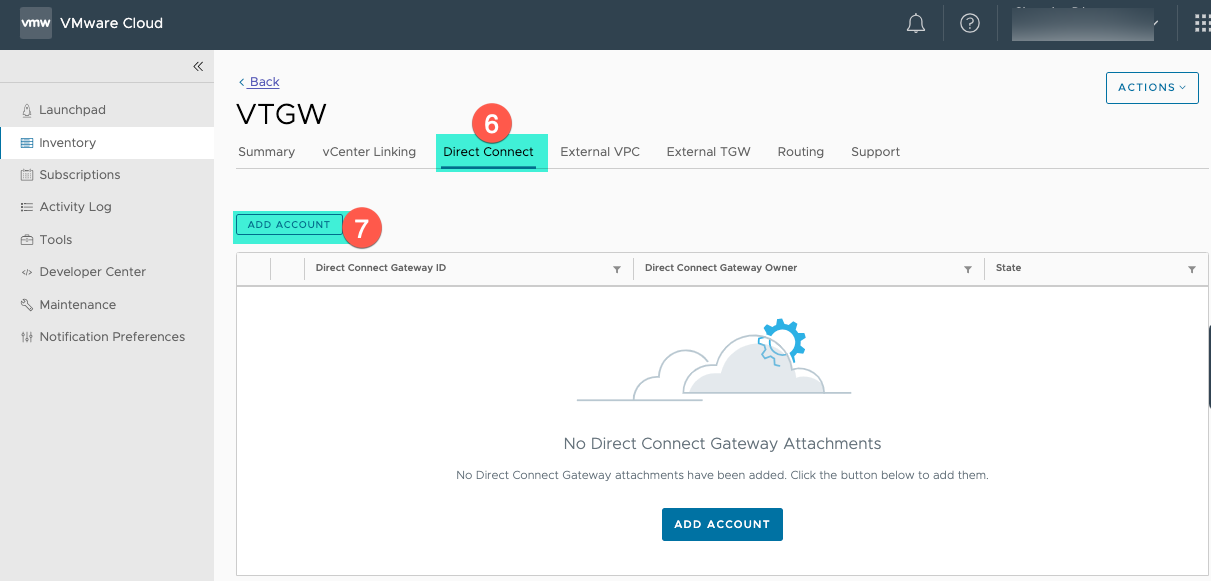
In this section, supply Direct connect Gateway ID, account id (Gateway owner), select your VTGW location, supply the prefix list that you want to allow (in my case I am allowing advertise 10.20.20.0/23 and 192.168.2.0/24) networks) and click on ‘ADD’

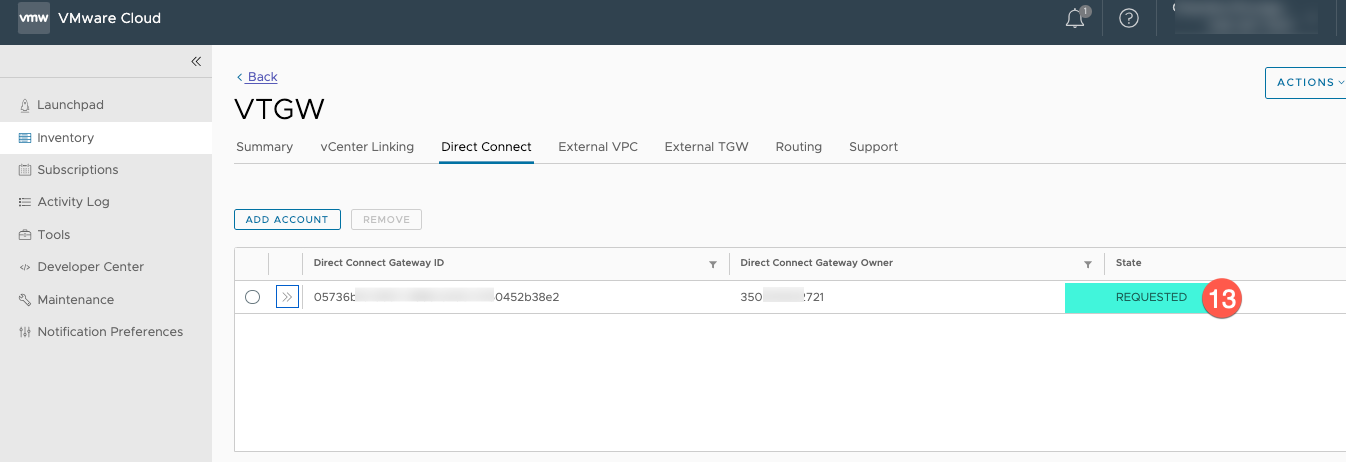
Now it shows the status is ‘REQUESTED’
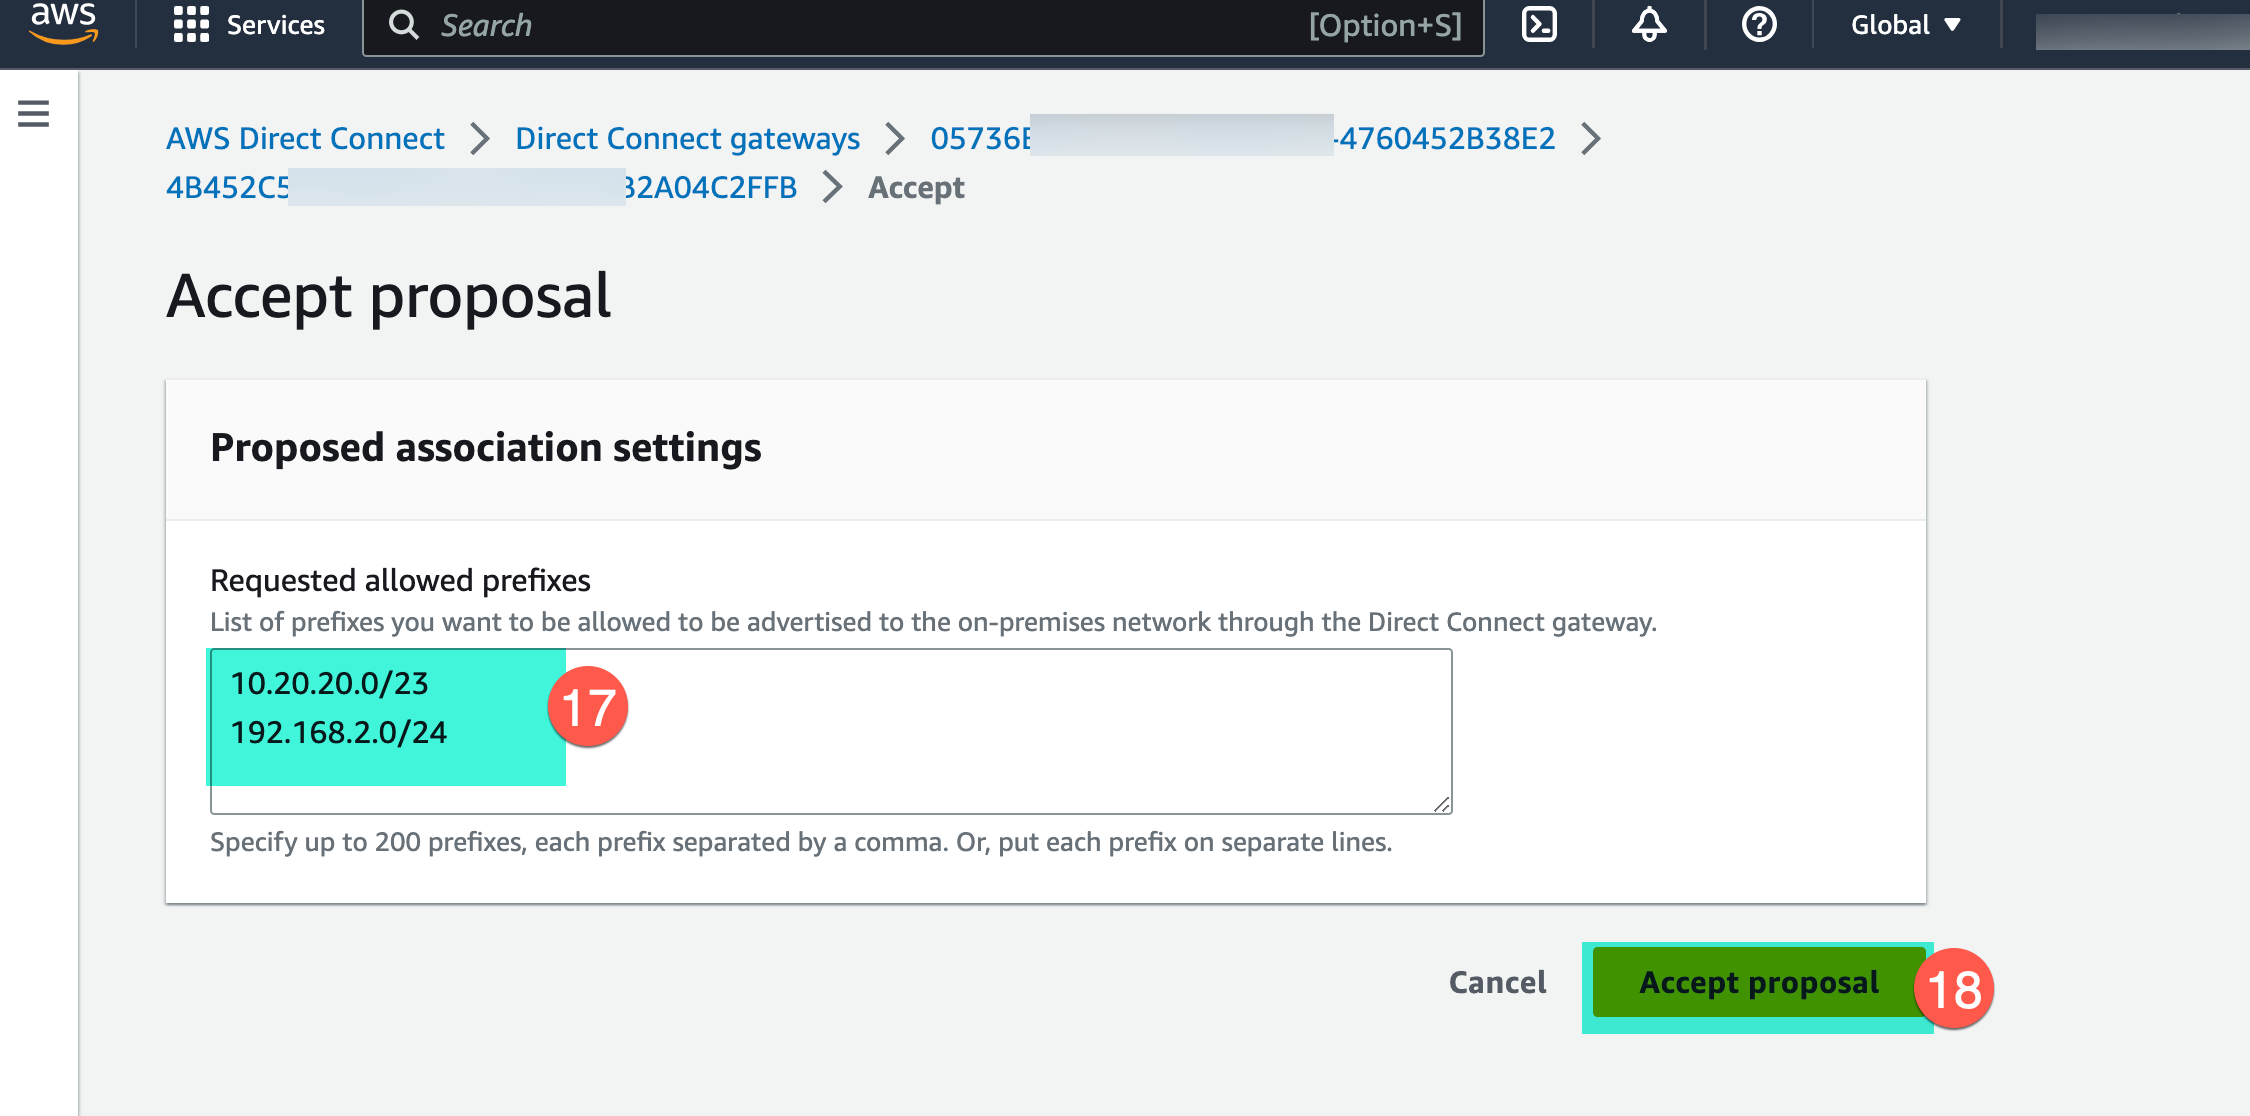
Go to on AWS Direct Connect Gateways console, under the Association Proposals you will see VTGW ID and click on ‘Accept’
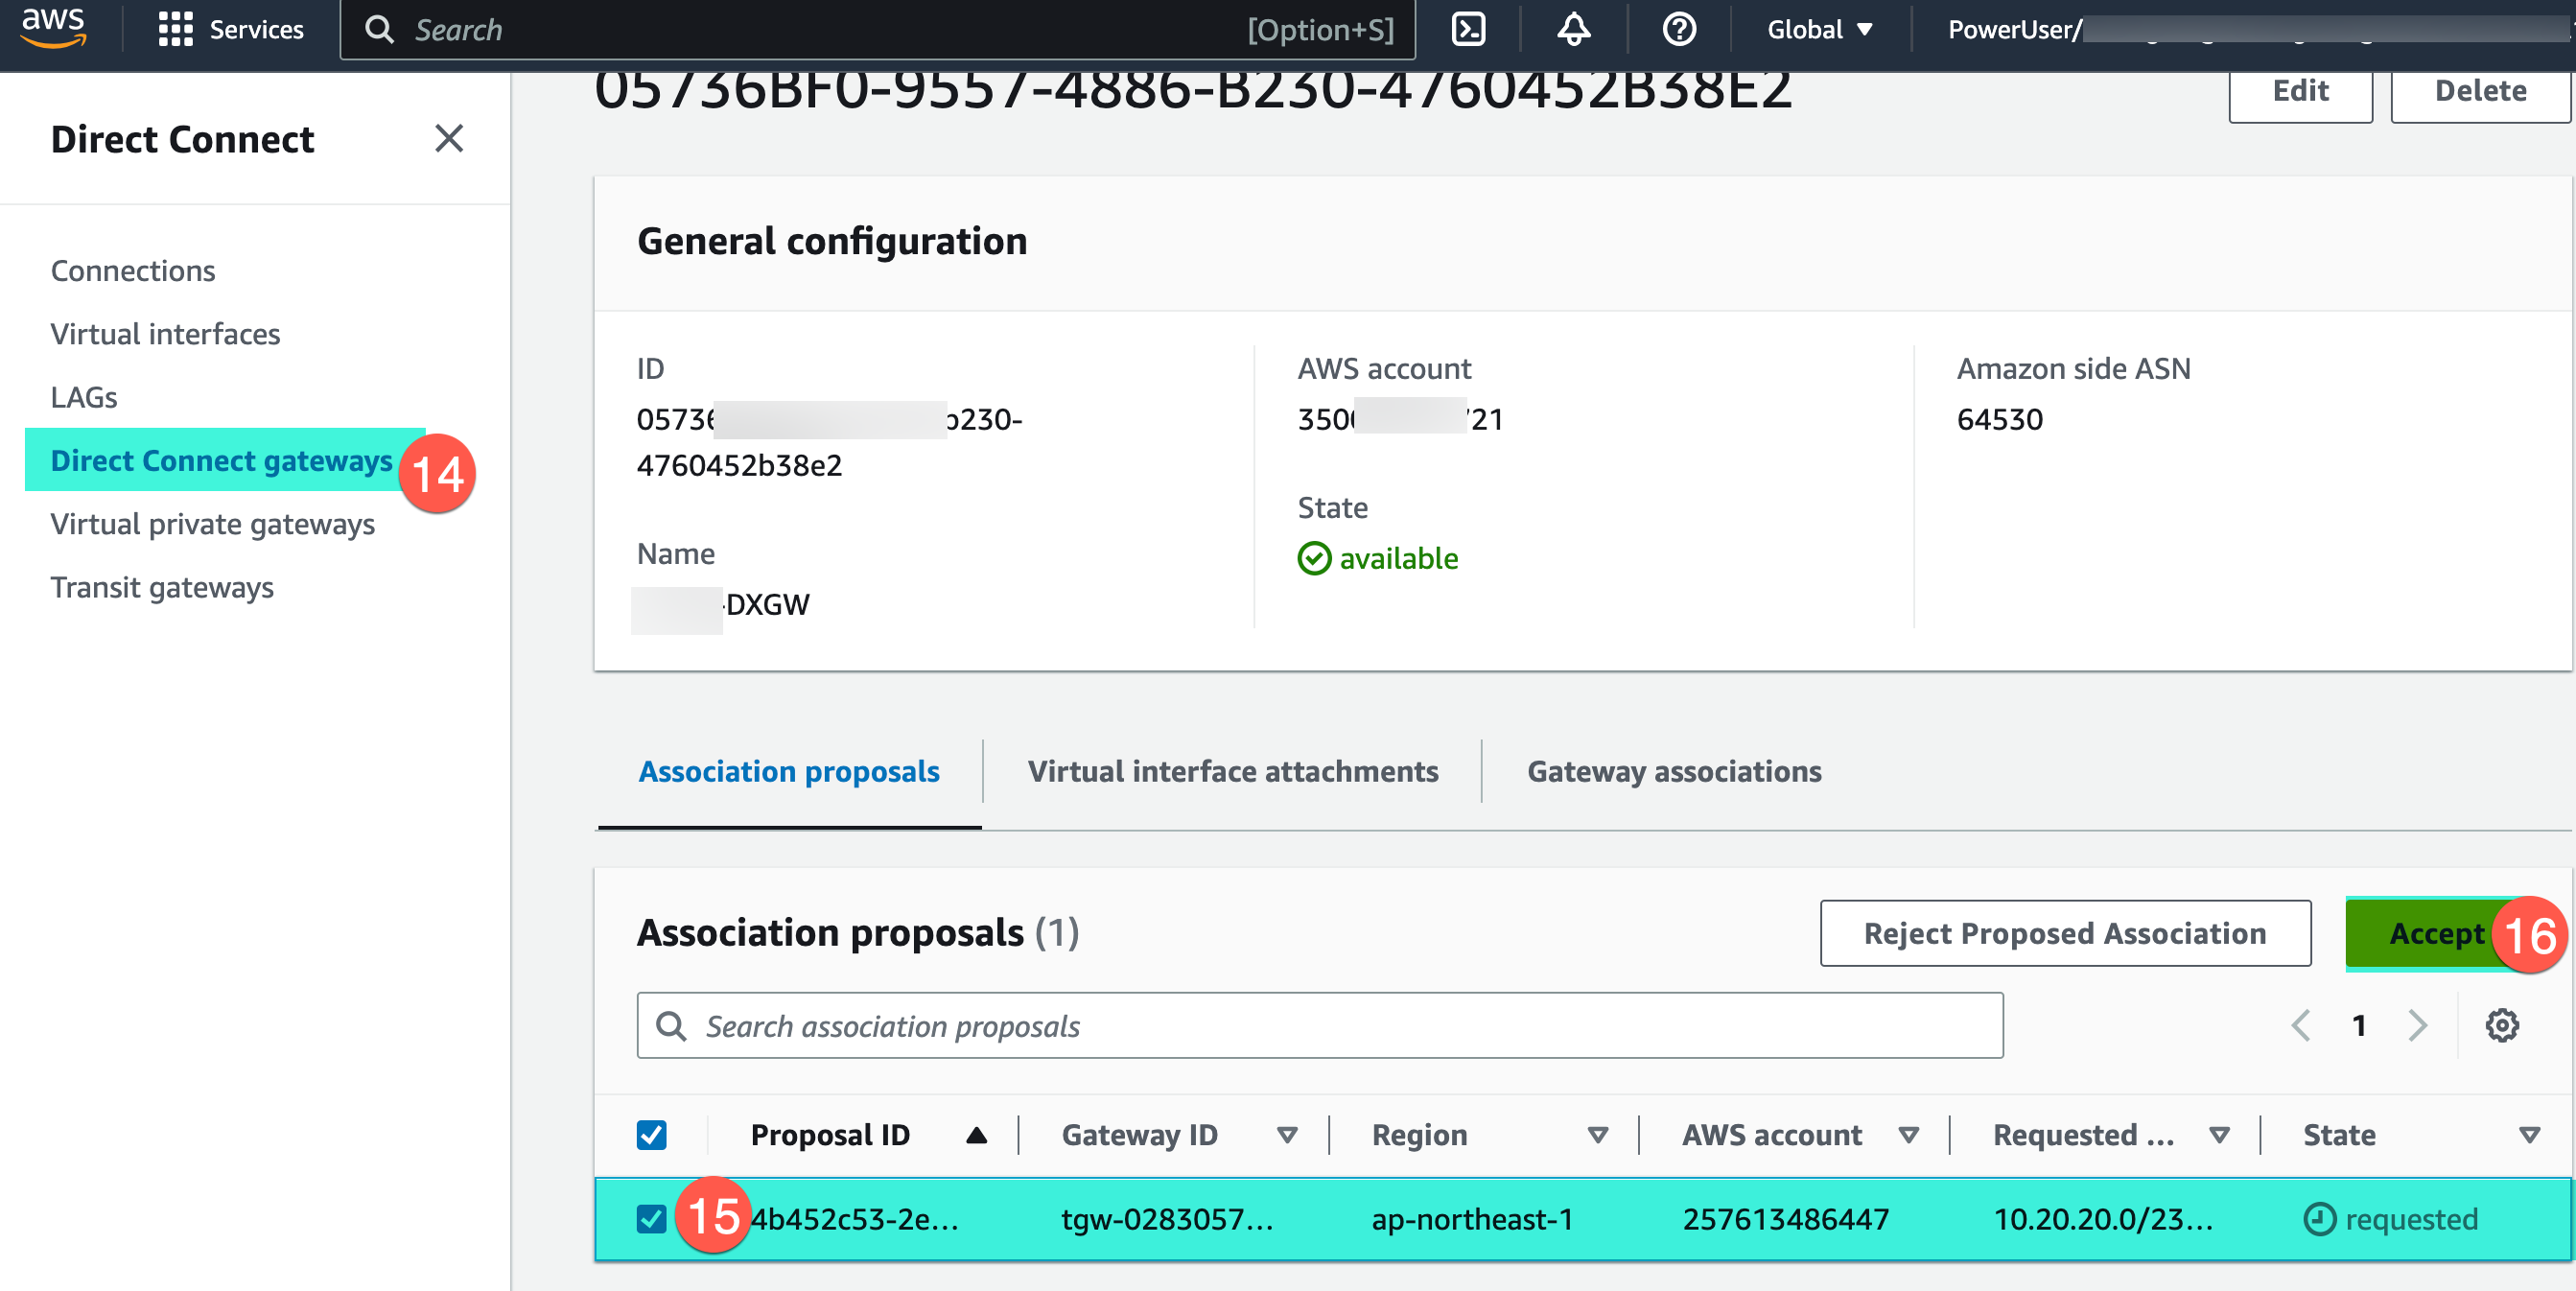
In this step you will see the same IP prefix you configured on VMConAWS console, click on ‘Accept proposal’
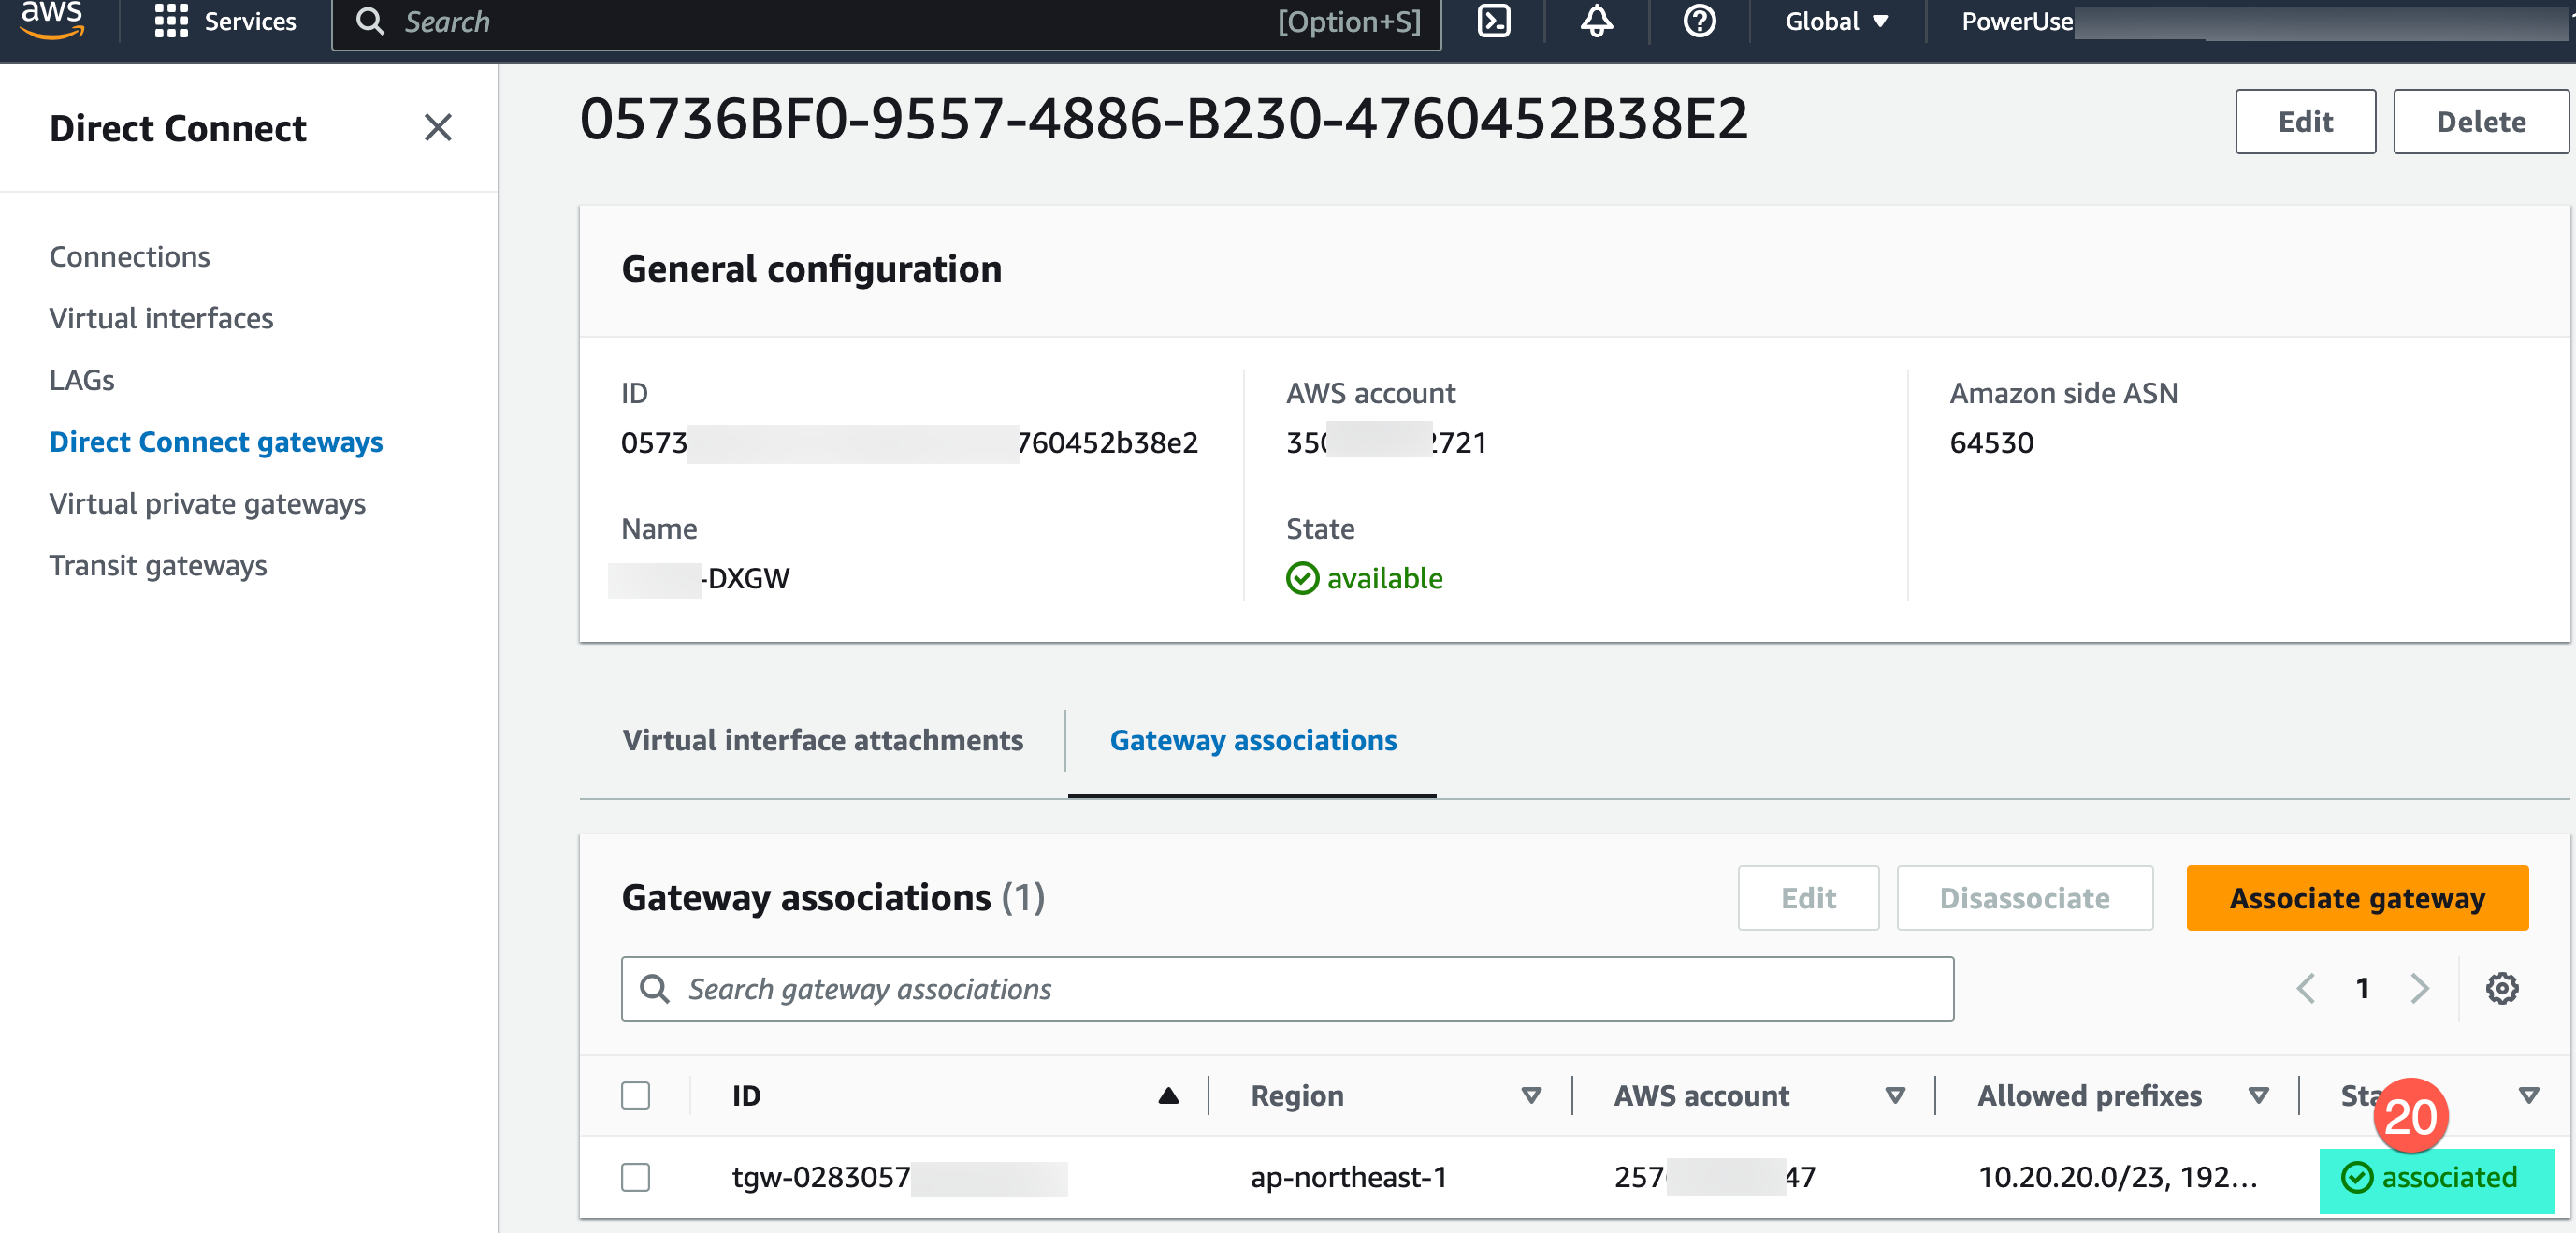
Few Minute later, you will see Status is ‘Associated’
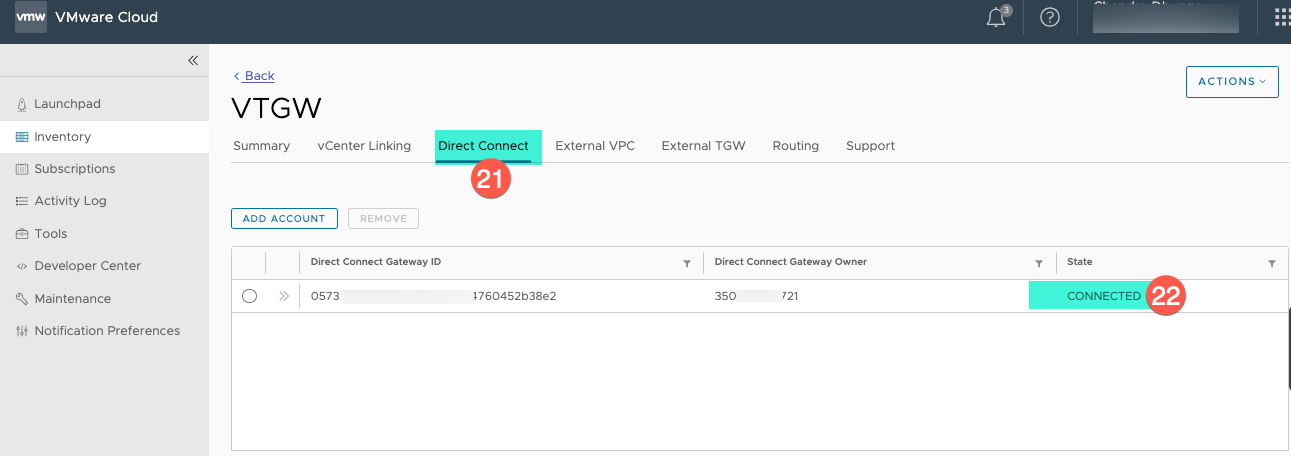
On the VMConAWS console also requested status change to ‘CONNECTED’
In this article, my main focus was to provide you a step-by-step guide on creating VTGW and linking it to DXGW. In my upcoming post, I will demonstrate how to establish a peer connection between VTGW and AWS TGW, enabling communication between VMs in the VMConAWS SDDC and EC2 instances in the VPC.
![]()