Before we start with VMware Cloud on AWS on-boarding process we need to prepare the Native AWS environment that will be linked to VMware VPC running the SDDC Stack. For that, create or use an existing VPC in the AWS region where you are going to deploy your SDDC.
1. Create a VPC & a Subnet
For an example, I will create a new VPC(SDDC-Chandra-VPC01) in Oregon Region with a CIDR block of 10.30.0.0/16 and will create 4 subnets (SDDC-Subnet01 10.30.0.0/18, SDDC-Subnet02 10.30.64.0/18 SDDC-Subnet03 10.20.128.0/18 & SDDC-Subnet04 10.30.192.0/18). Since I am deploying non-stretch (Single AZ) Cluster, Only a SDDC-Subnet02 10.30.64.0/18 will be used for SDDC deployment and other 3 subnets will be used for different purpose.
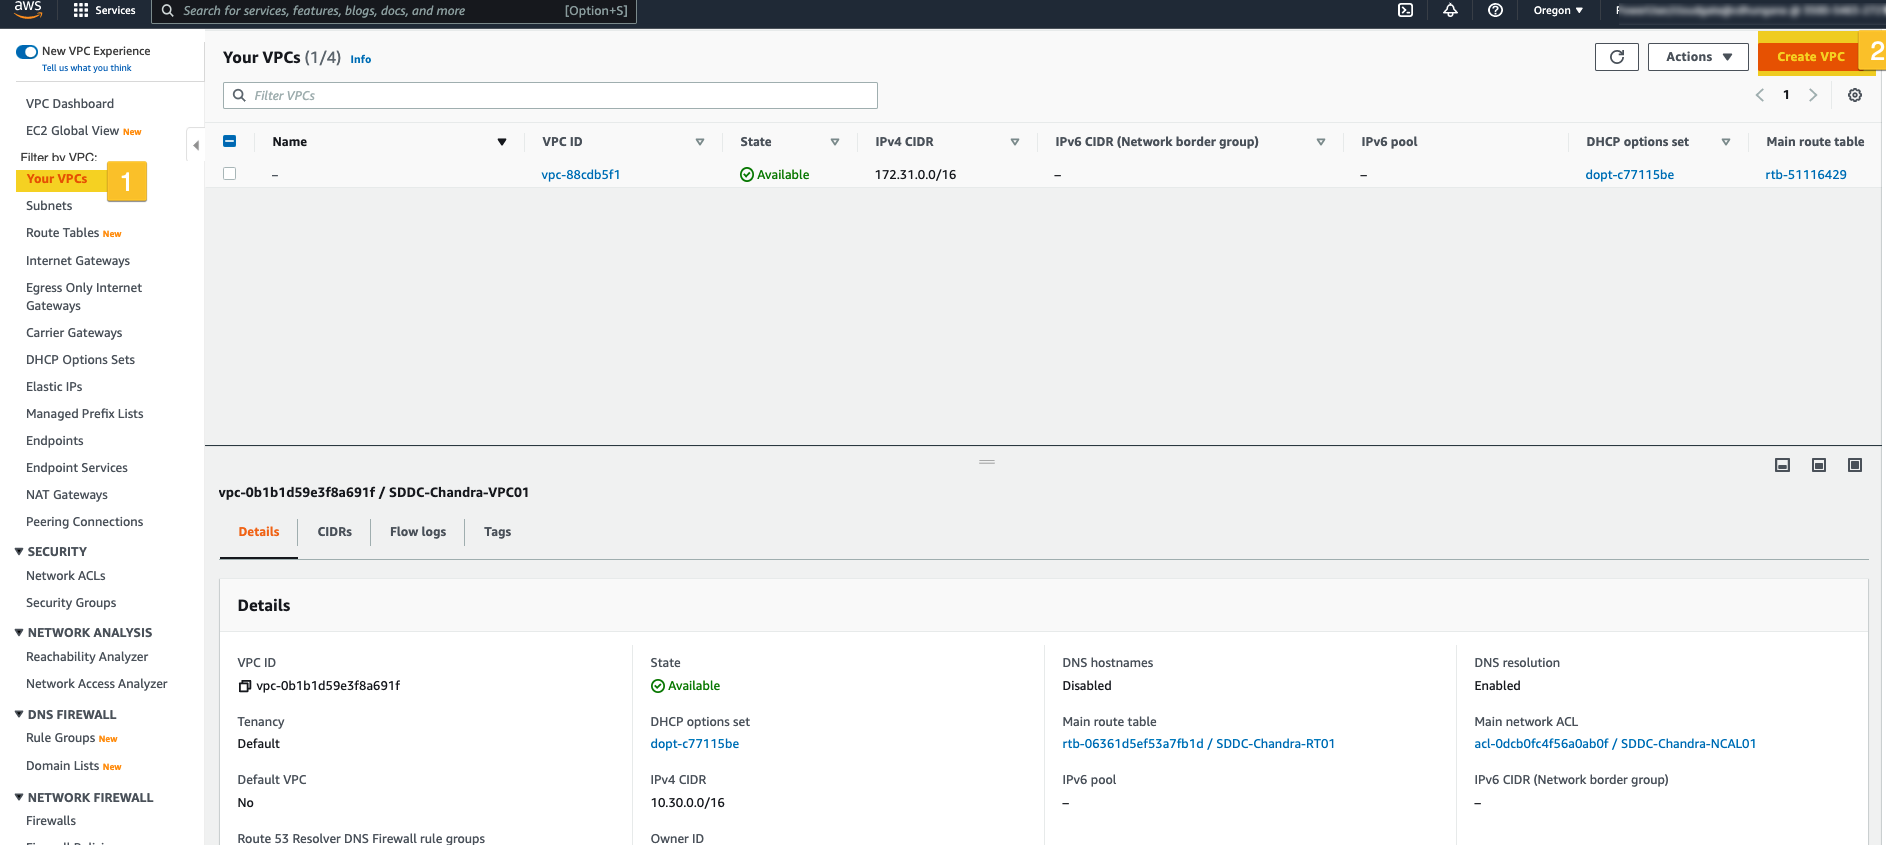
Step1. Log on to AWS portal, select ‘Your VPCs’ and Click on Create ‘VPC’
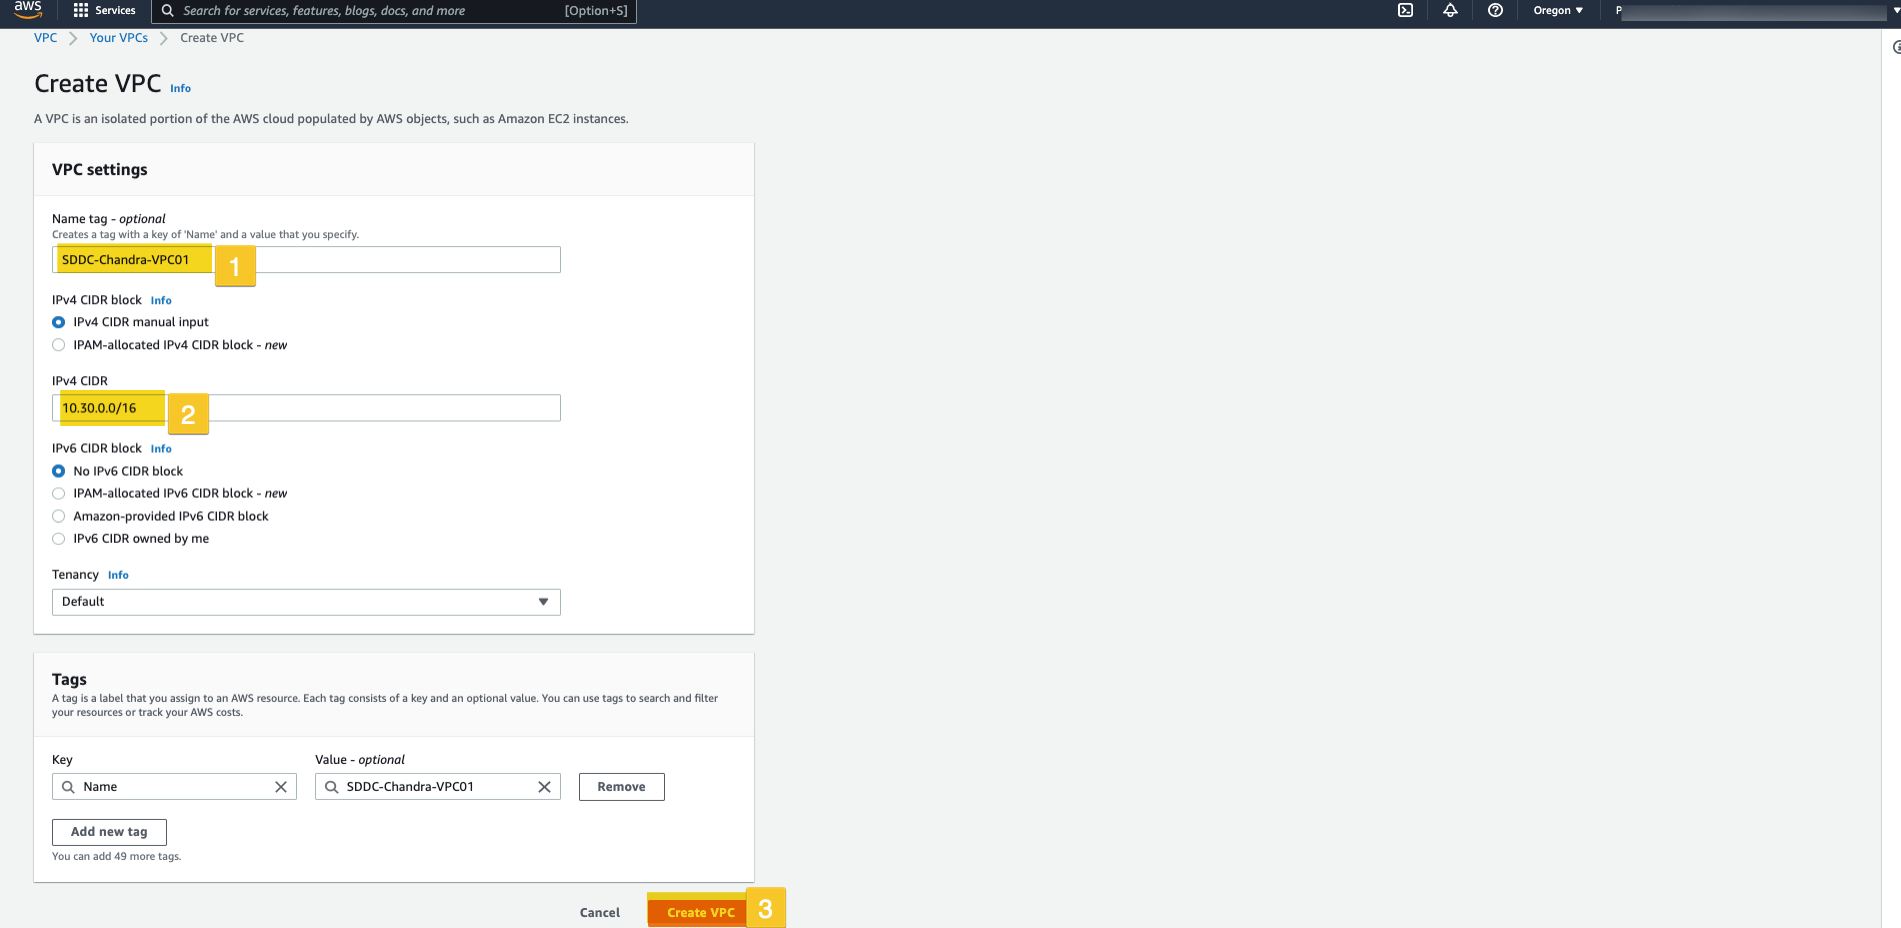
Step 2: Supply the VPC name, CIDR block for this VPC and click on Create
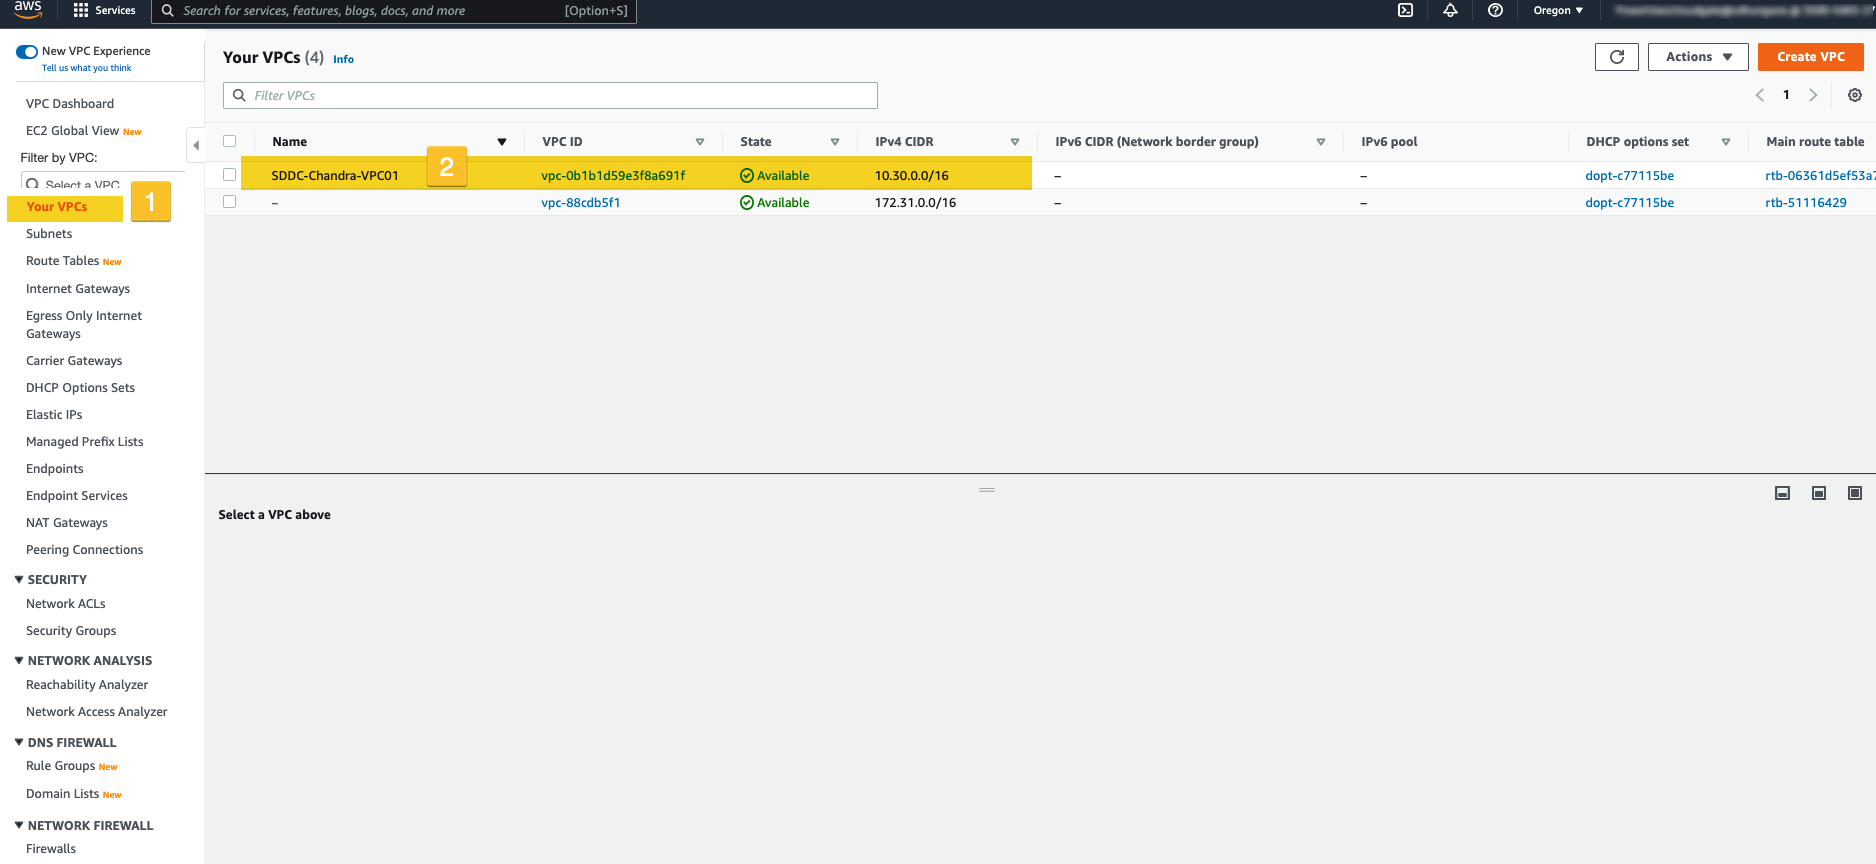
Step3: Go to ‘Your VPCs’ section and make sure that the VPC has been created
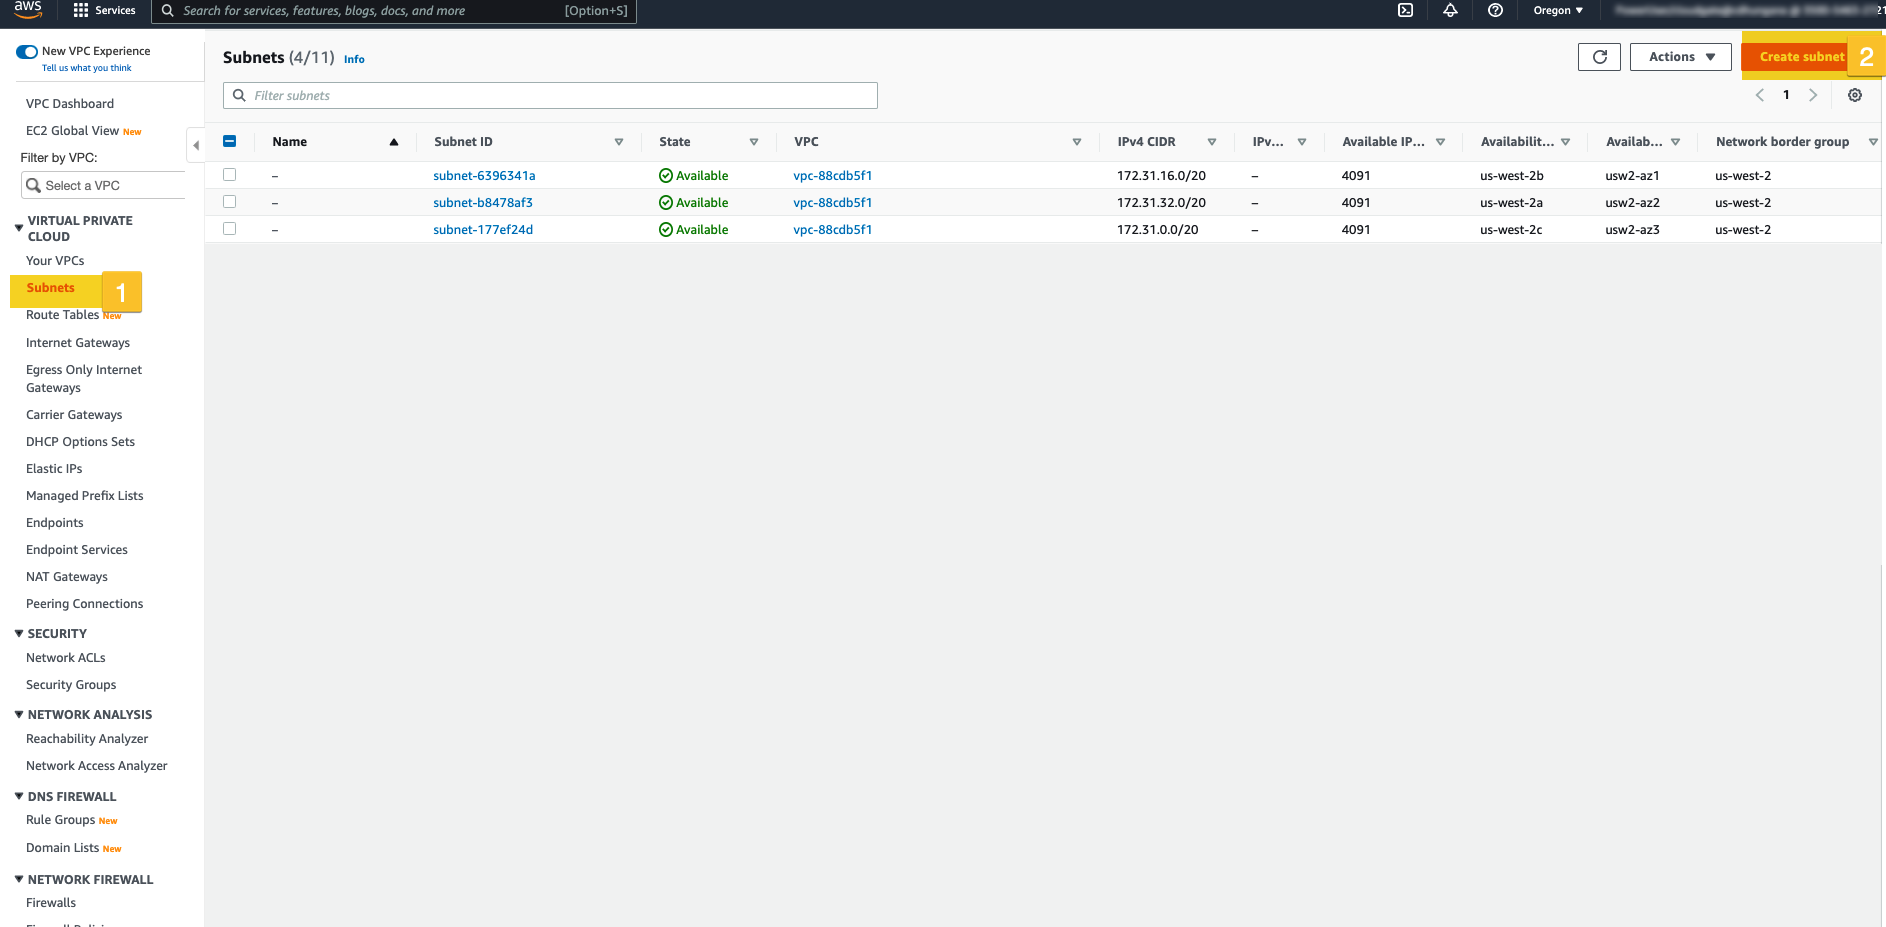
Step 4: Now, create subnet in each Availability Zone. Go to ‘Subnets’ and click on ‘Create’
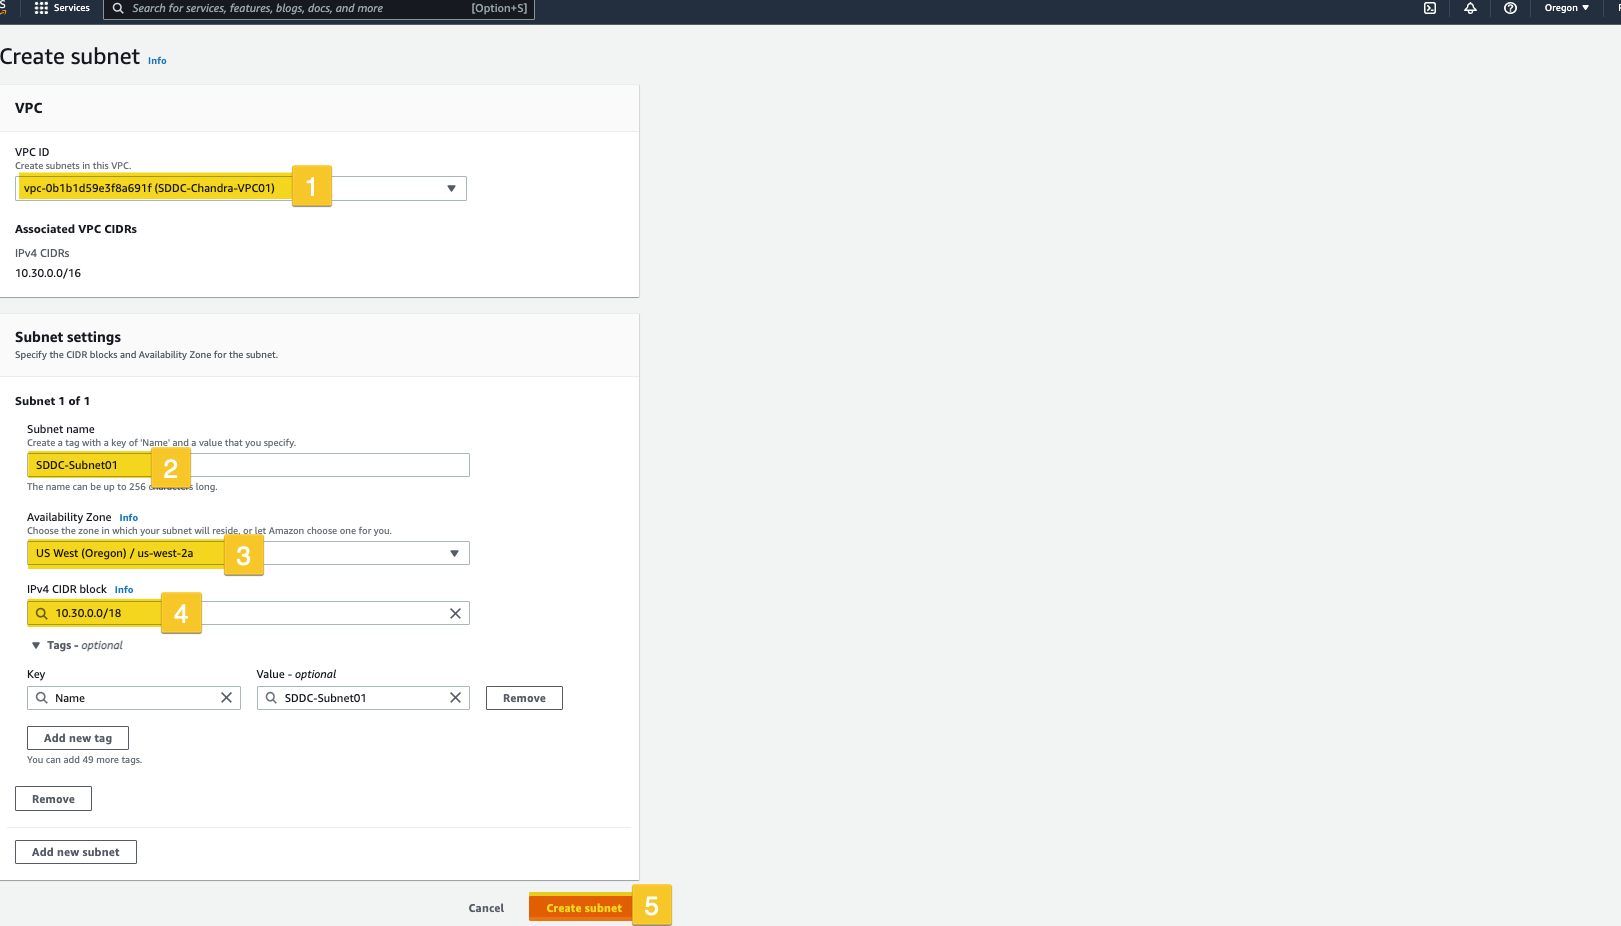
Step5: Chose the VPC that you created on Step2, provide subnet name, chose Availability zone and provide CIDR block for this subnet and click on Create.
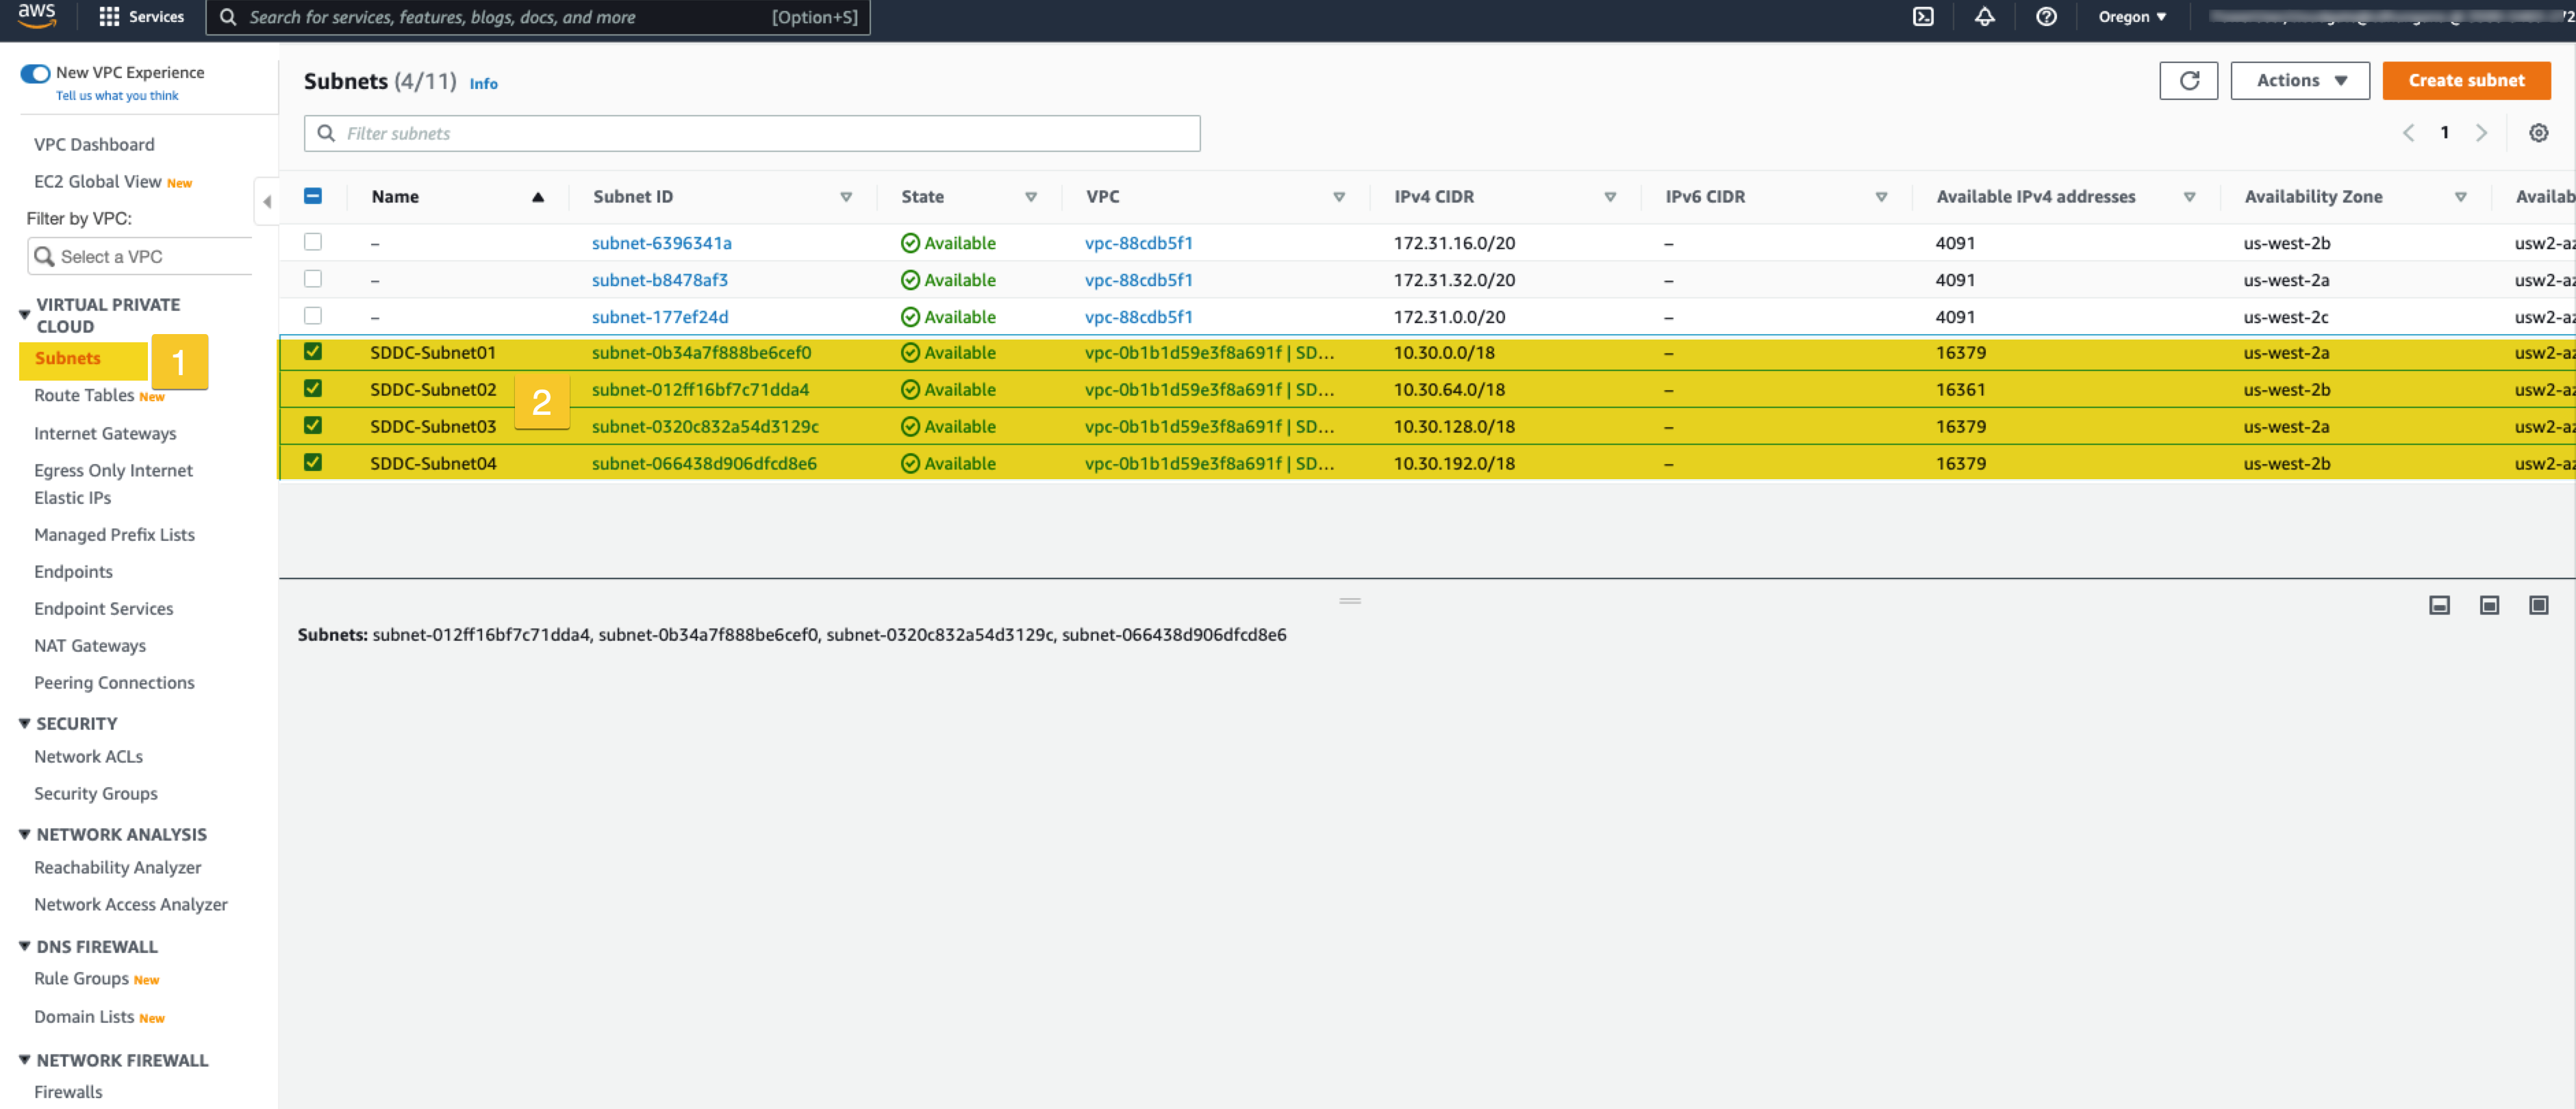
Step6: From the subnet section verify the subnets you have created ( I have created 4 different subnet here)
2. Create SDDC
Step 7: Log into your VMC Dashboard, select ‘Inventory’ and click on ‘Create SDDC’

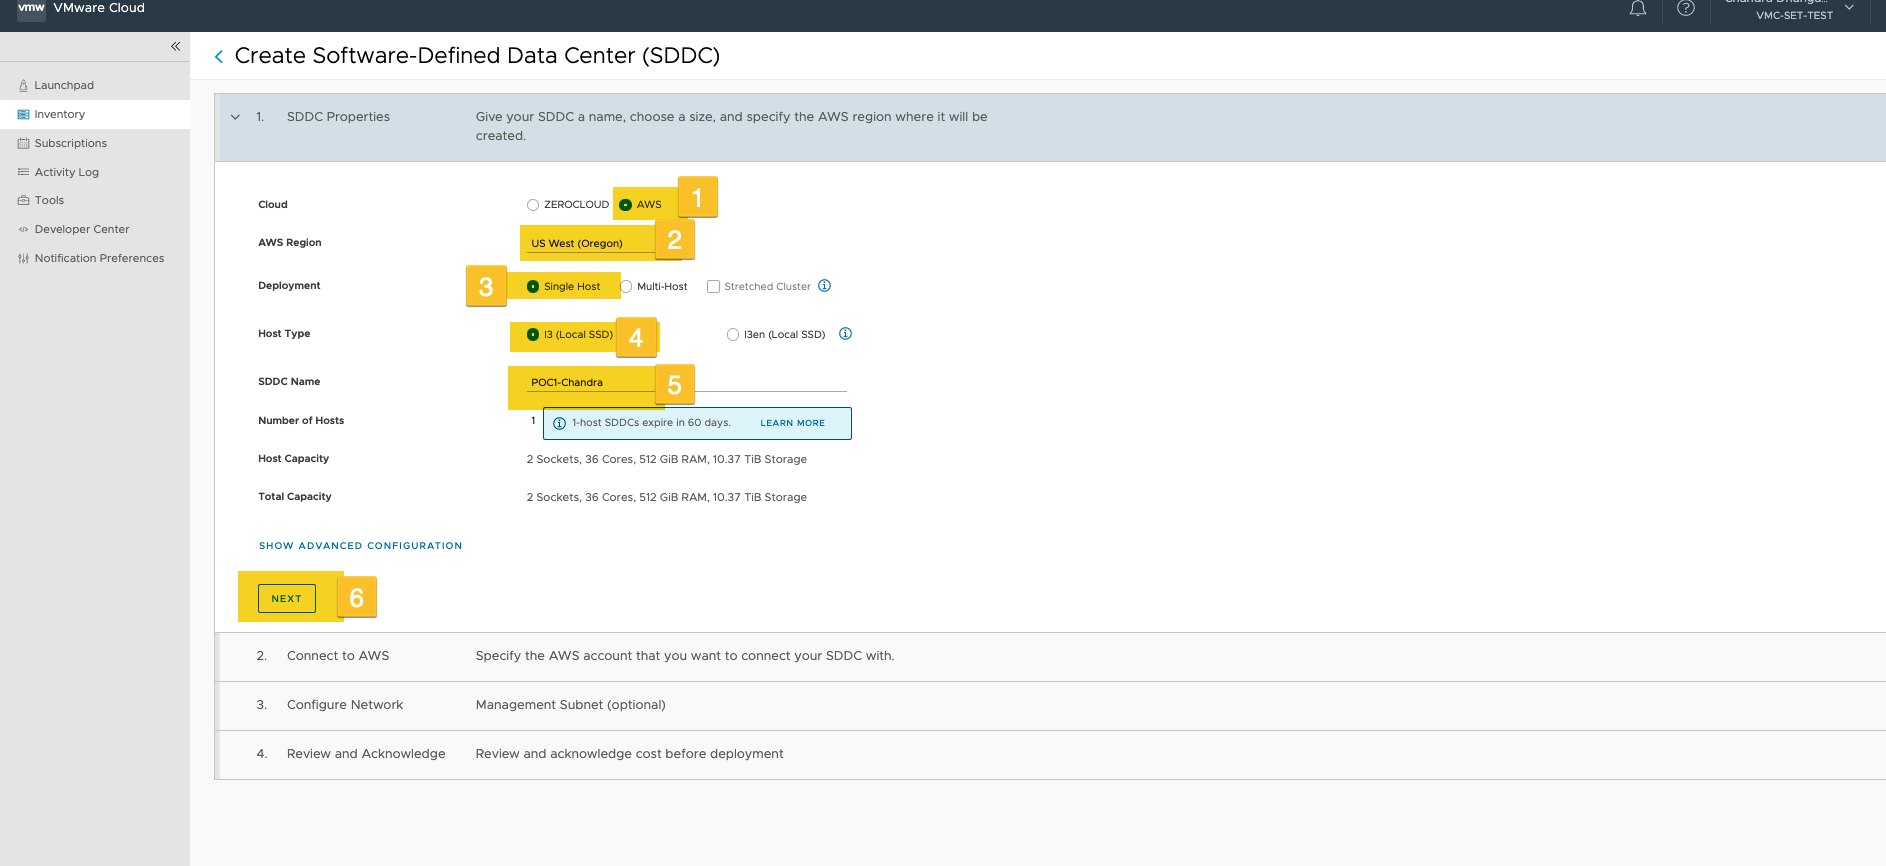
Step 8: On this step, select Cloud ‘AWS’, ‘AWS Region’, Deployment’, ‘Host type’, ‘SDDC Name’ and click on ‘Next’ (in this example I have selected i3metal, single host SDDC on Oregon Region and SDDC name POC1-Chandra)
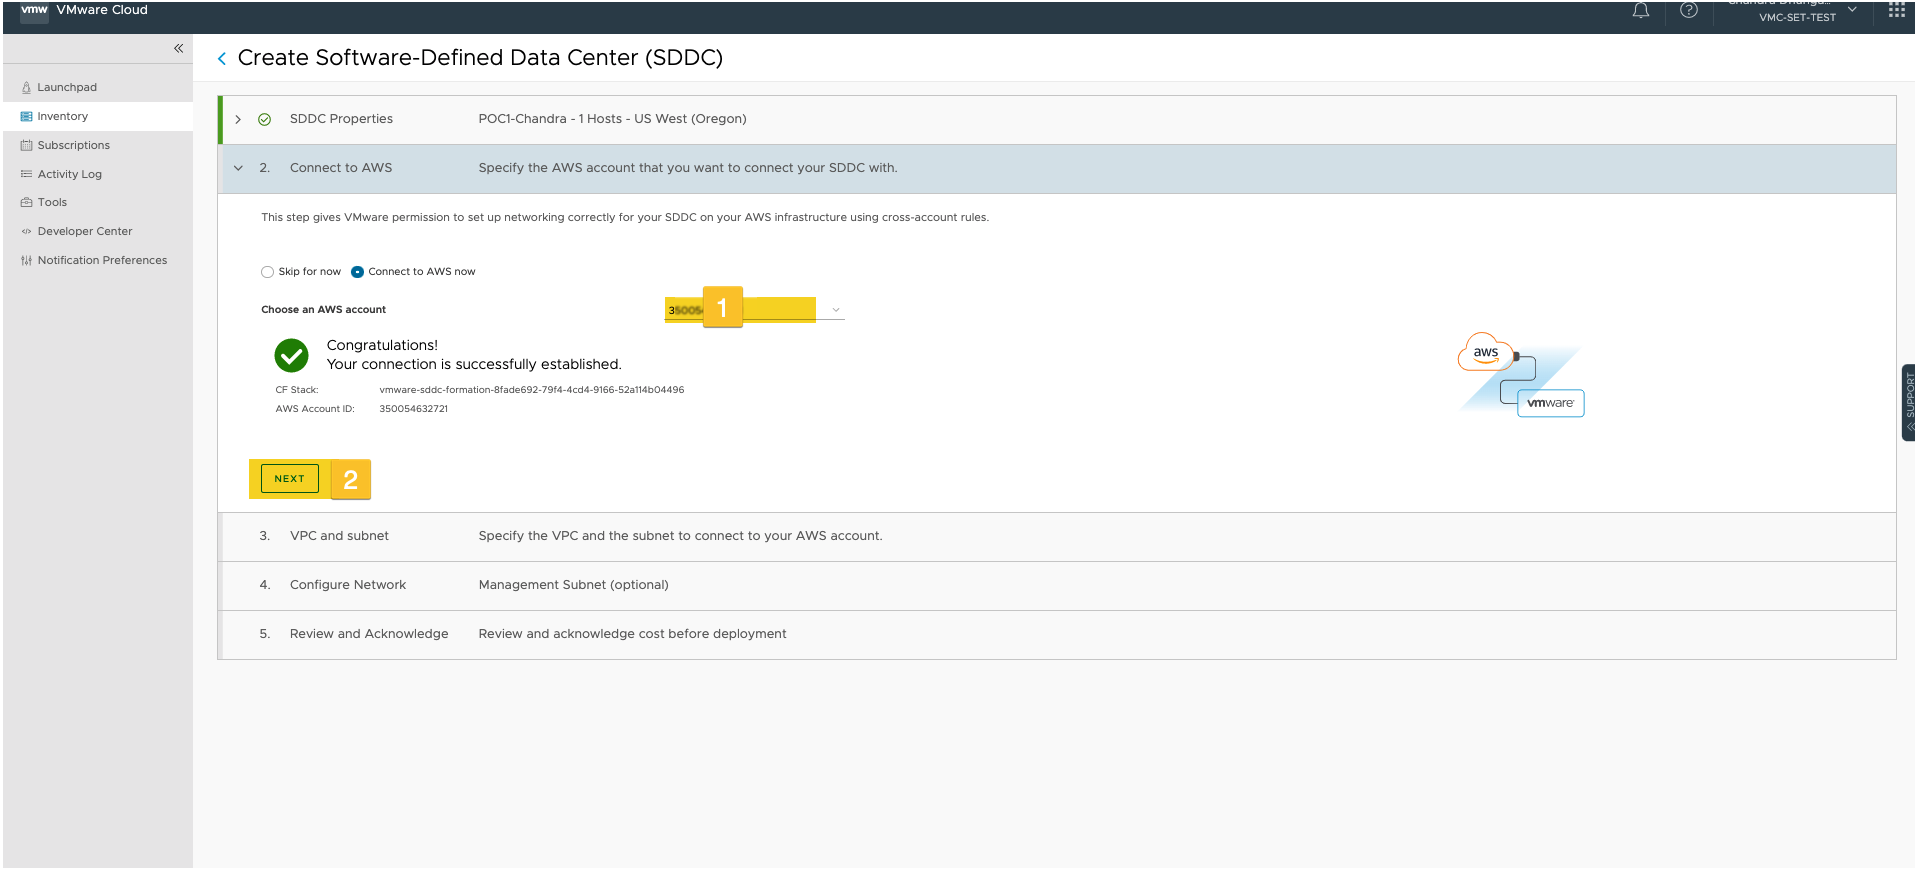
Step 9: Supply AWS account (same account you that you used to create VPC) and click on next.
If you are using this account to create SDDC first time, you need to “open the AWS console with Cloud Formation Template”, check ‘I acknowledge that AWS CloudFormation might create IAM resources’ box and ‘Create’
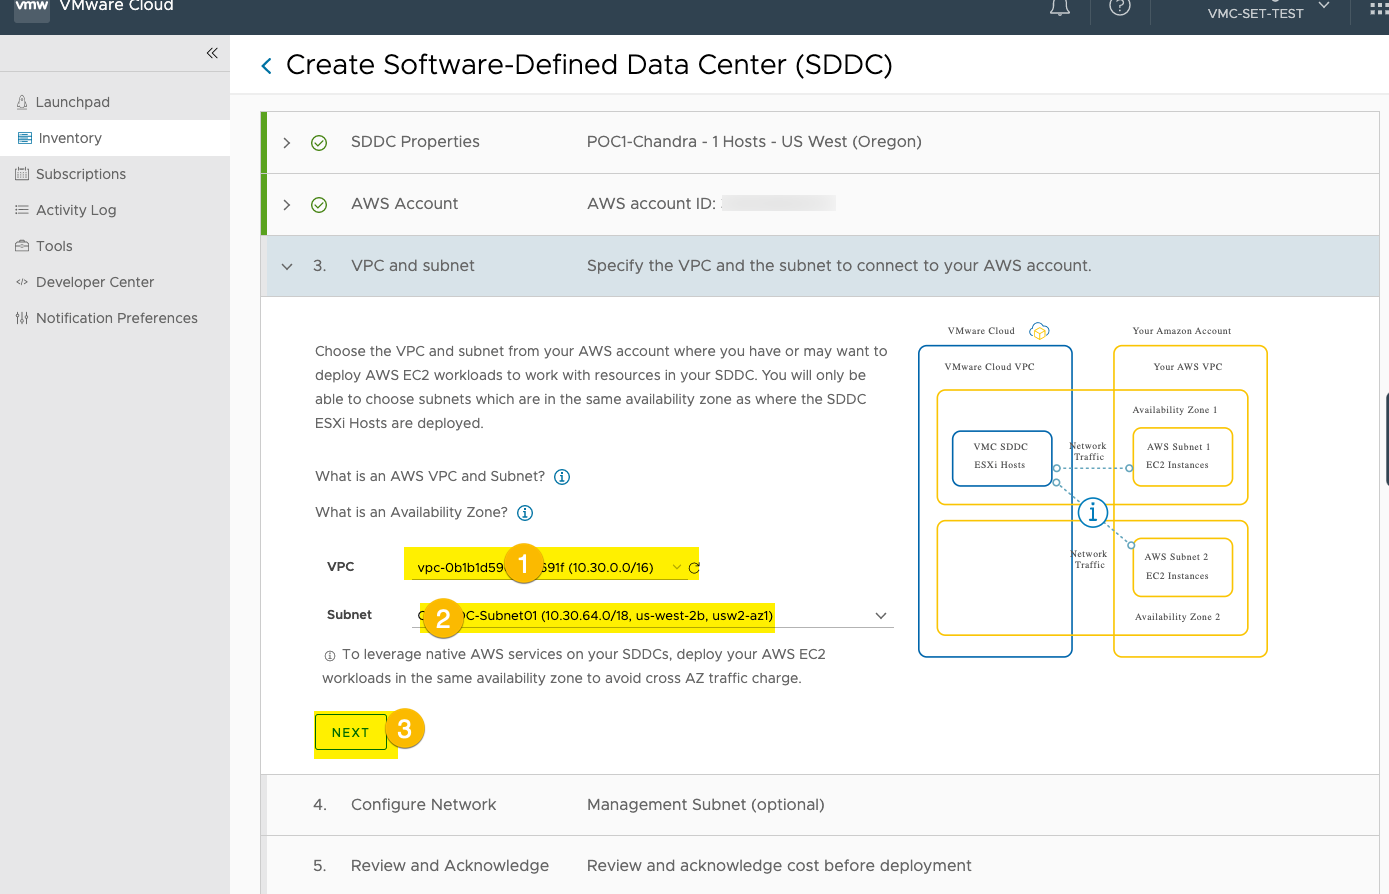
Step 10: Selected the VPC that you created on Step 2 and select one of the subnets you created on step 5 (here I am using SDDC-Subnet02 10.30.64.0/18) and click on ‘Next’
Step 11: Enter a CIDR block for the management stack ( vCenter, esxi hosts, NSX Manager, etc.)

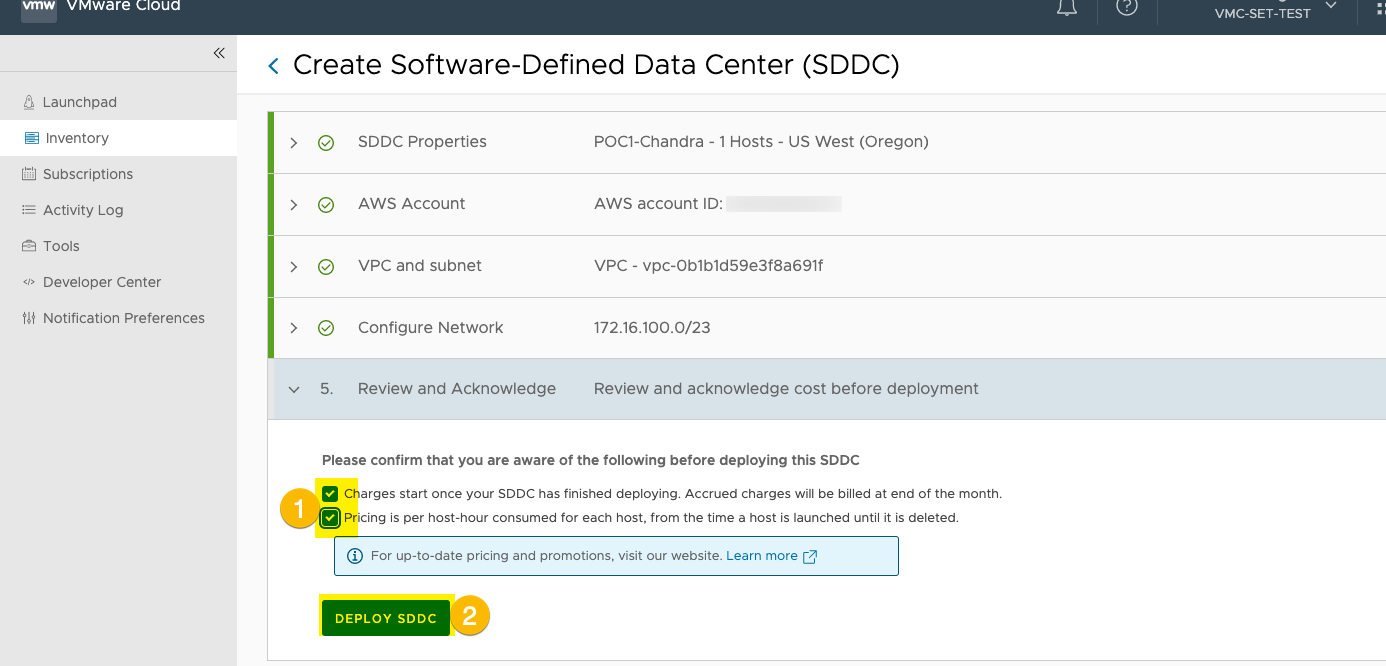
Step 12: Check mark you agree to charges and understand pricing and click on ‘ Deploy SDDC’
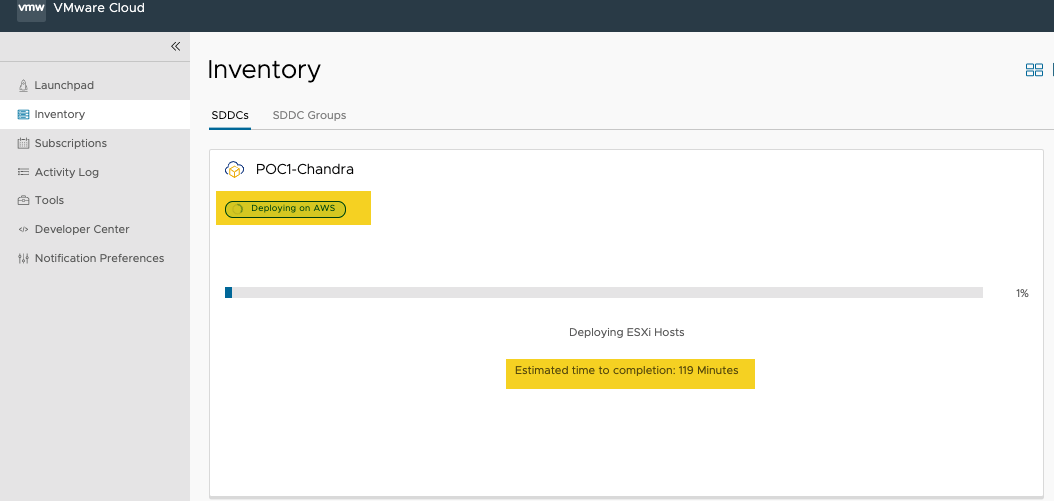
Step 13: Deploying SDDC can take up to 2 hours, have a coffee break and wait
3. Create Firewall rule to access vCenter
By default, it’s not allowed to access VC from internet you need to have firewall rule in place to access vCenter from internet.
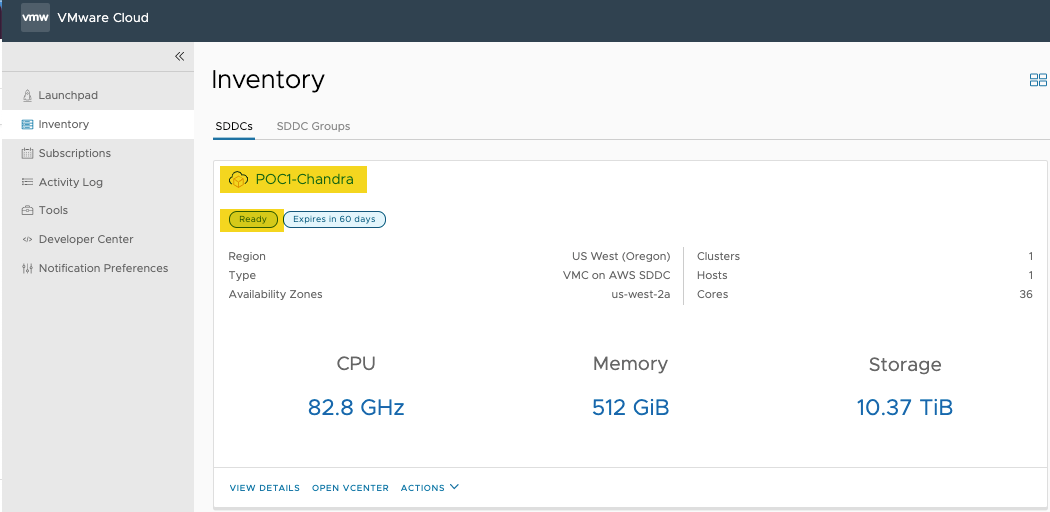
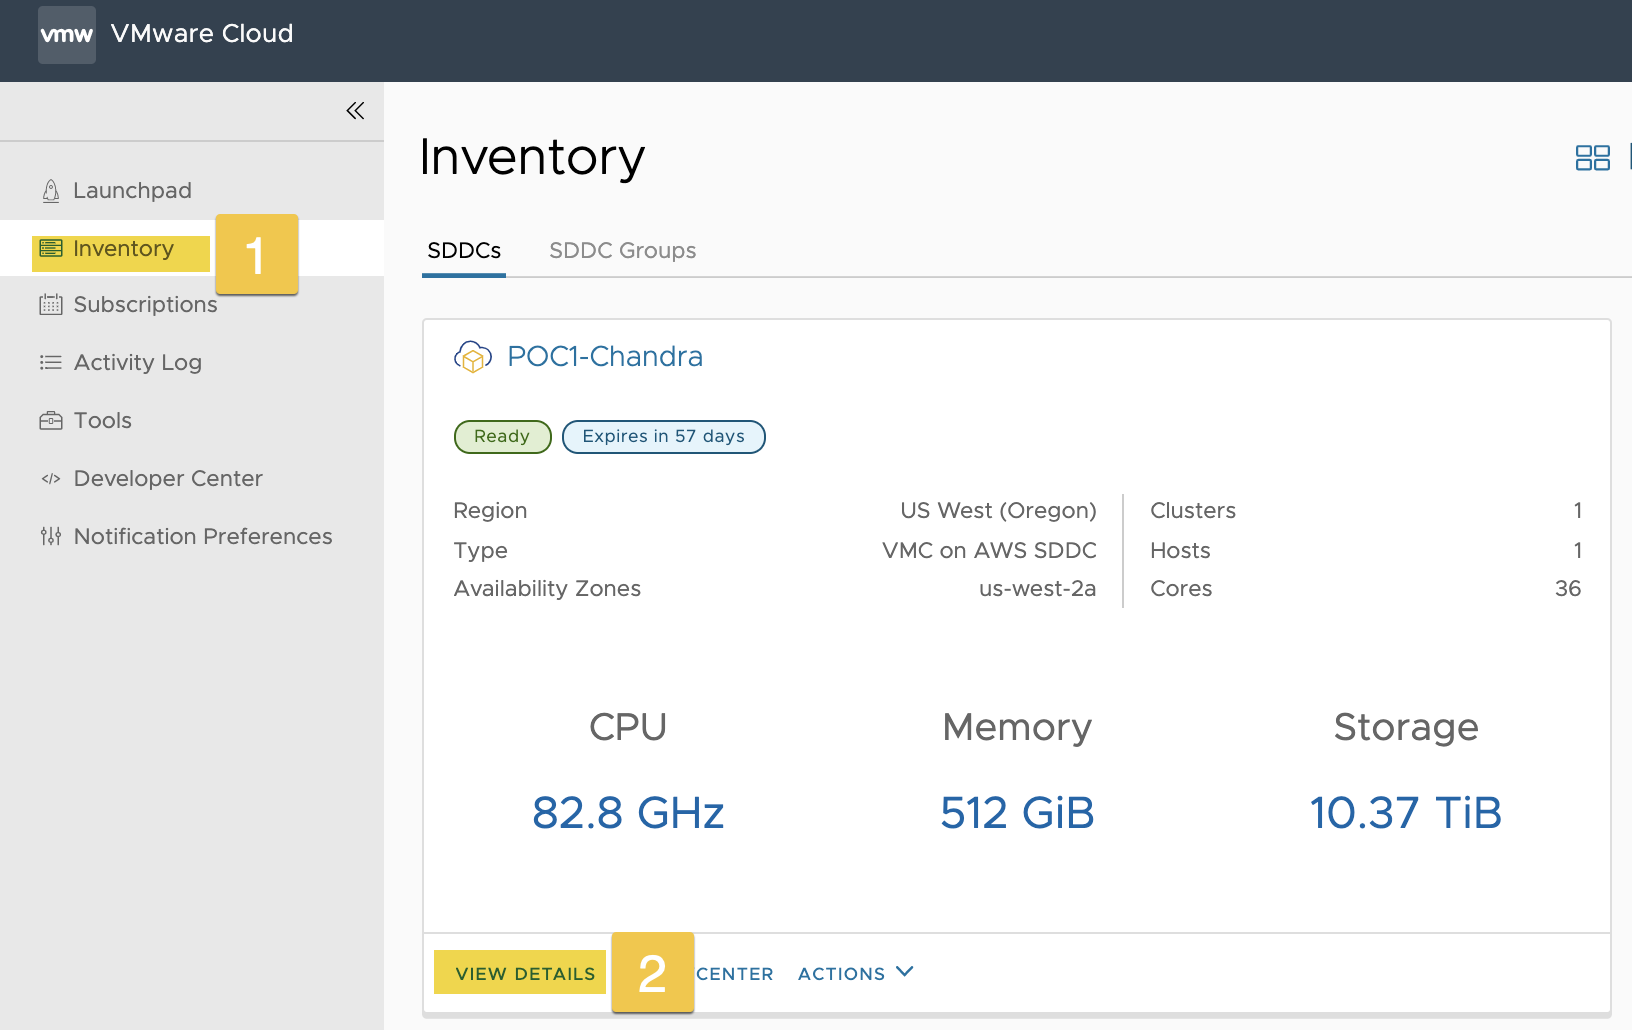
Step 14: After SDDC deployment, select ‘Inventory’ and click on ‘VIEW DETAILS’
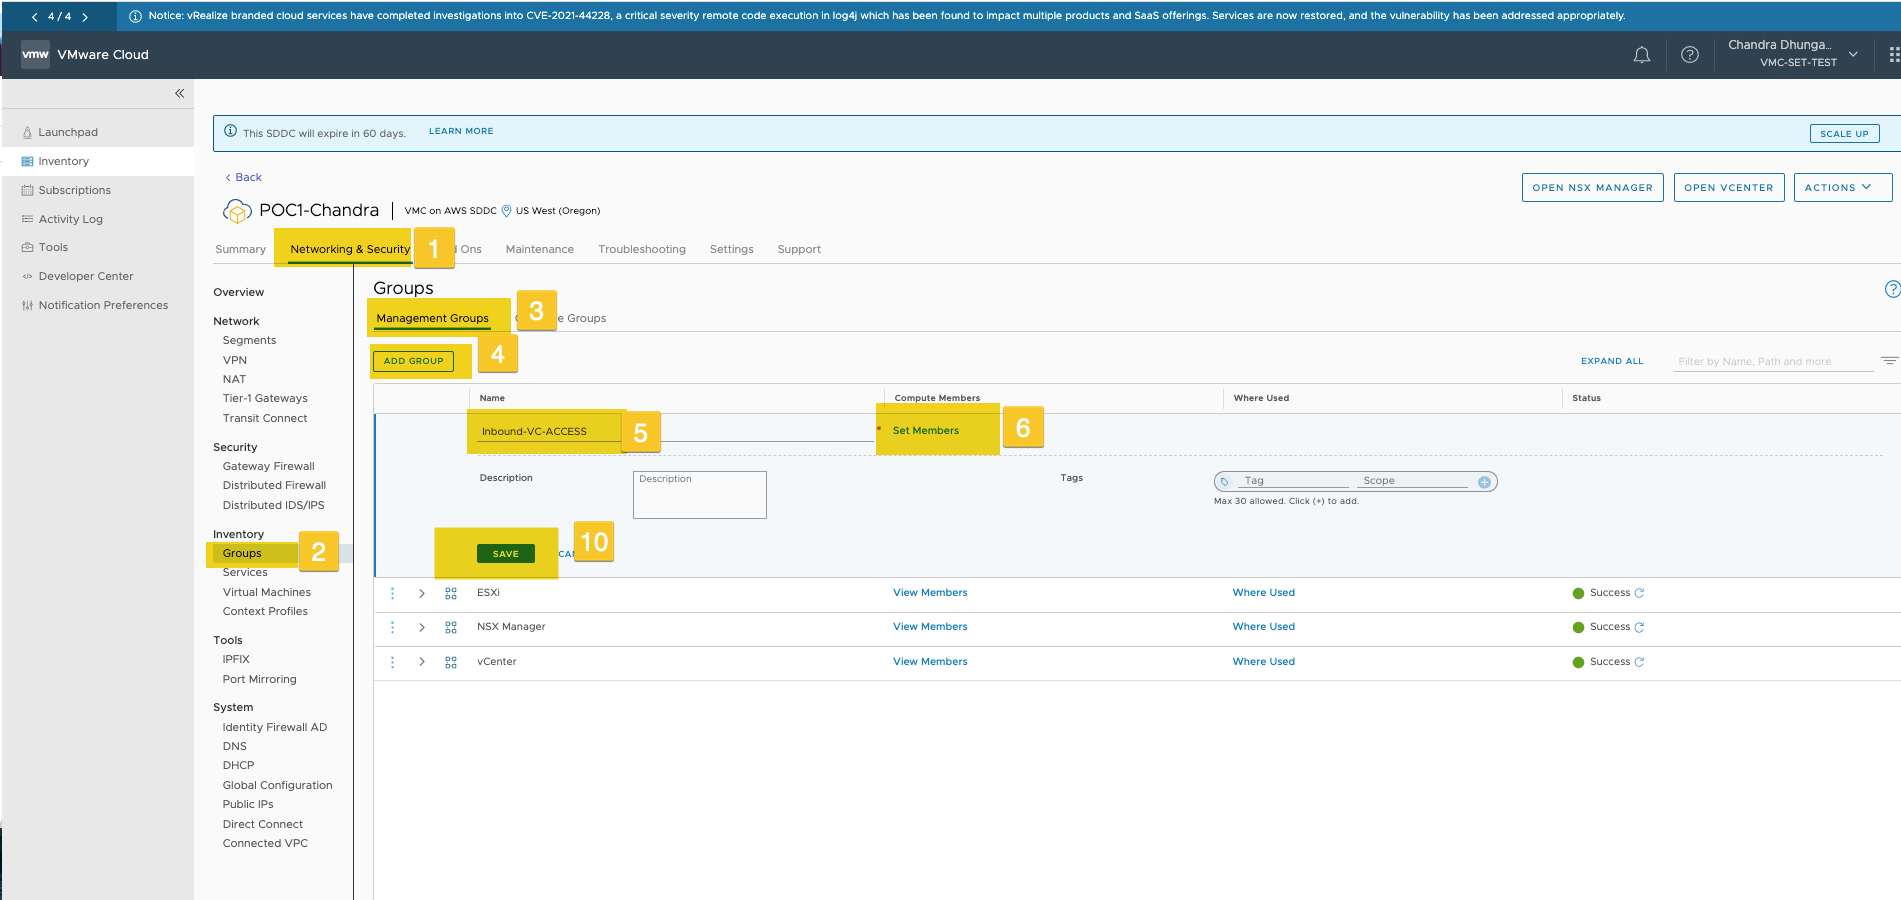
Step 15: On this page, select ‘Networking & Security’ tab, click on ‘Groups’, select ‘Management Groups’ and click on ‘ADD GROUP’
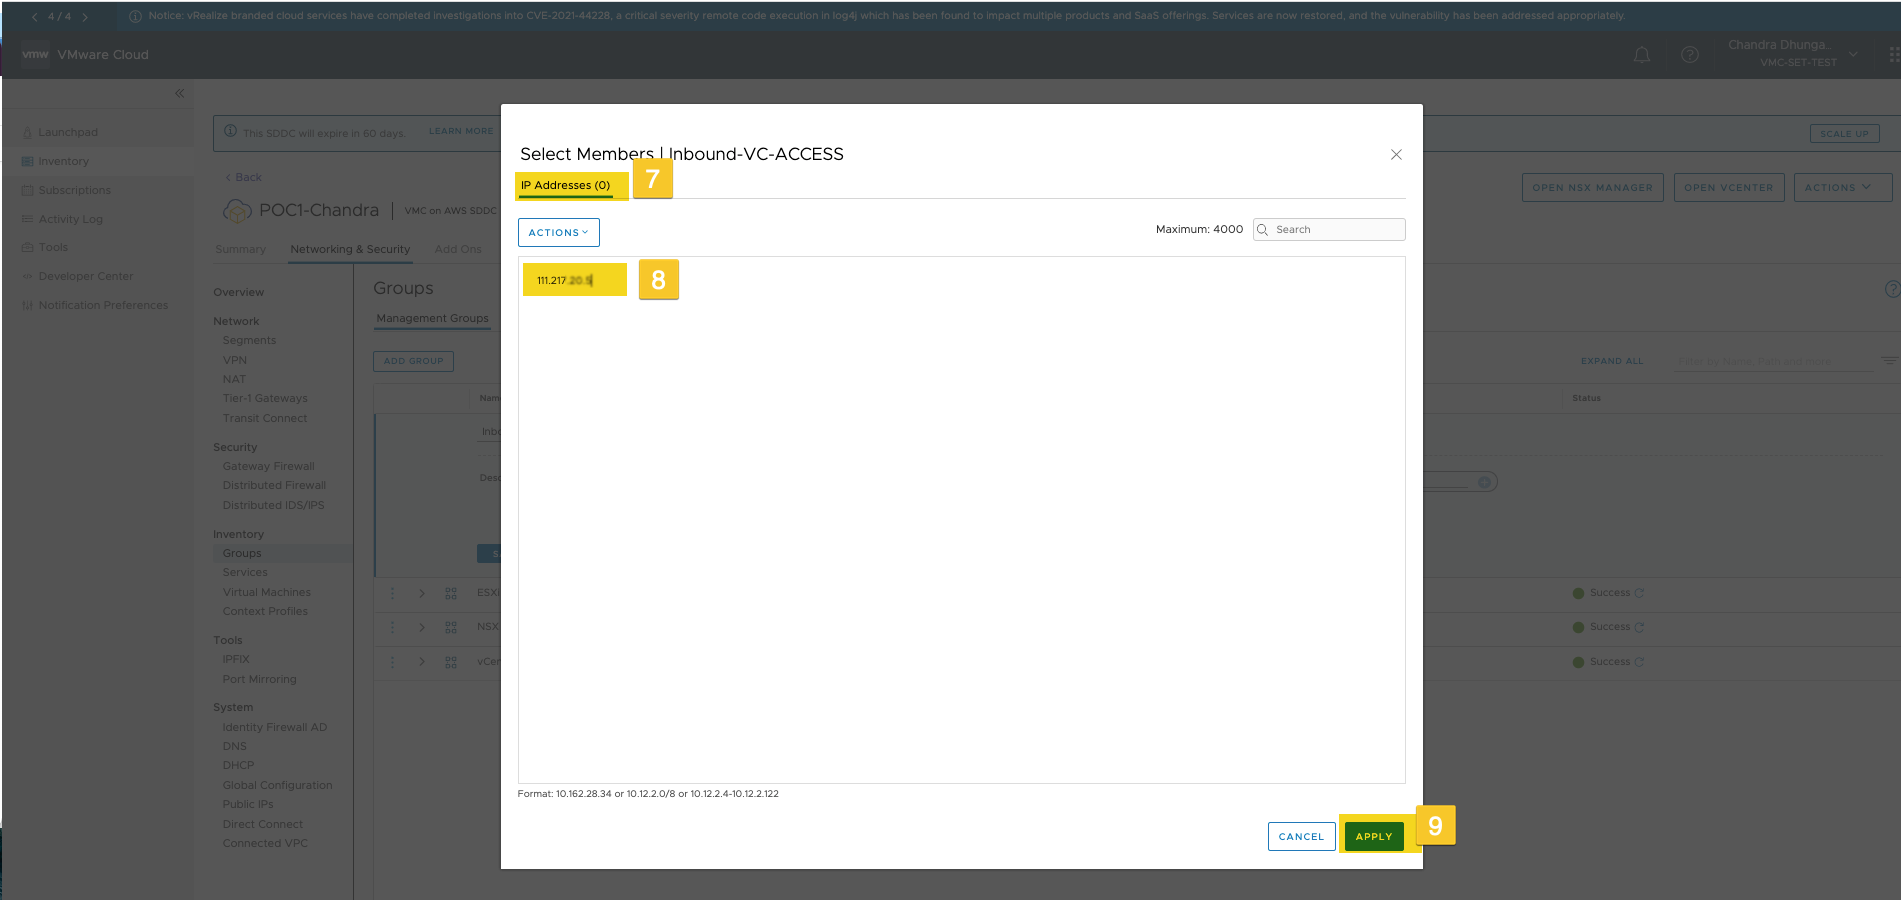
Provide group name and click on ‘Set Member’, supply ip address or ip address ranges, click on ‘Apply’ and ‘Save’ it
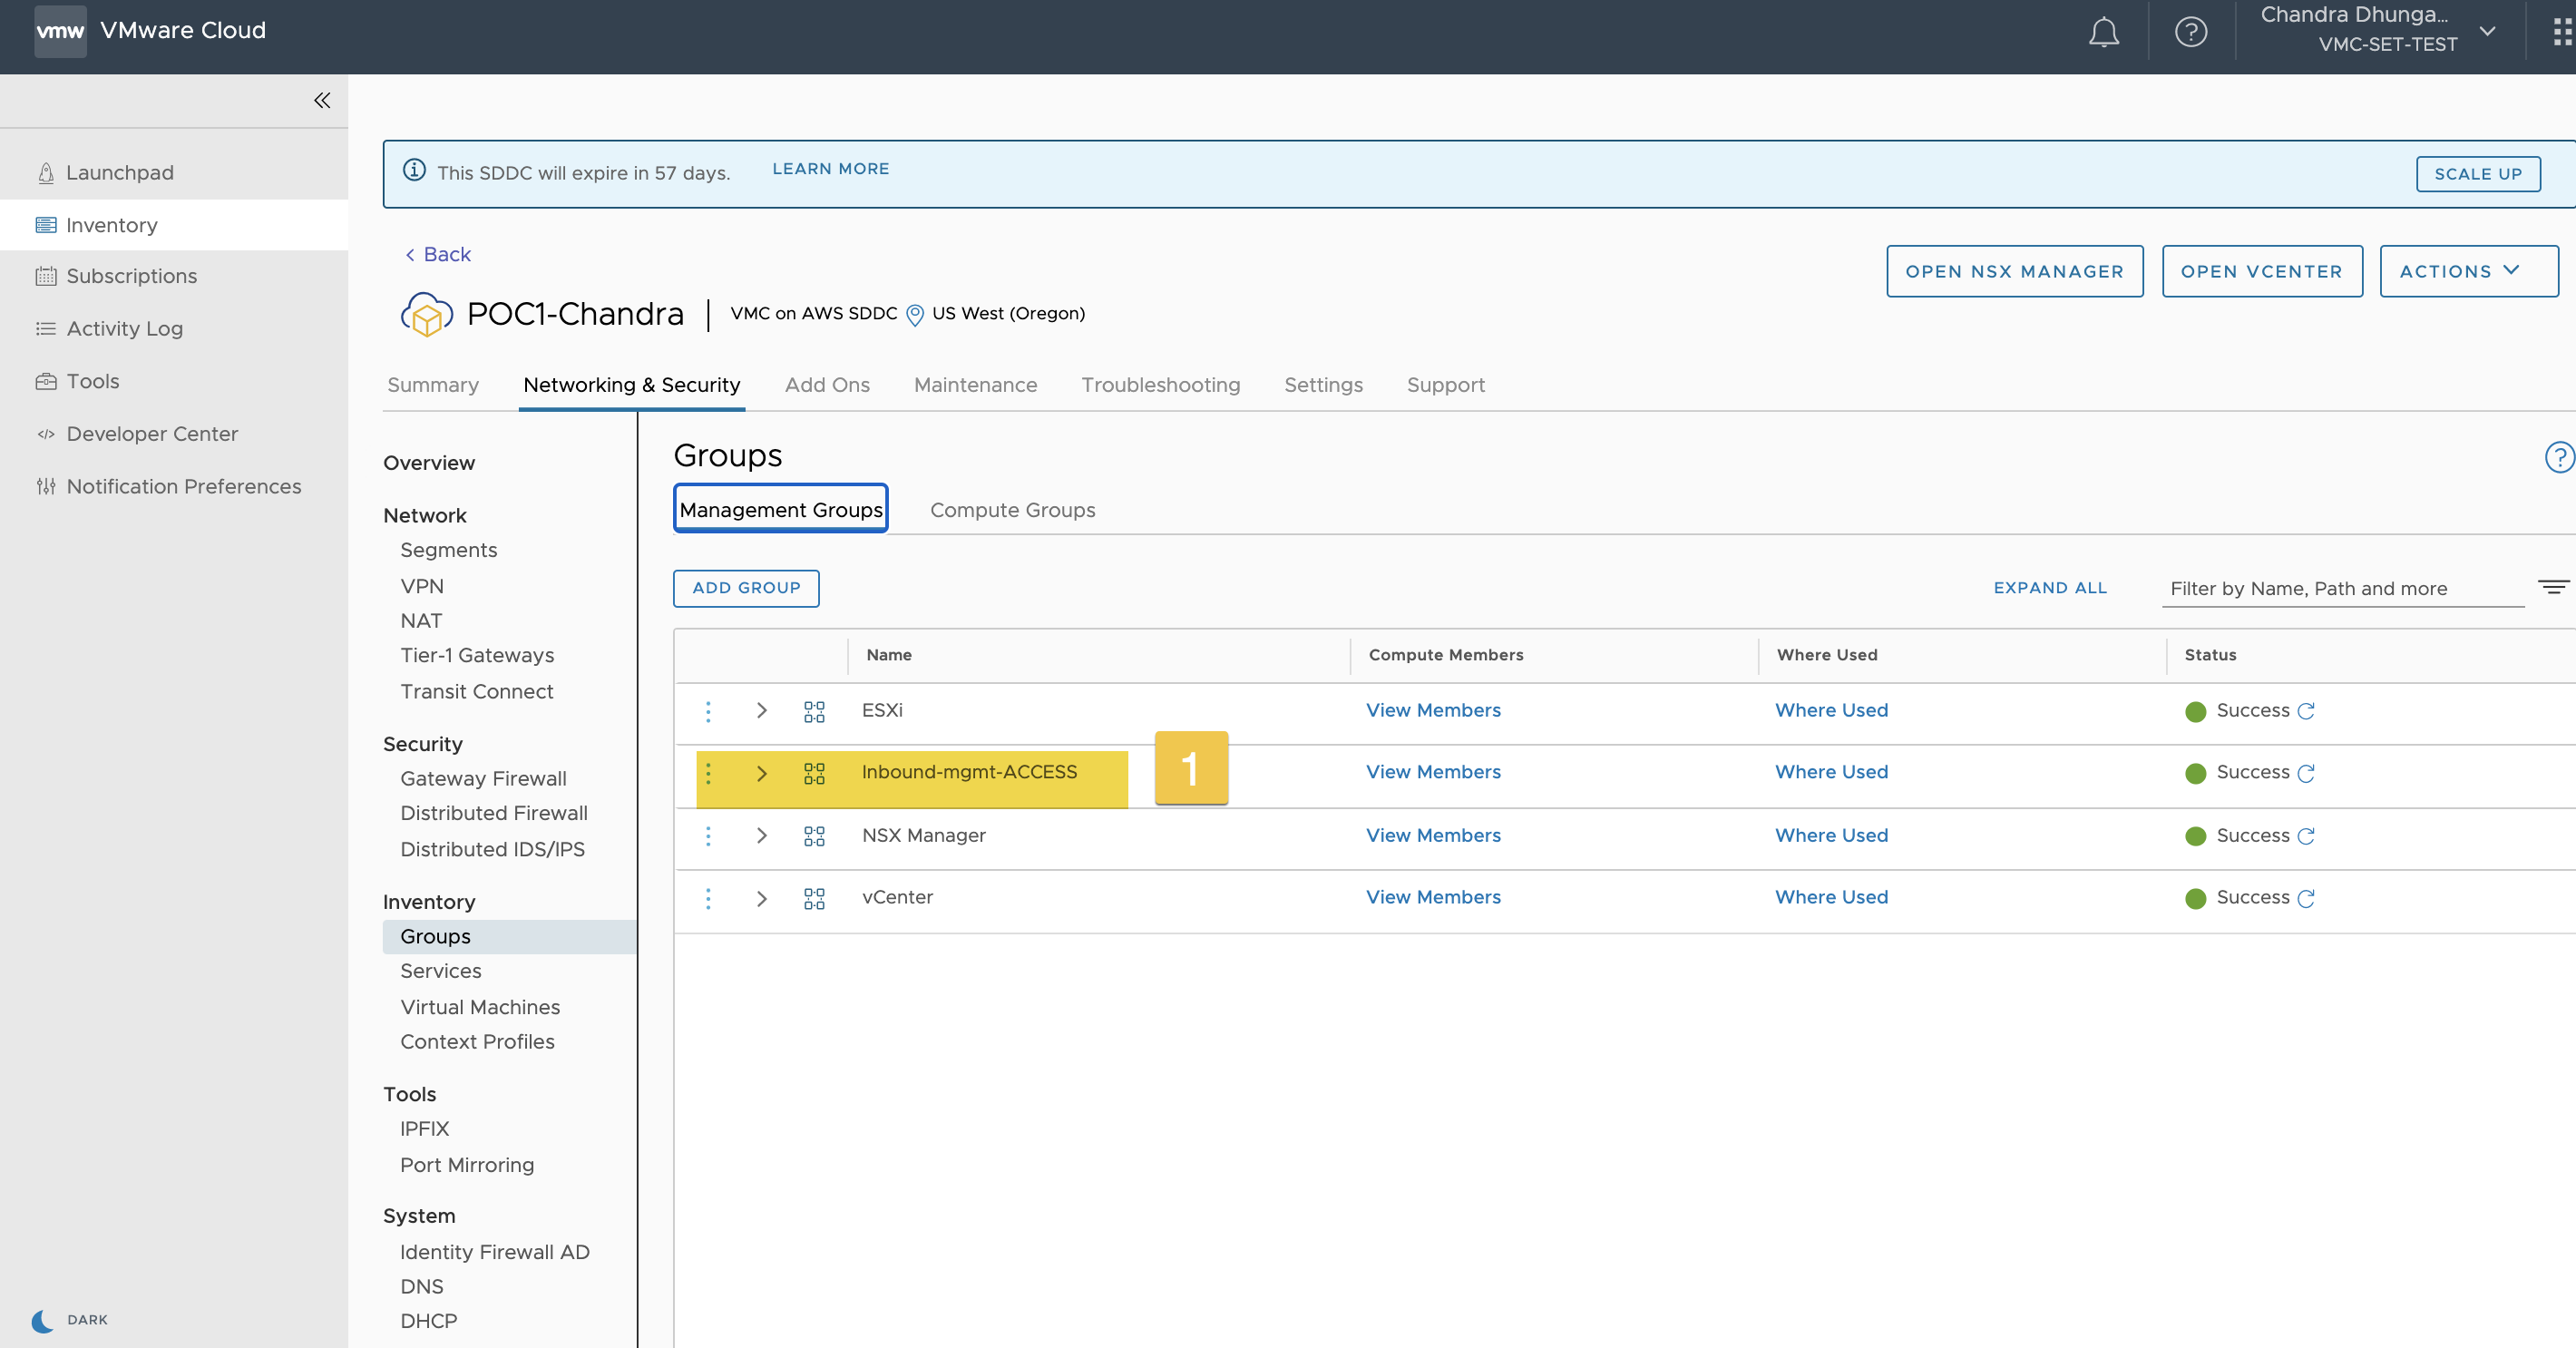
Step 16: Make sure Group has been created
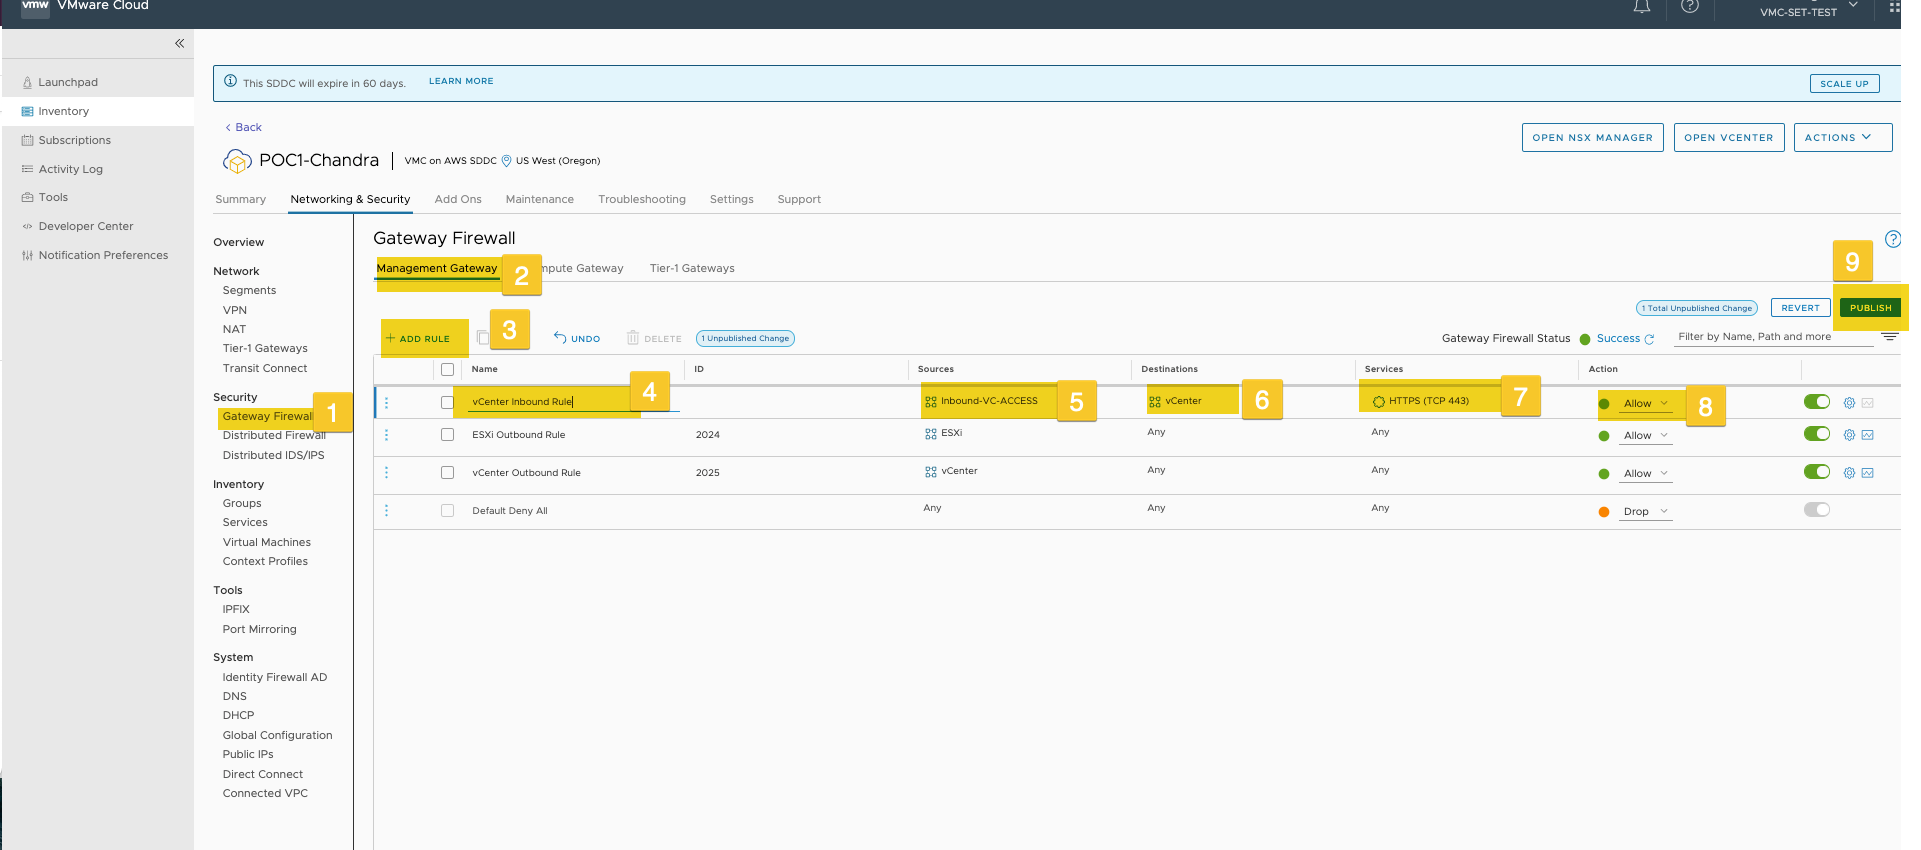
Step 17: Now select ‘Gateway Firewall’ under the security tab, click on ‘Management Gateway’ and ‘ADD RULE’
Supply Firewall rule name, source (the group created on step 14), destination ‘vCenter’, services ‘HTTPS’, action ‘Allow’ and ‘PUBLISH’ for the activation.
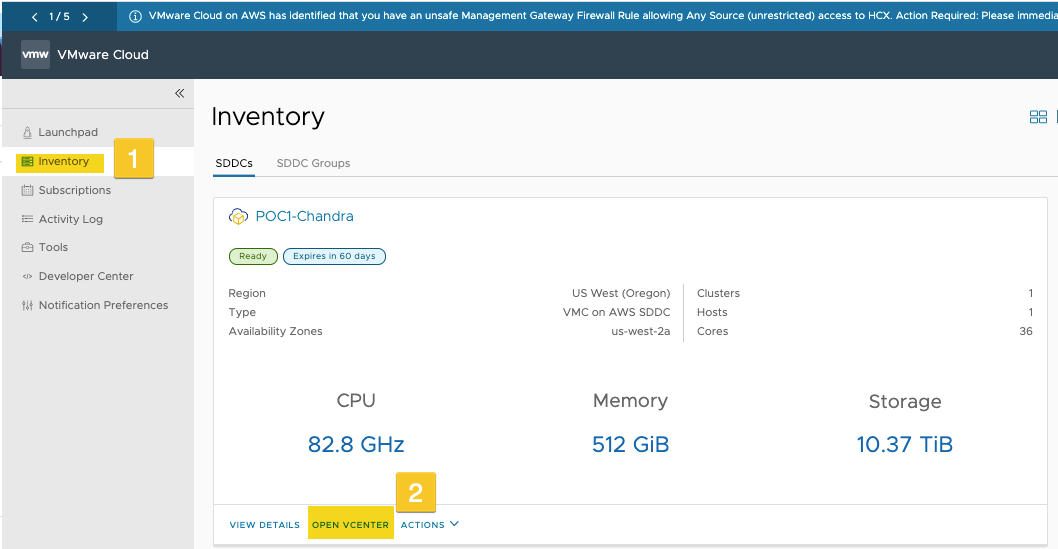
Step 18: Once firewall rule is in place, it should allow you to access vCenter. Go to your web console select ‘Inventory’ and ‘OPEN VCENTER’
![]()