Tanzu on VMC provides customers with a fully managed Kubernetes runtime that runs on top of VMware’s SDDC stack, including vSphere, NSX-T, and vSAN. It allows you to run container workloads on the same hosts and infrastructure as your VMs. In this blog, I am writing step by step procedure to activate the TKG cluster in the VMware Cloud on AWS and register the supervisor cluster with Tanzu mission control.
Before you begin make sure the following pre-requisites are met:
- Make sure you have at least three nodes SDDC deployed and have at least 112 GB of memory, 16 vCPUs, and more than 200 GB of storage are available.
- Get the following 4 CIDR blocks that shouldn’t be overlapped or being used. (For details here)
- Service CIDR: This network is allocated to Tanzu supervisor services, such as Cluster API Components, CoreDNS and etcd.
- Namespace CIDR: This network is allocated to namespace segments. Each time a new namespace is created, a new Tier-1 router is created and connected to the Tier-0 router. Then a namespace segment is created and attached to this new Tier-1 router
- Ingress CIDR: This network is allocated for inbound traffic (through load balancers to containers). When you create tkg cluster a Load Balancer is created in the Namespace Tier-1 router, and VIP is assigned from this CIDR range.
- Egress CIDR: This network is for SNATted outbound traffic from containers. If traffic from TKC nodes need to leave, the source IP Address will be translated into an egress IP address before leaving the Tier-1 router.
My Environment details
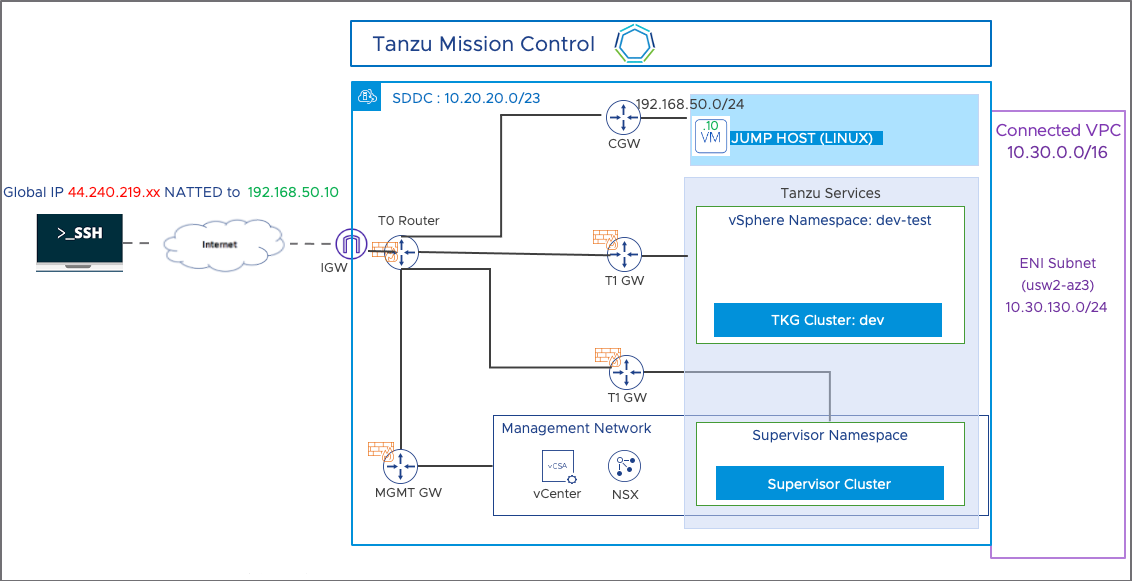
- My 3 nodes SDDC environment is fully up and running (SDDC MGMT CIDR 10.20.20.0/23, ENI subnet 10.30.130.0)
- Workload segment 192.168.50.0/24 is created under the CGW (T1 router)
- Jumpbox (10.168.50.10) is placed under the workload segment and it has been NATTed with Global IP 44.240.219.xx and the SSH port has been opened in the CGW firewall. This allows me SSH on Jumpbox from my PC
- All the Tanzu-related commands will be executed via this Jumpbox.
- Activate your Tanzu Kubernetes Grid
Go to your SDDC-VIEW DETAILS and click on “Activate Tanzu Kubernetes Grid”

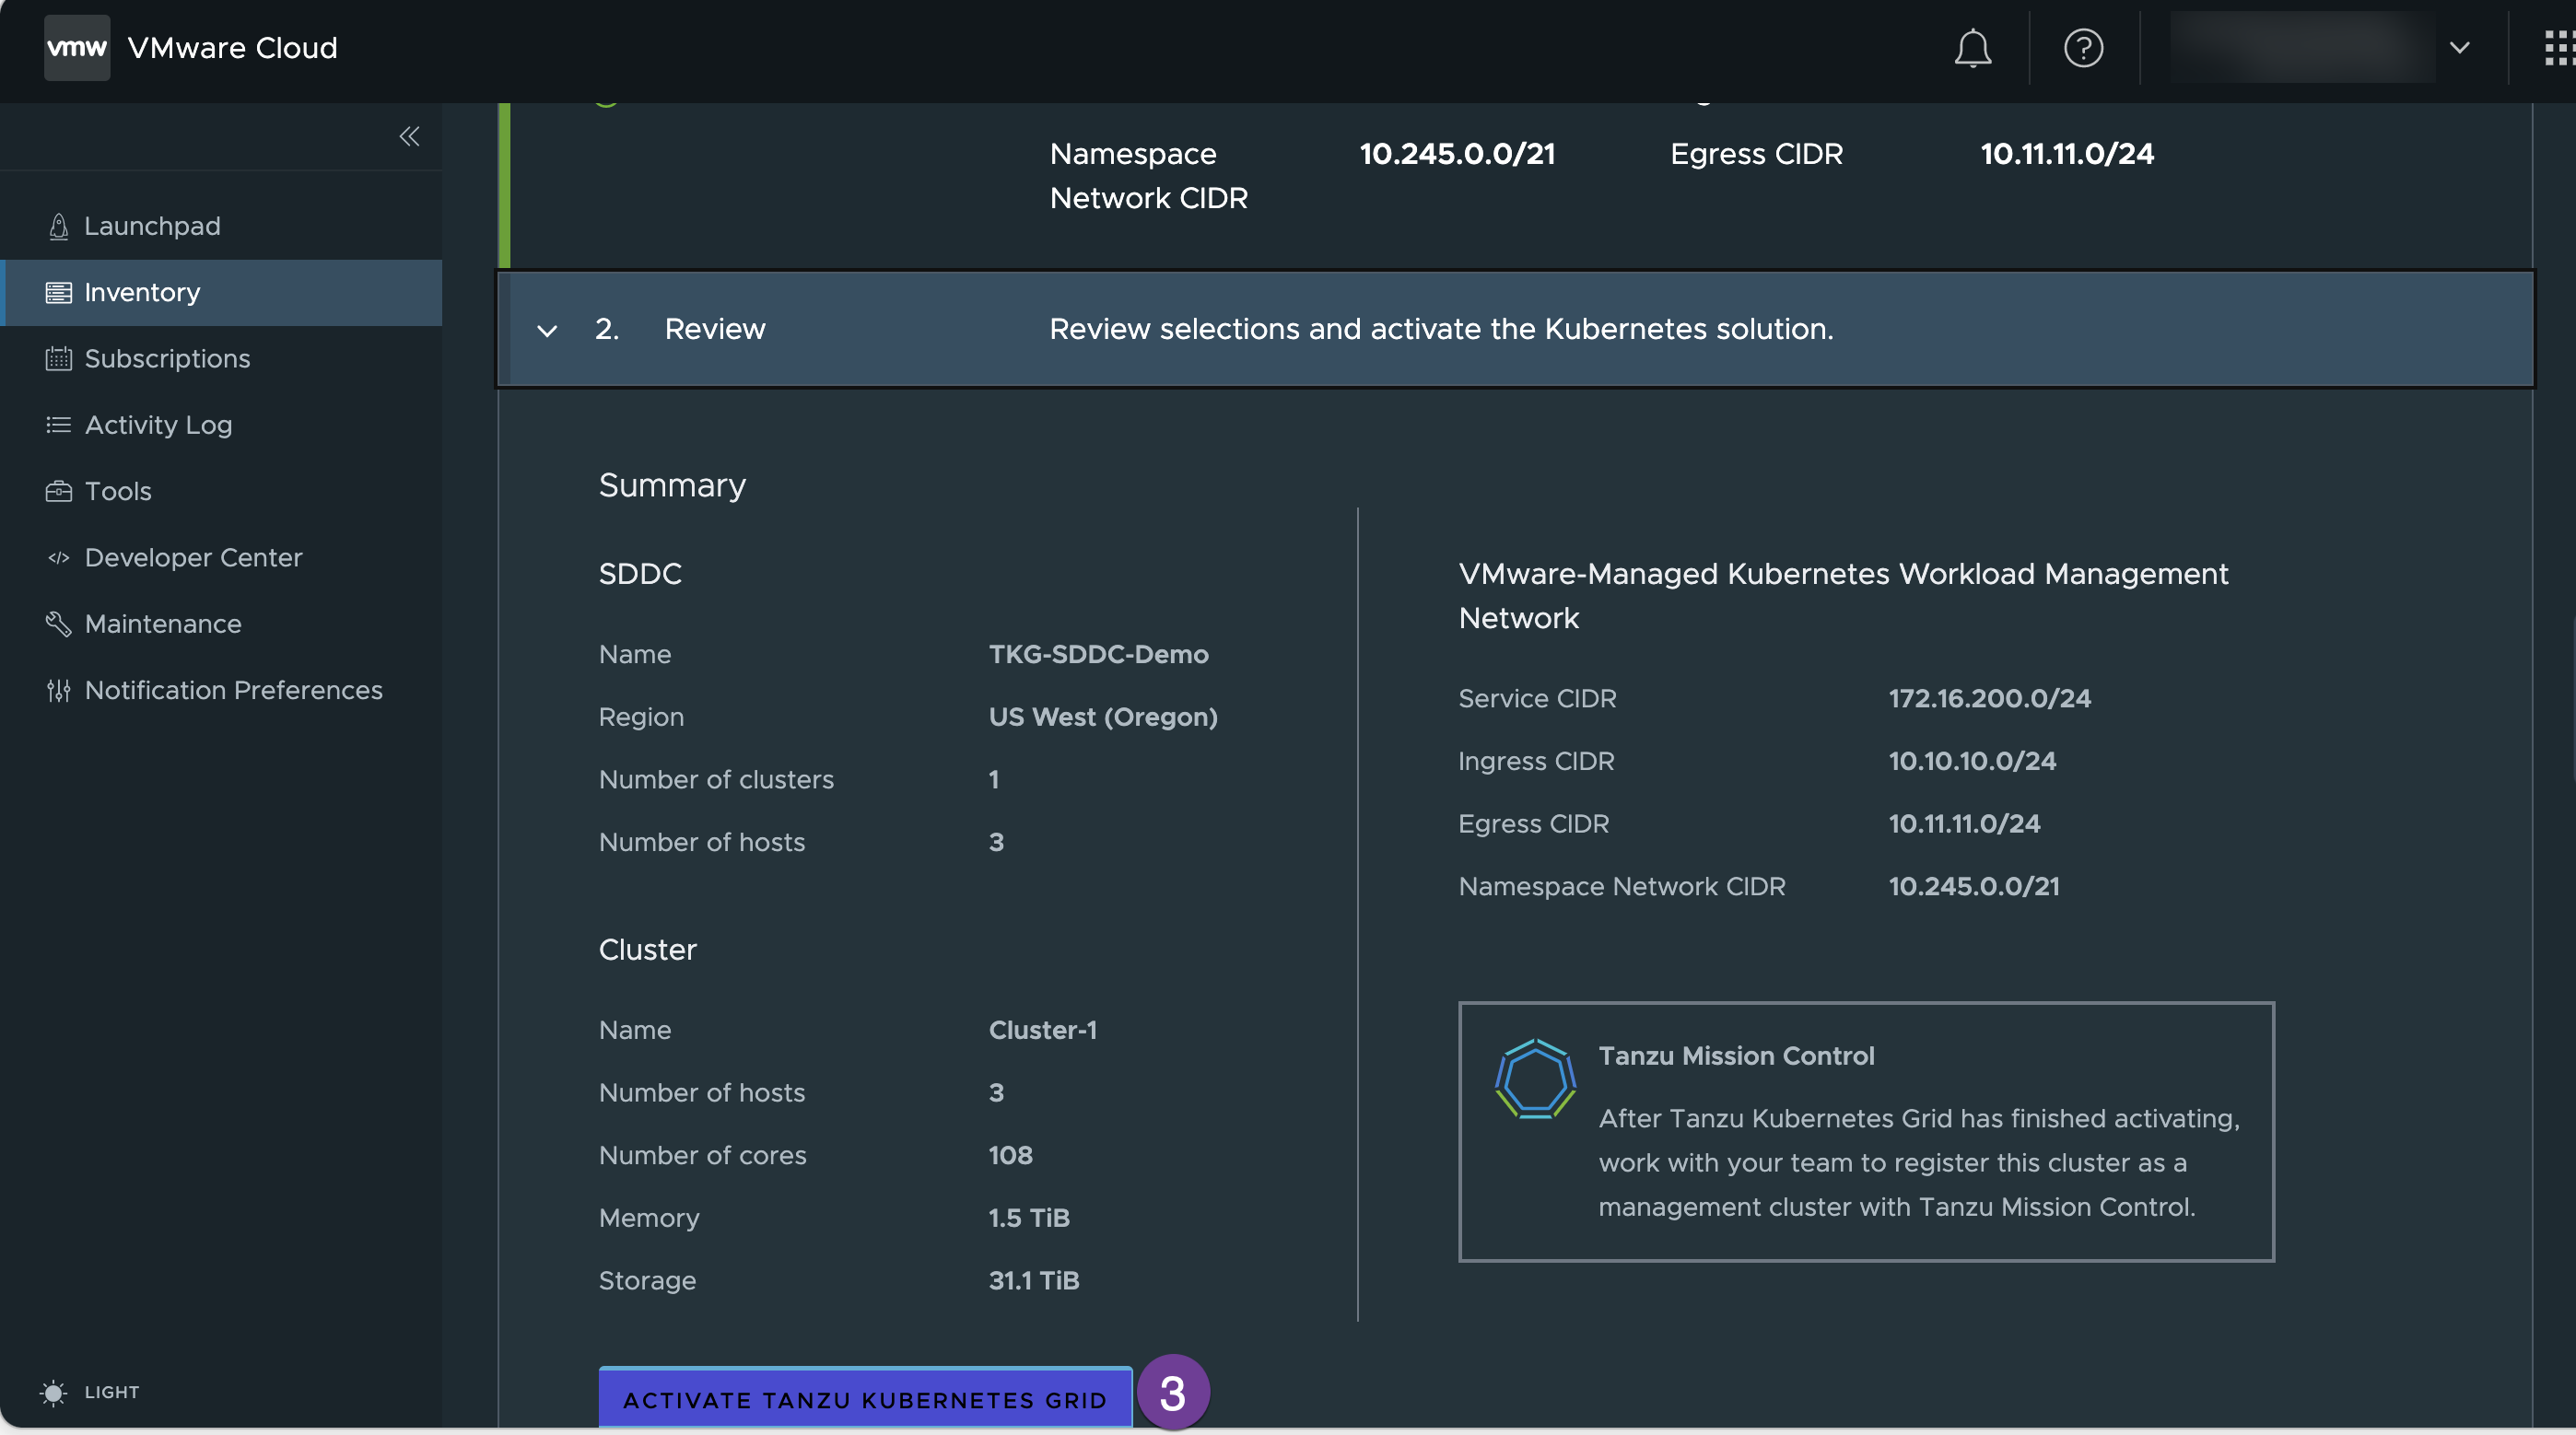
Supply non-overlapping CIDR ranges, (in my environment I have assigned these CIDR blocks:- Service CIDR: 172.16.200.0/24, Namespace CIDR: 10.245.0.0/21, Ingress CIDR: 10.10.10.0/24 & Egress CIDR: 10.11.11.0/24)
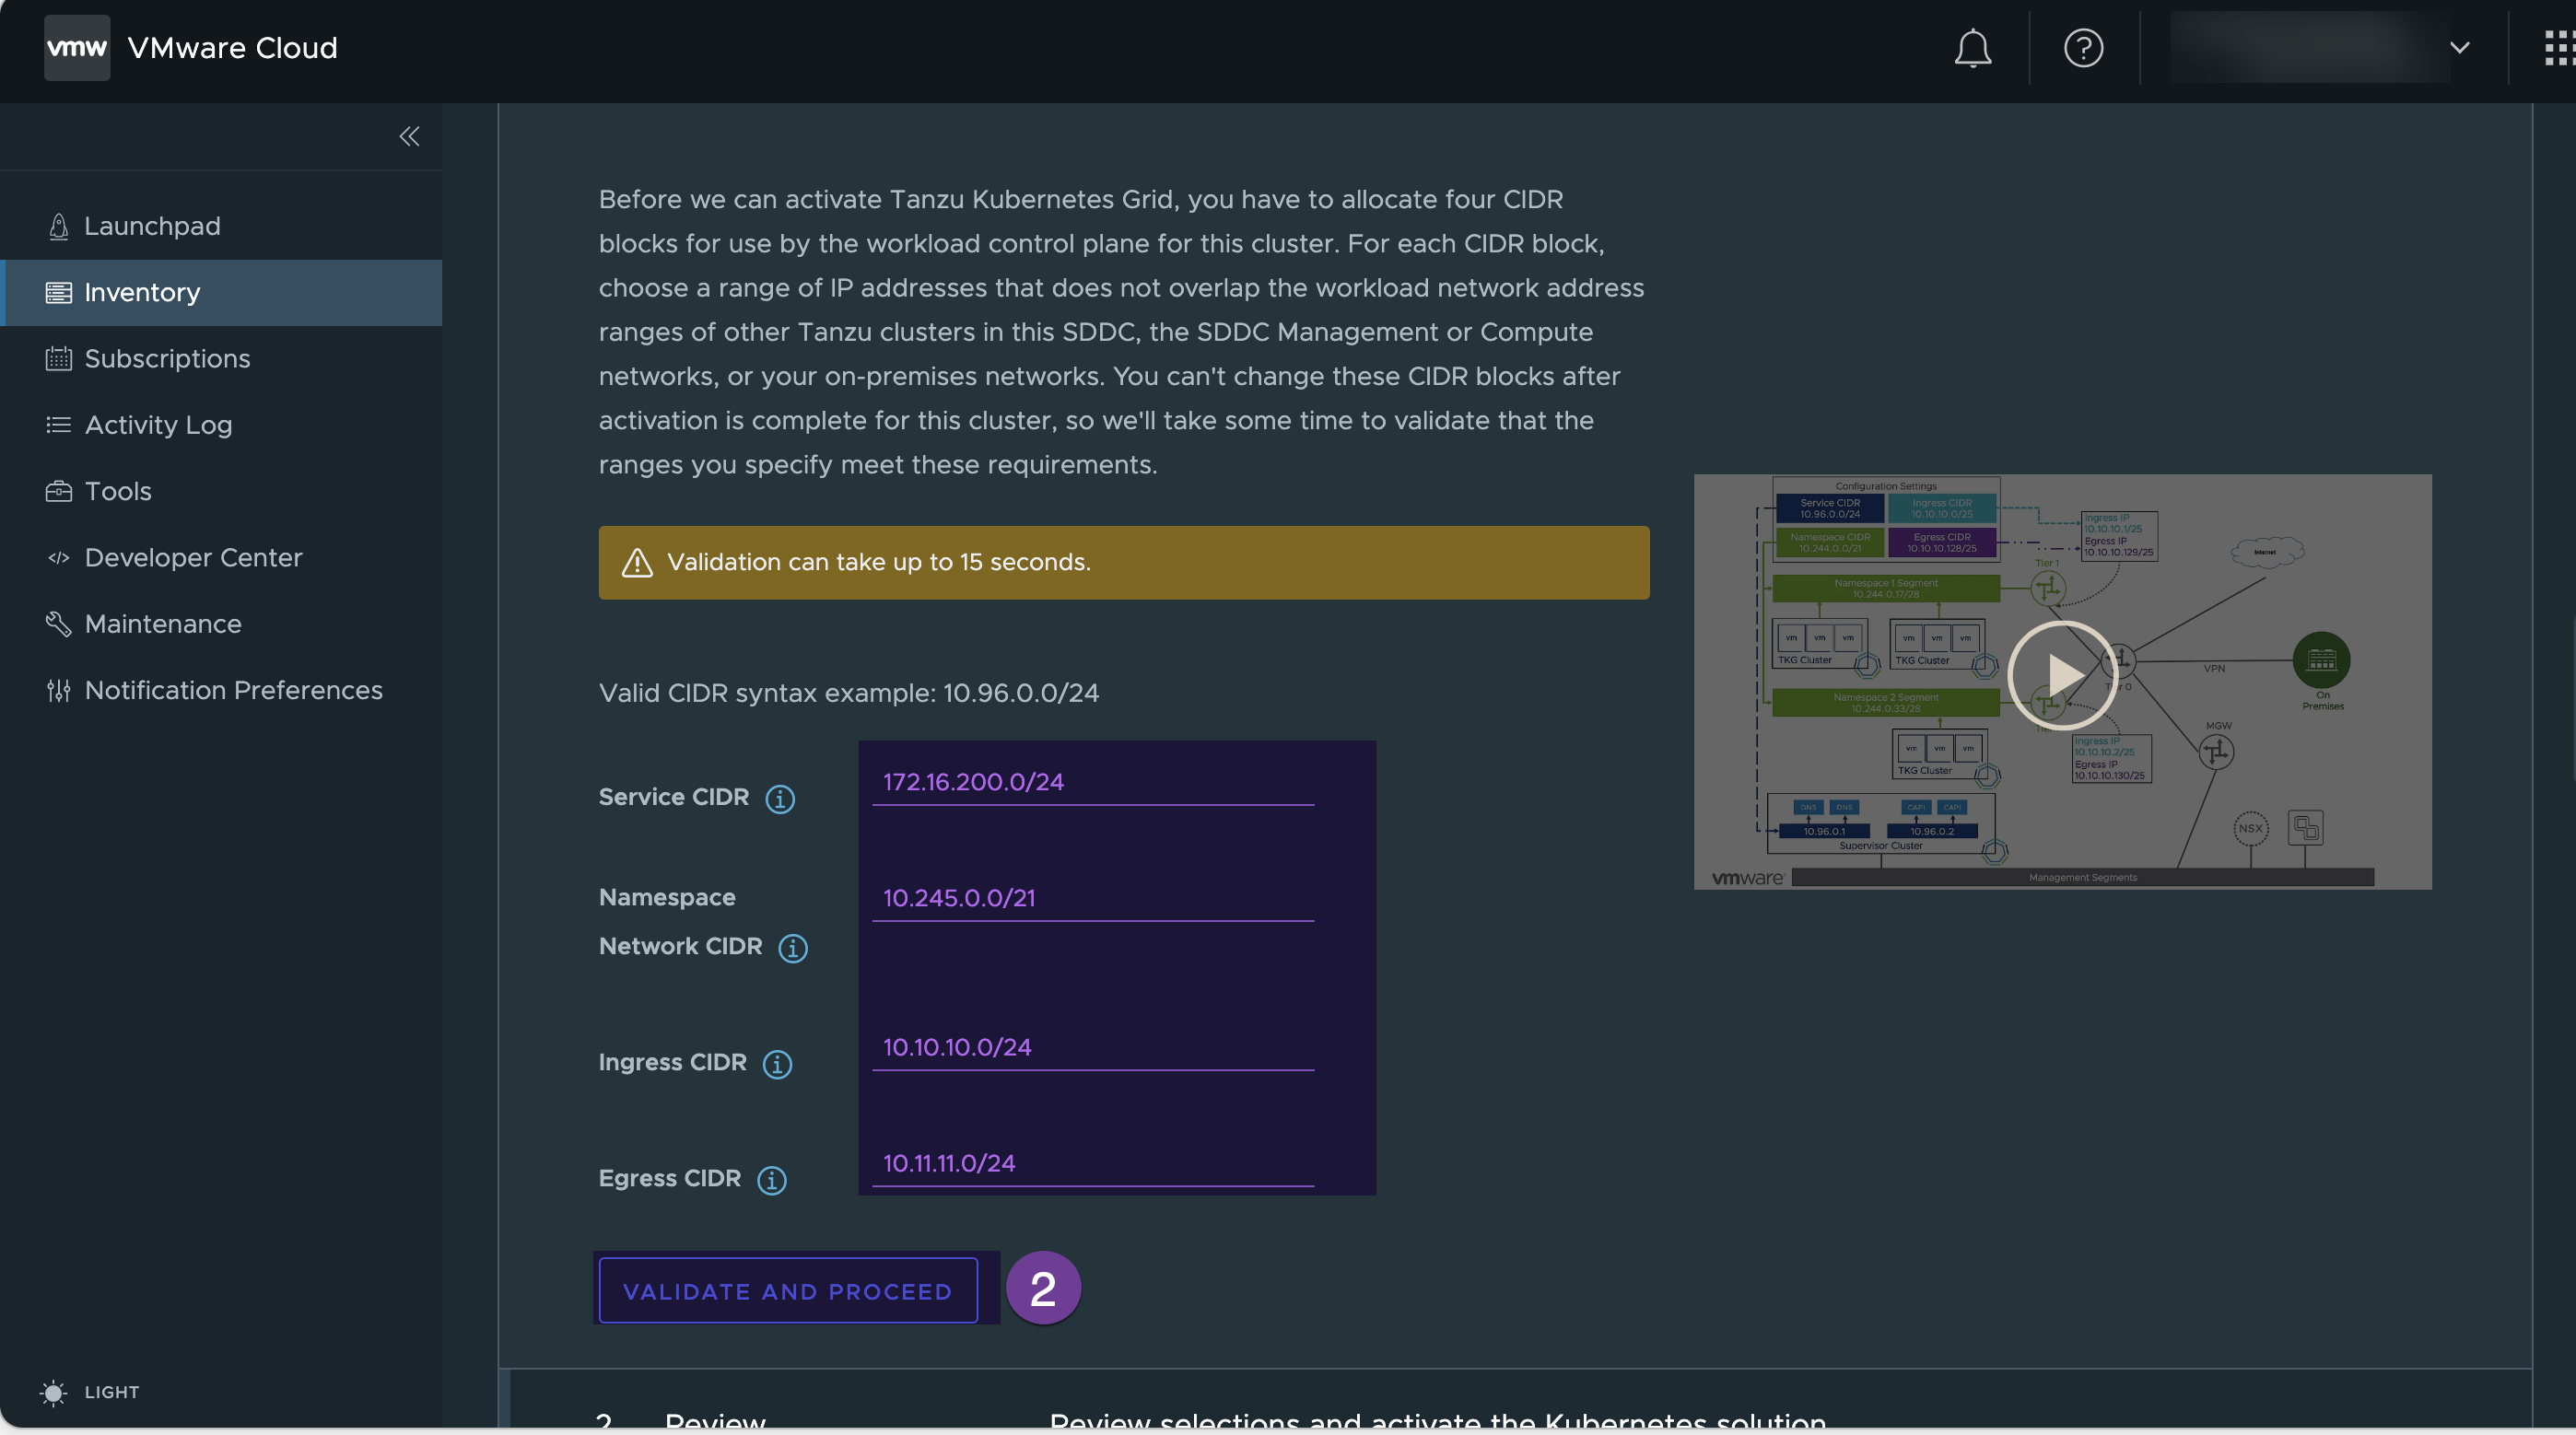
Review the Summary and click on “ACTIVATE TANZU KUBERNET GRID”
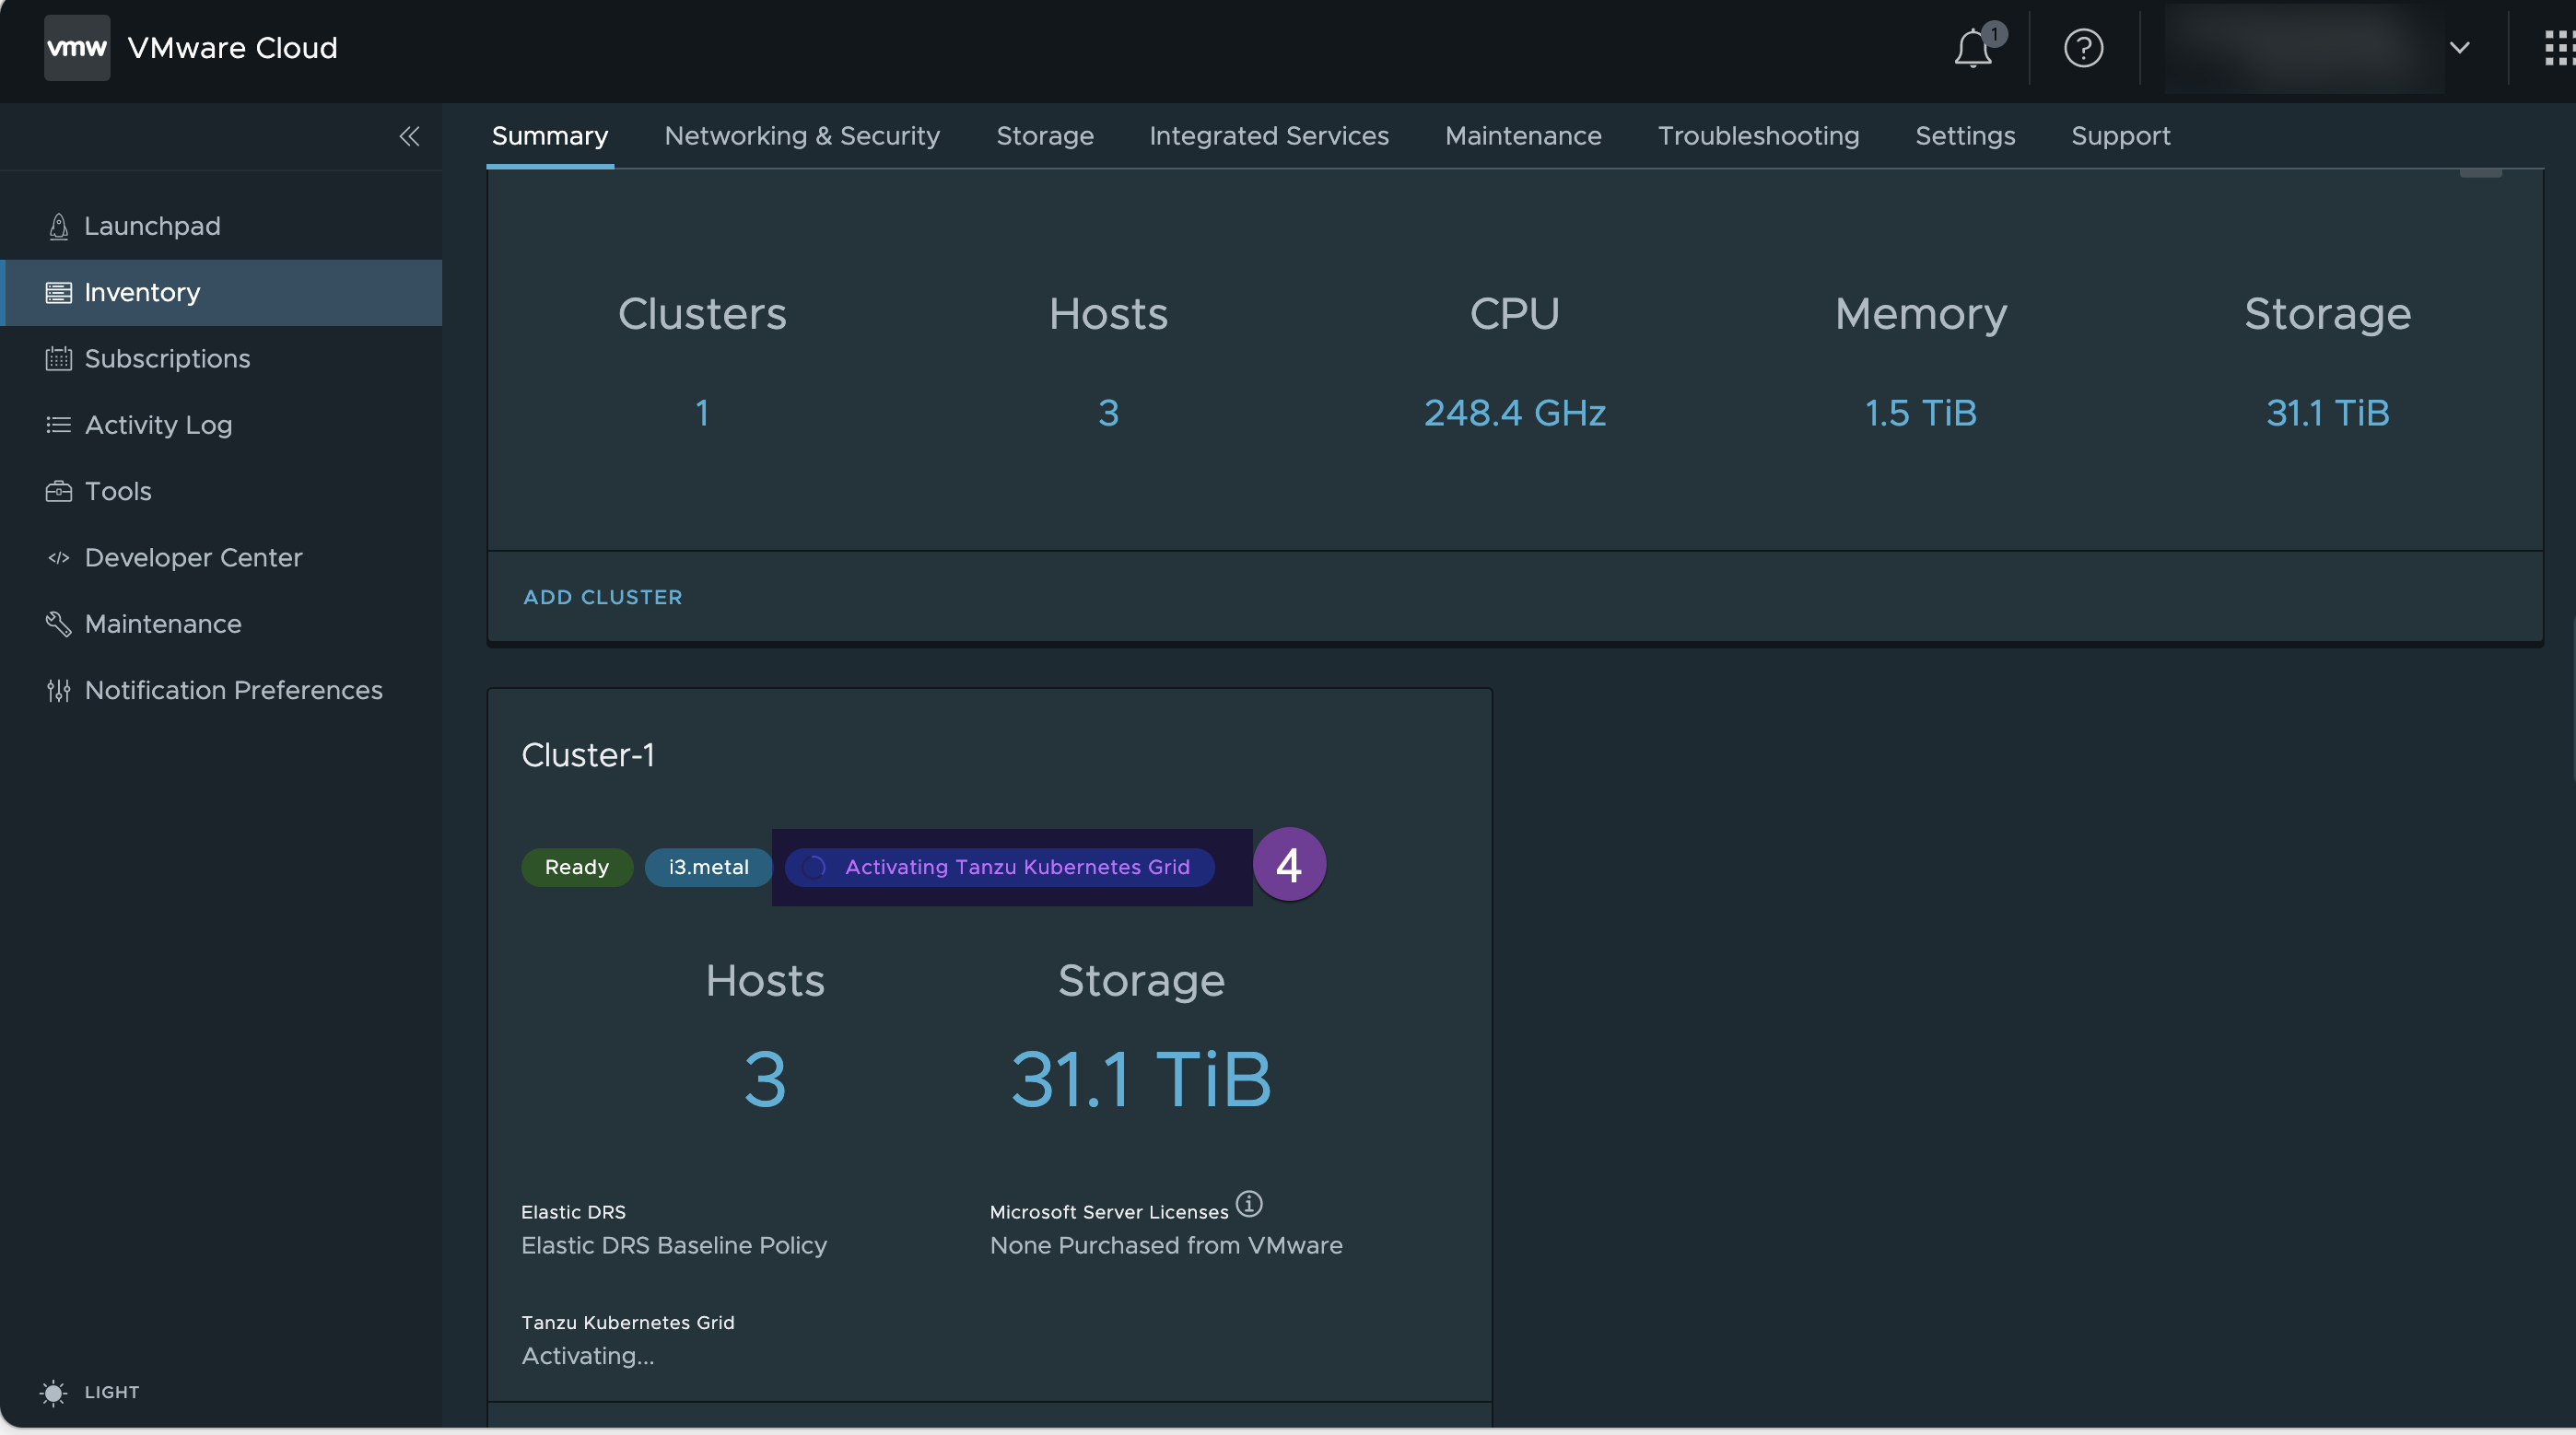
Cluster status shows “activating Tanzu Kubernet Grid” , wait until it completes the activation
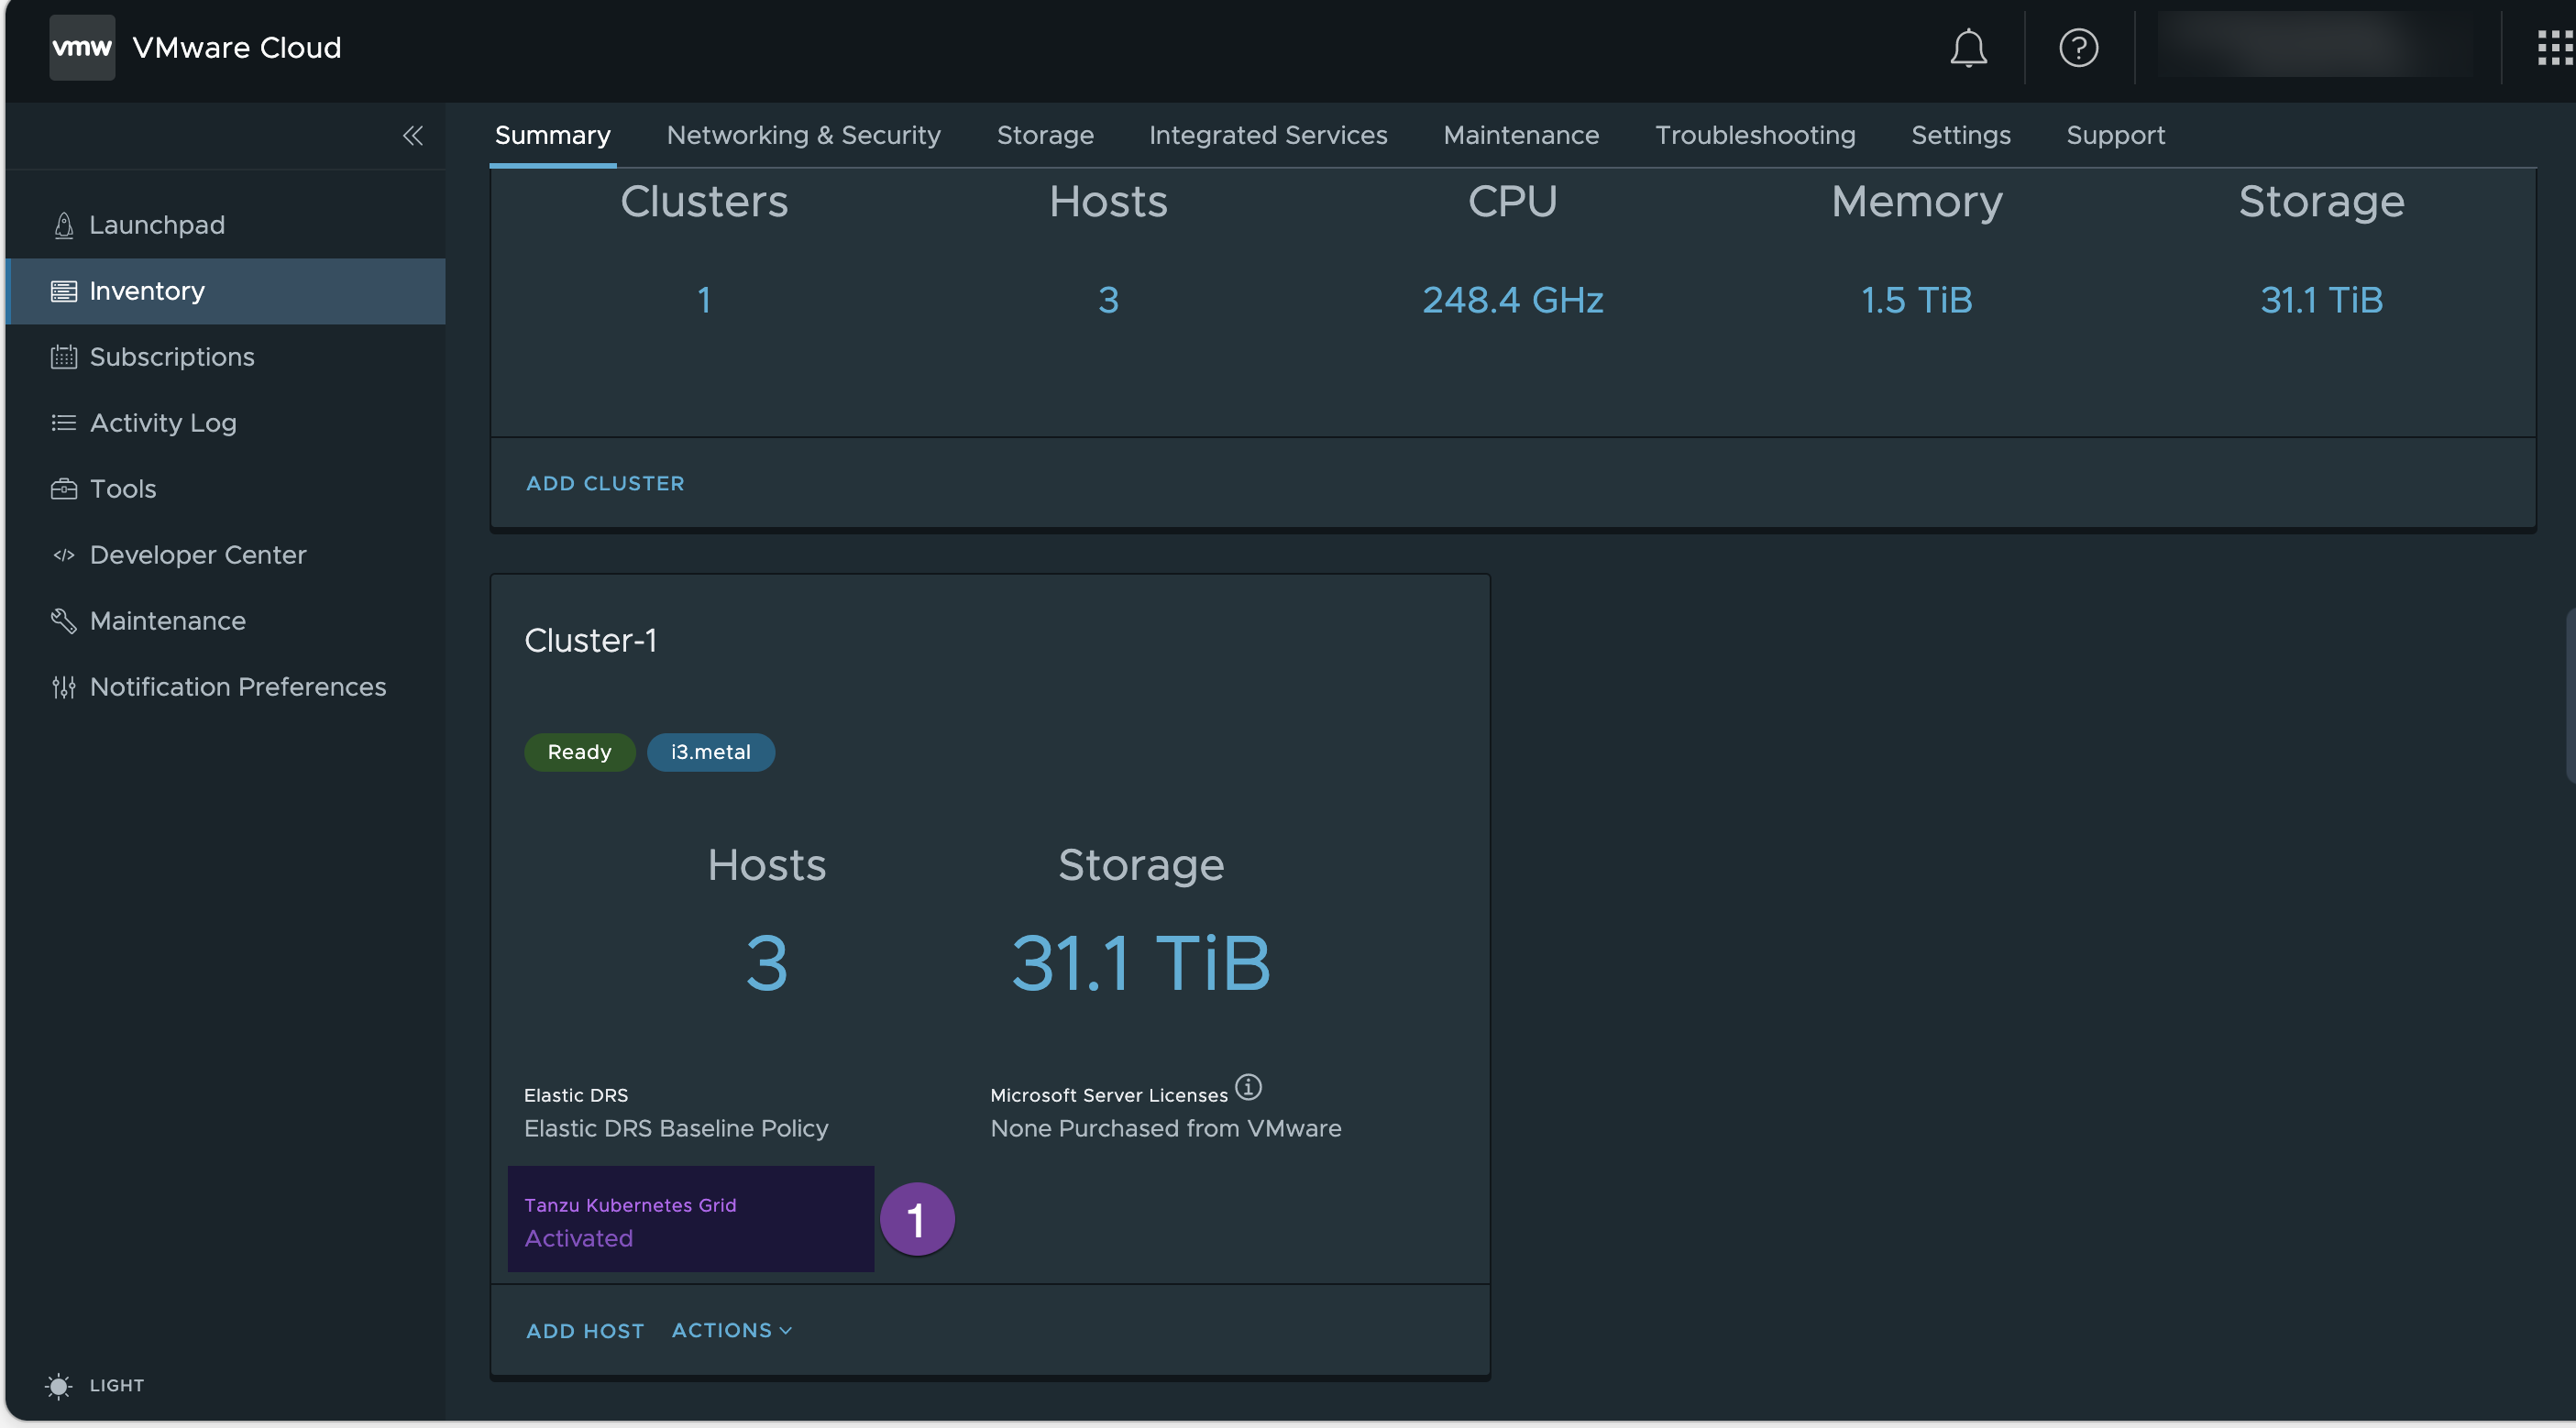
2. Verify the Tanzu Grid Activation
Once TKG completes activation, it shows as “Activated”
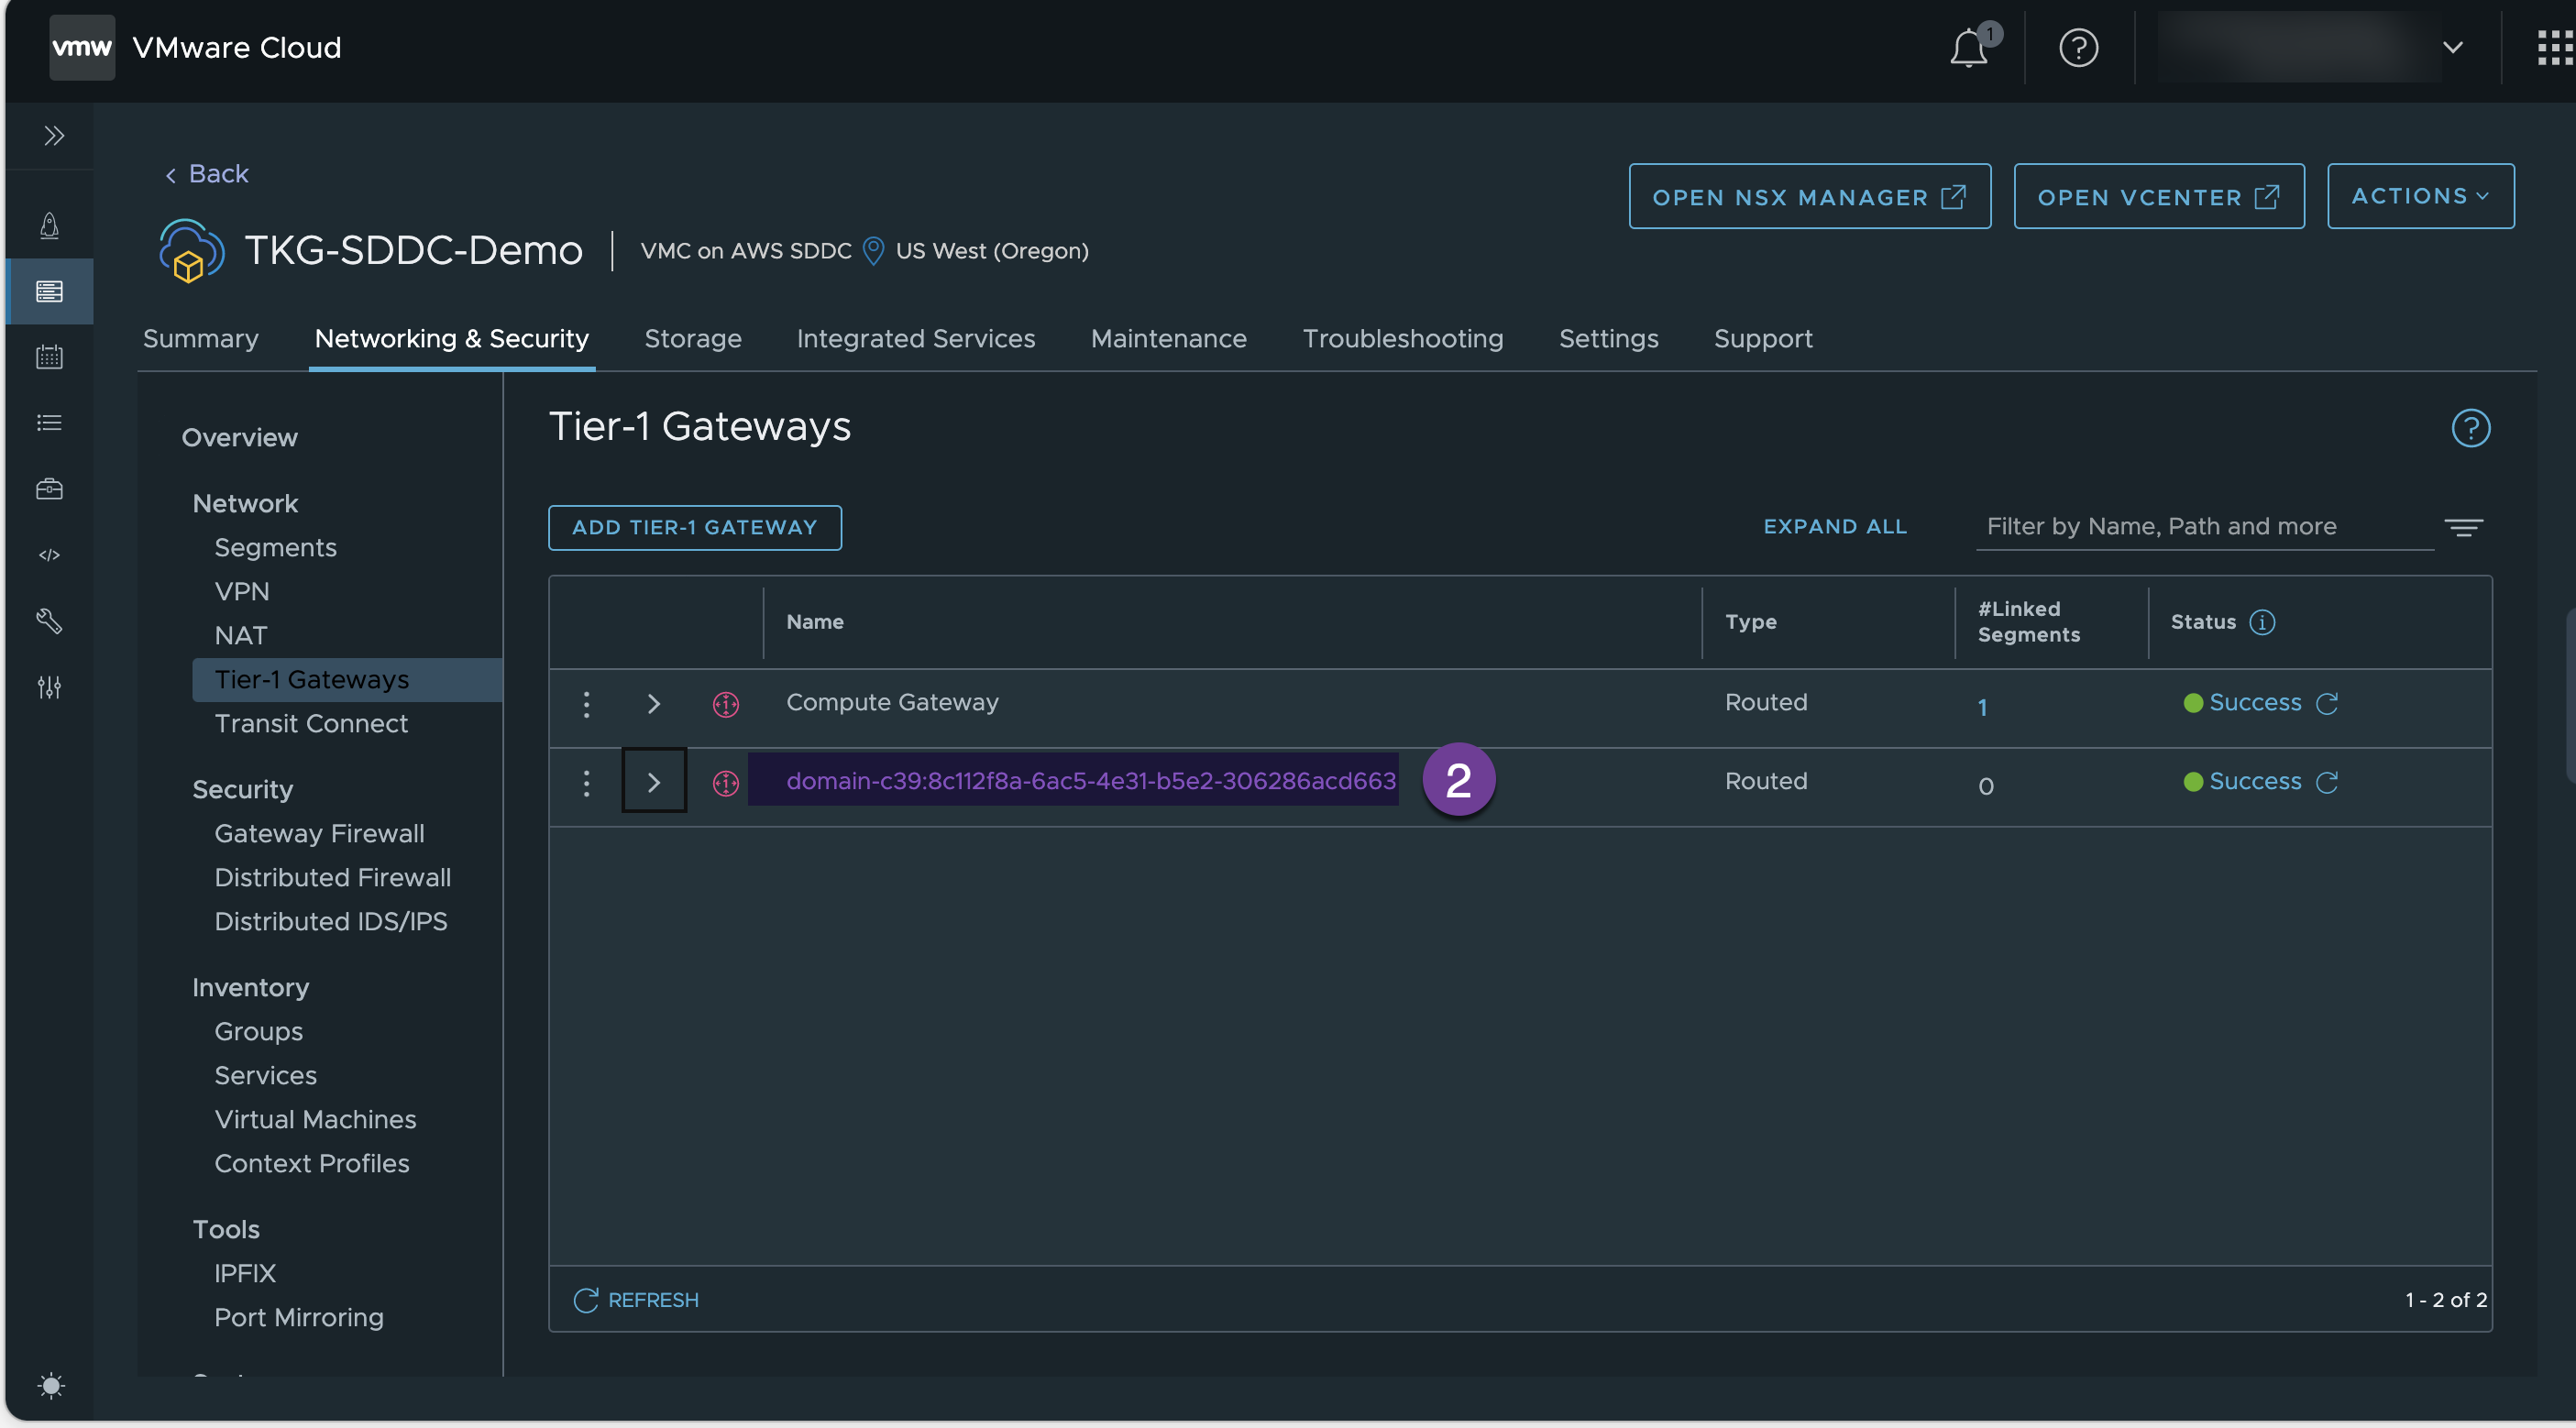
Under the “Tire-1 Gateway” verify that the Tanzu Supervisor namespace has created new T1 router
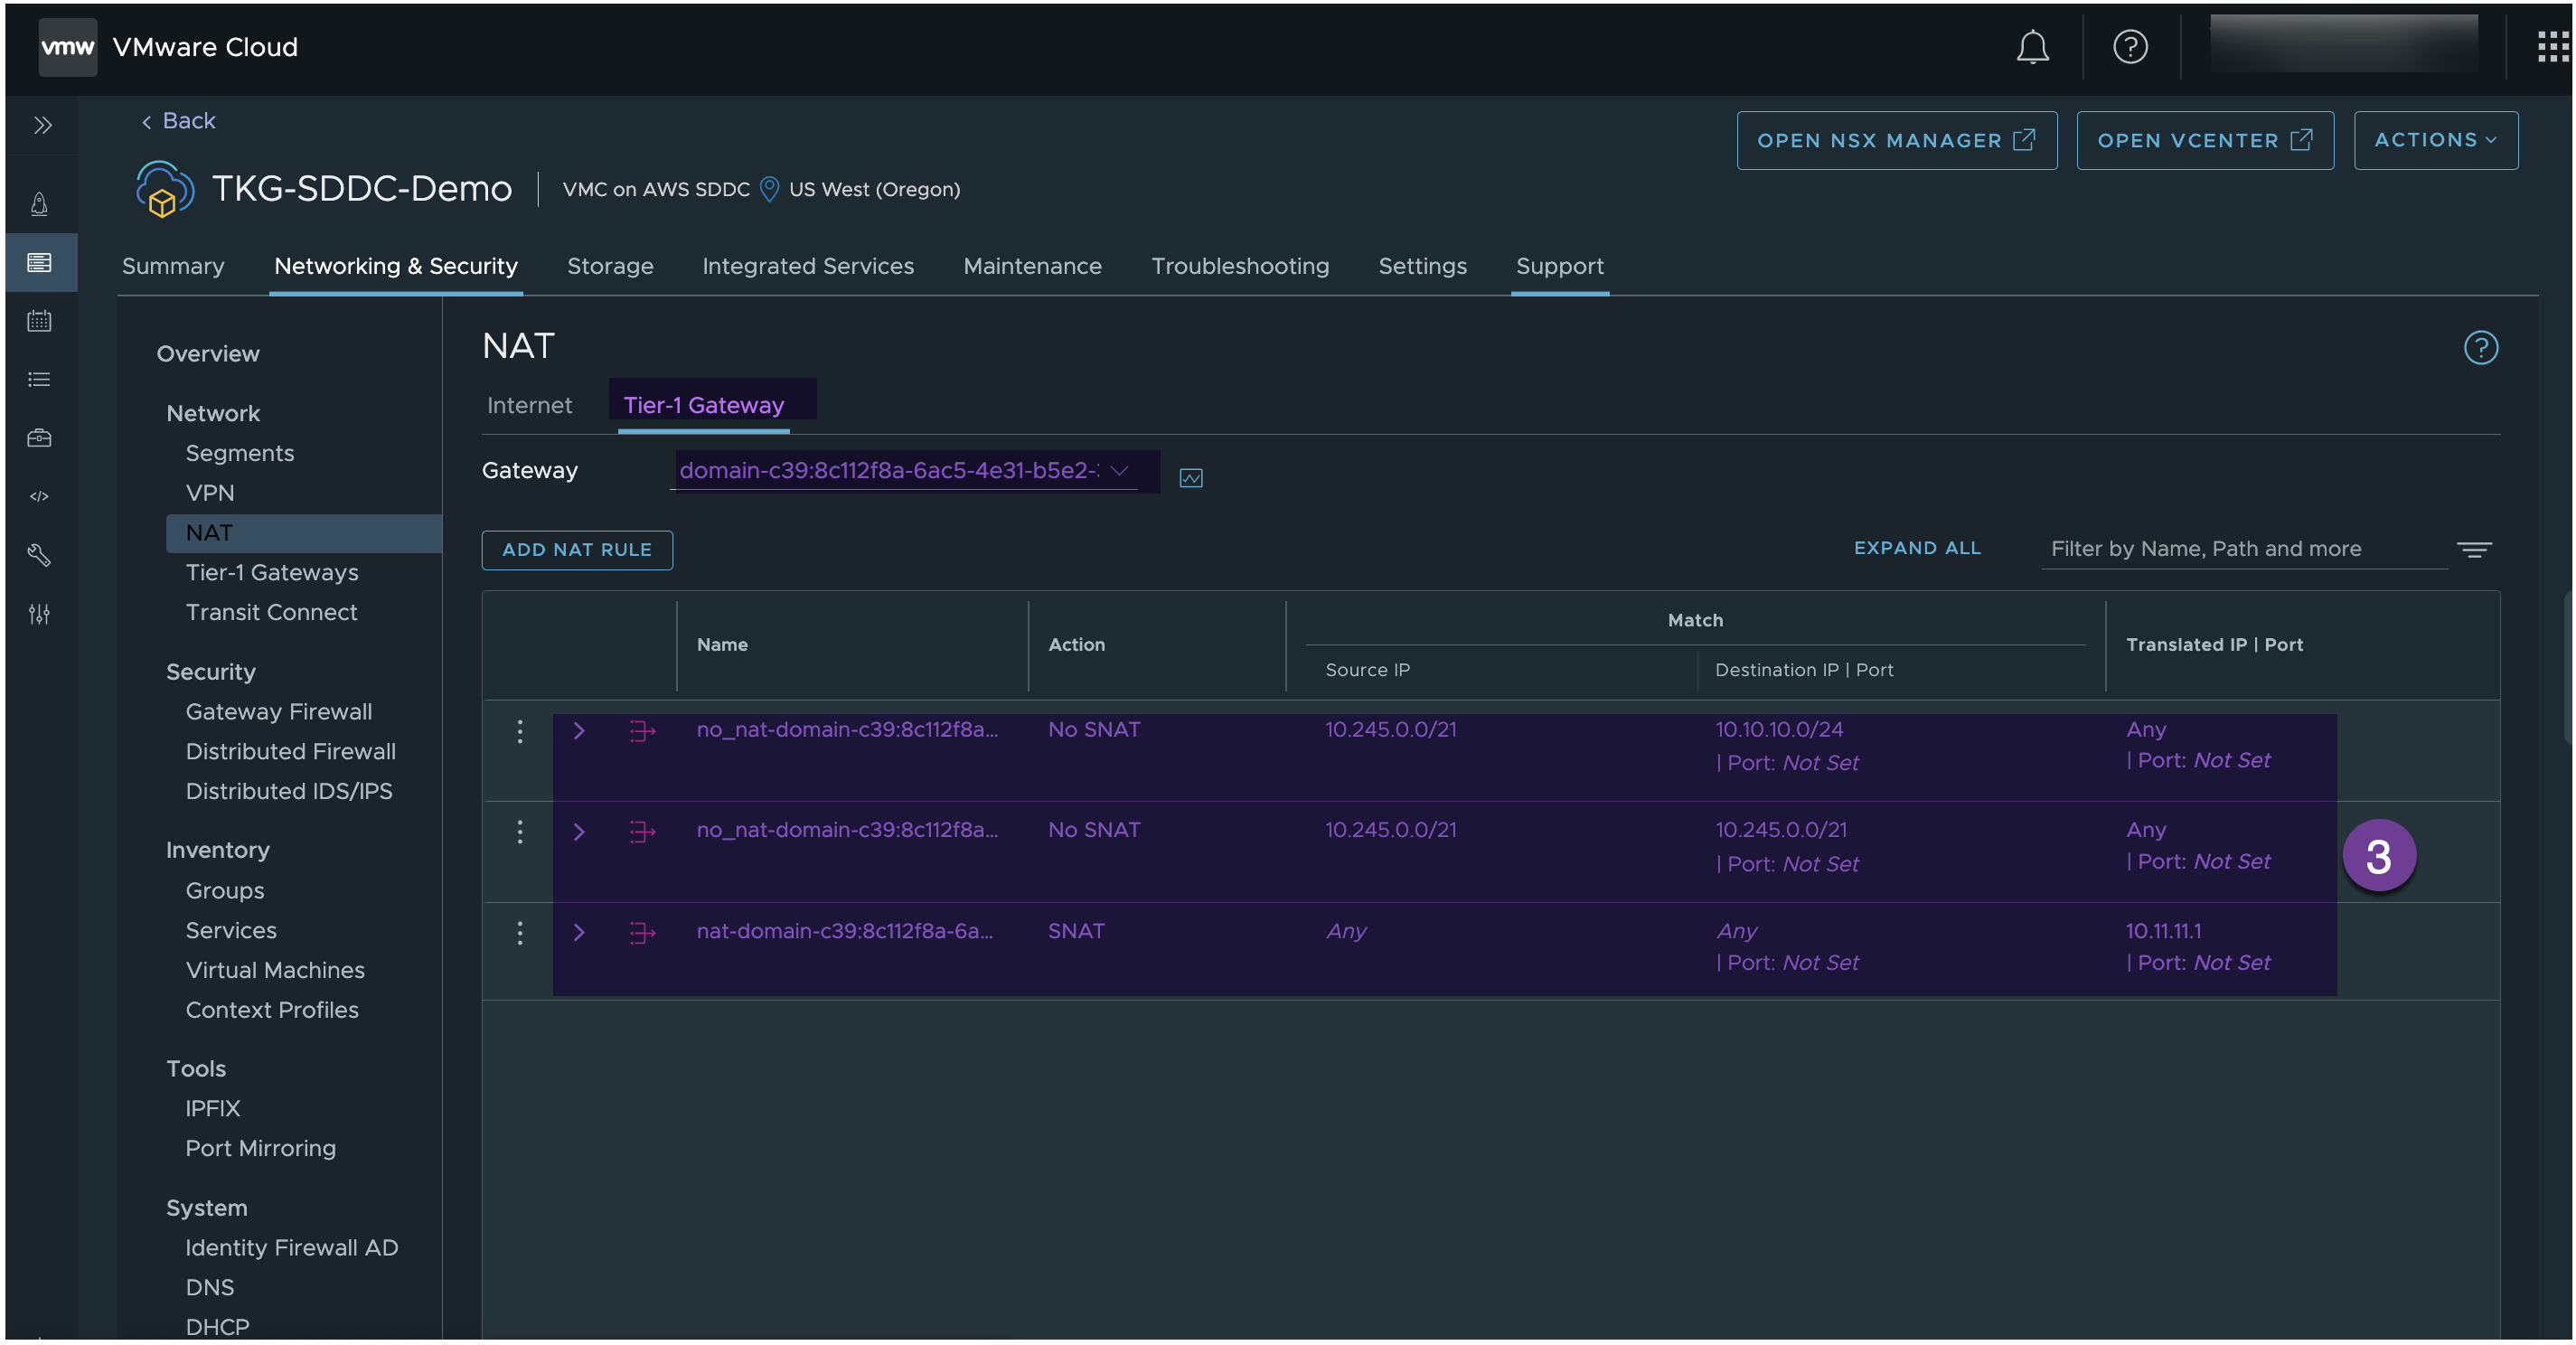
Under the NAT section, verify NAT rules are created in the Supervisor Namespace T1 router
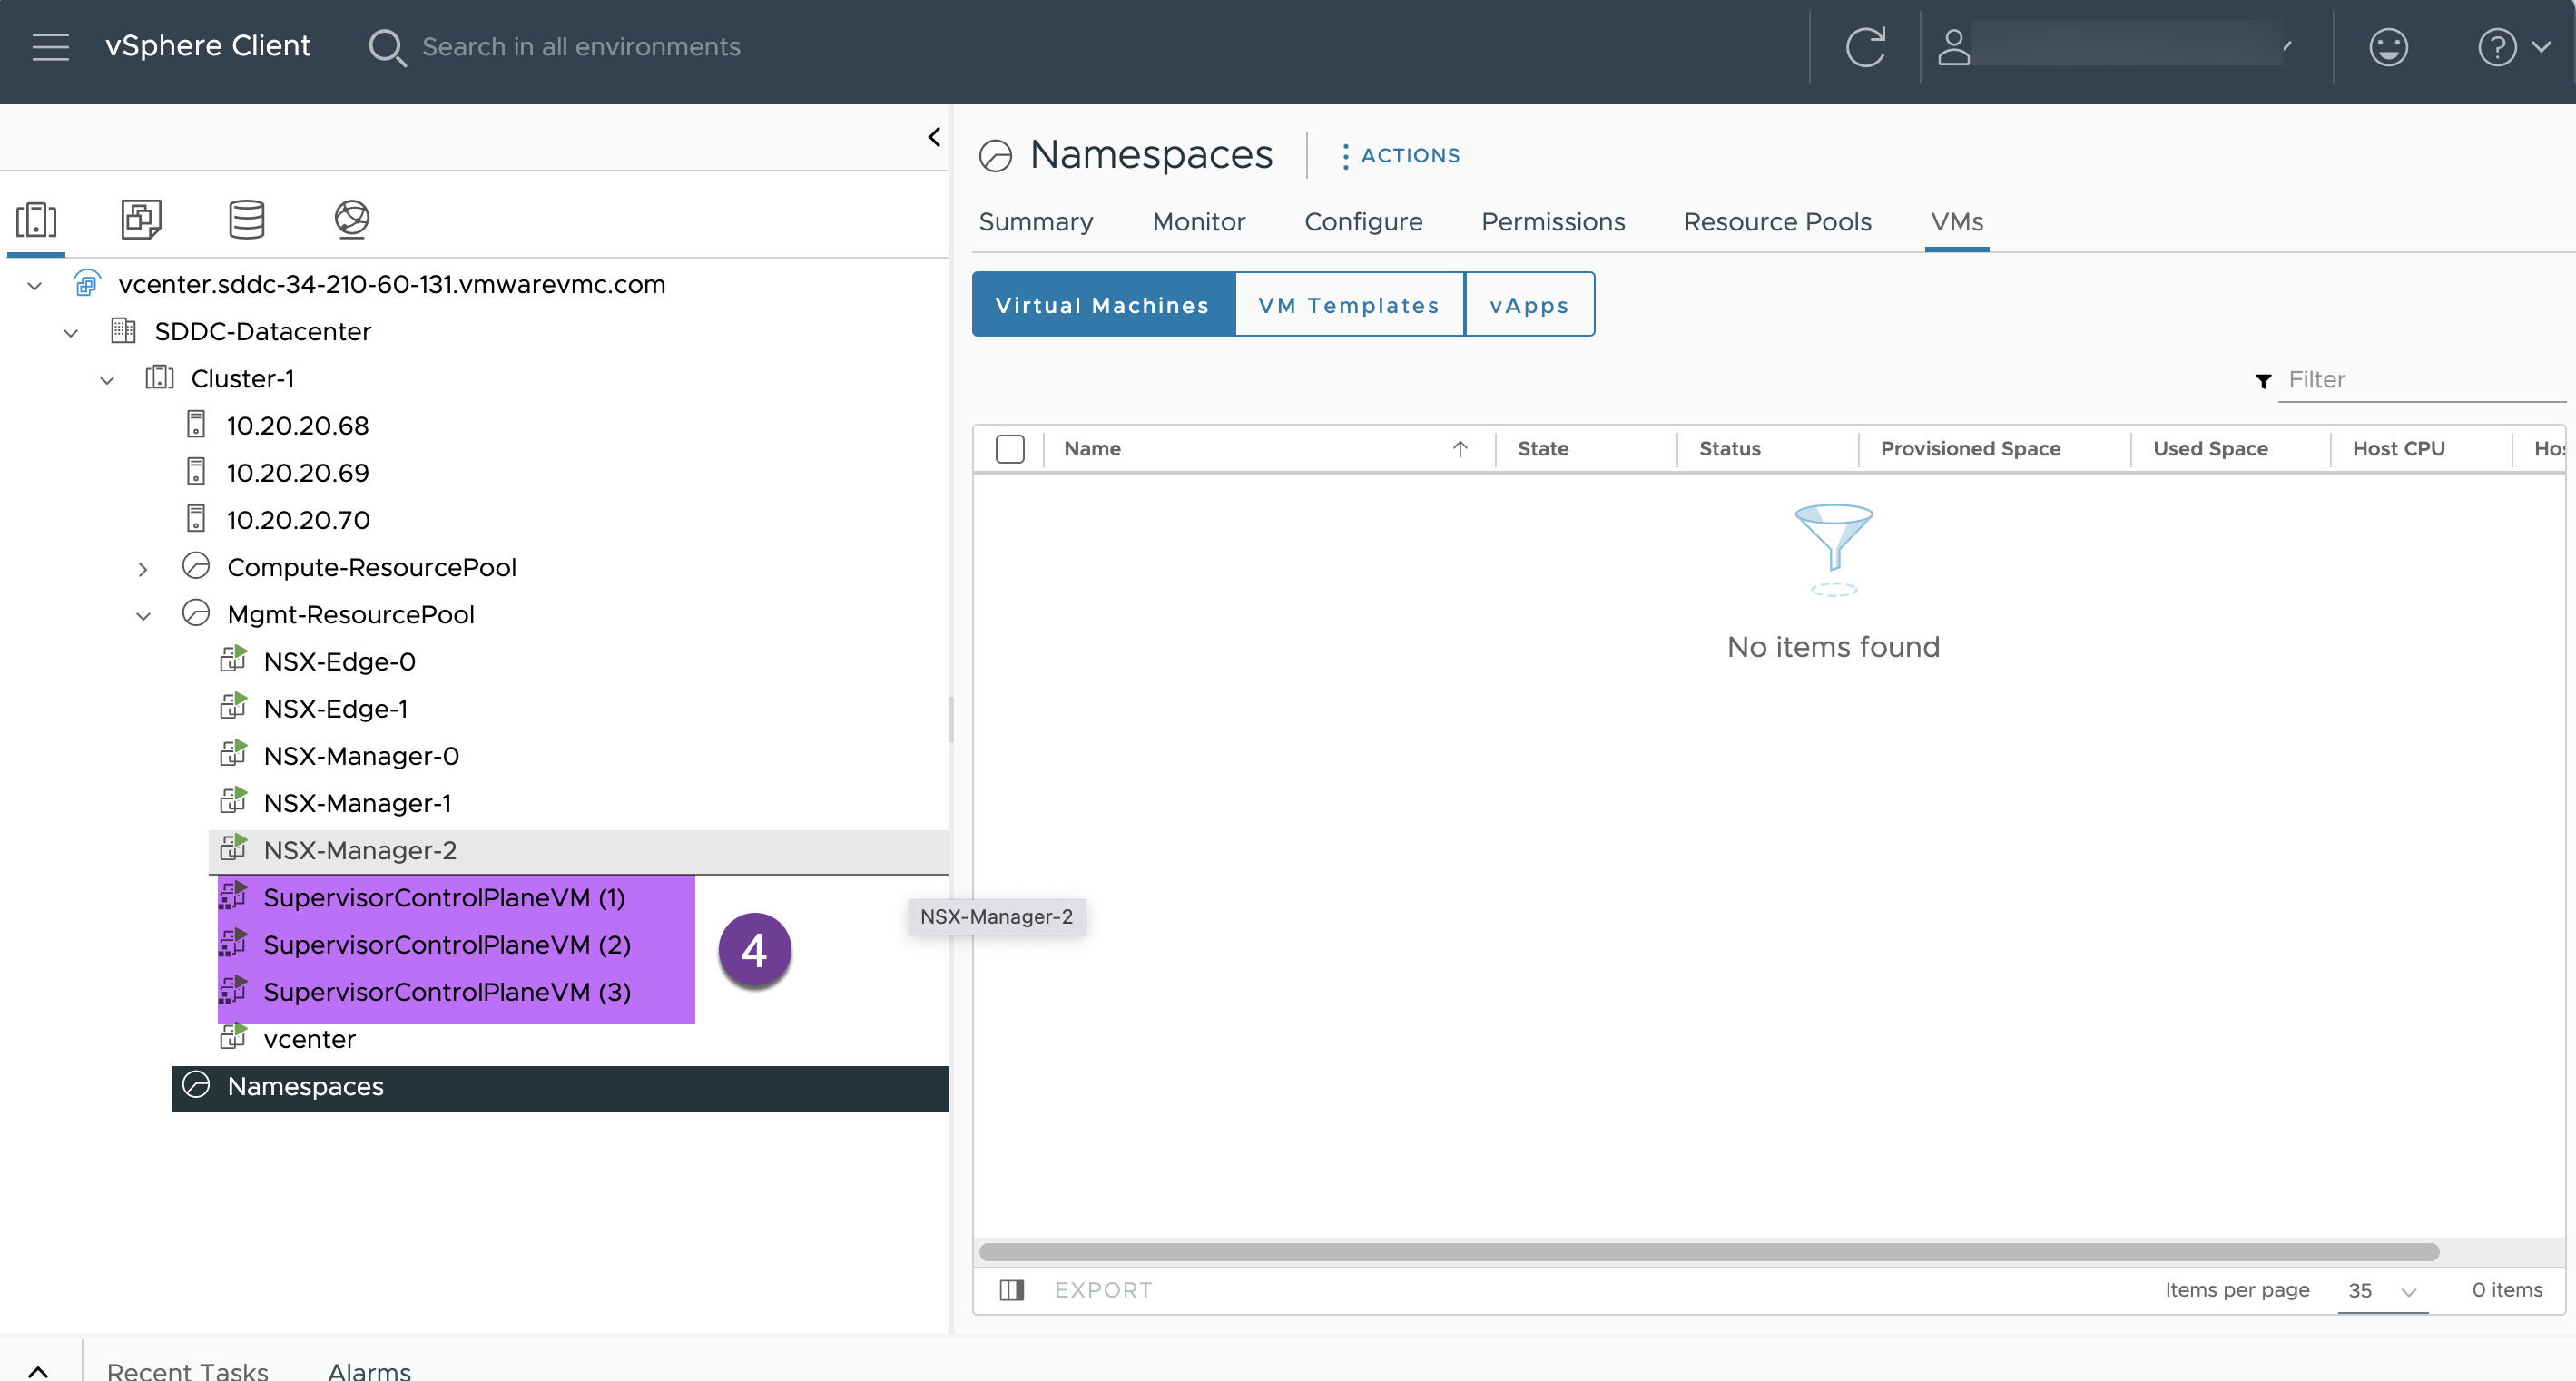
Access the vCenter and verify that 3 nodes Supervisor cluster is deployed under “Mgmt-ResourcePool” successfully
3. Create vSphere namespace
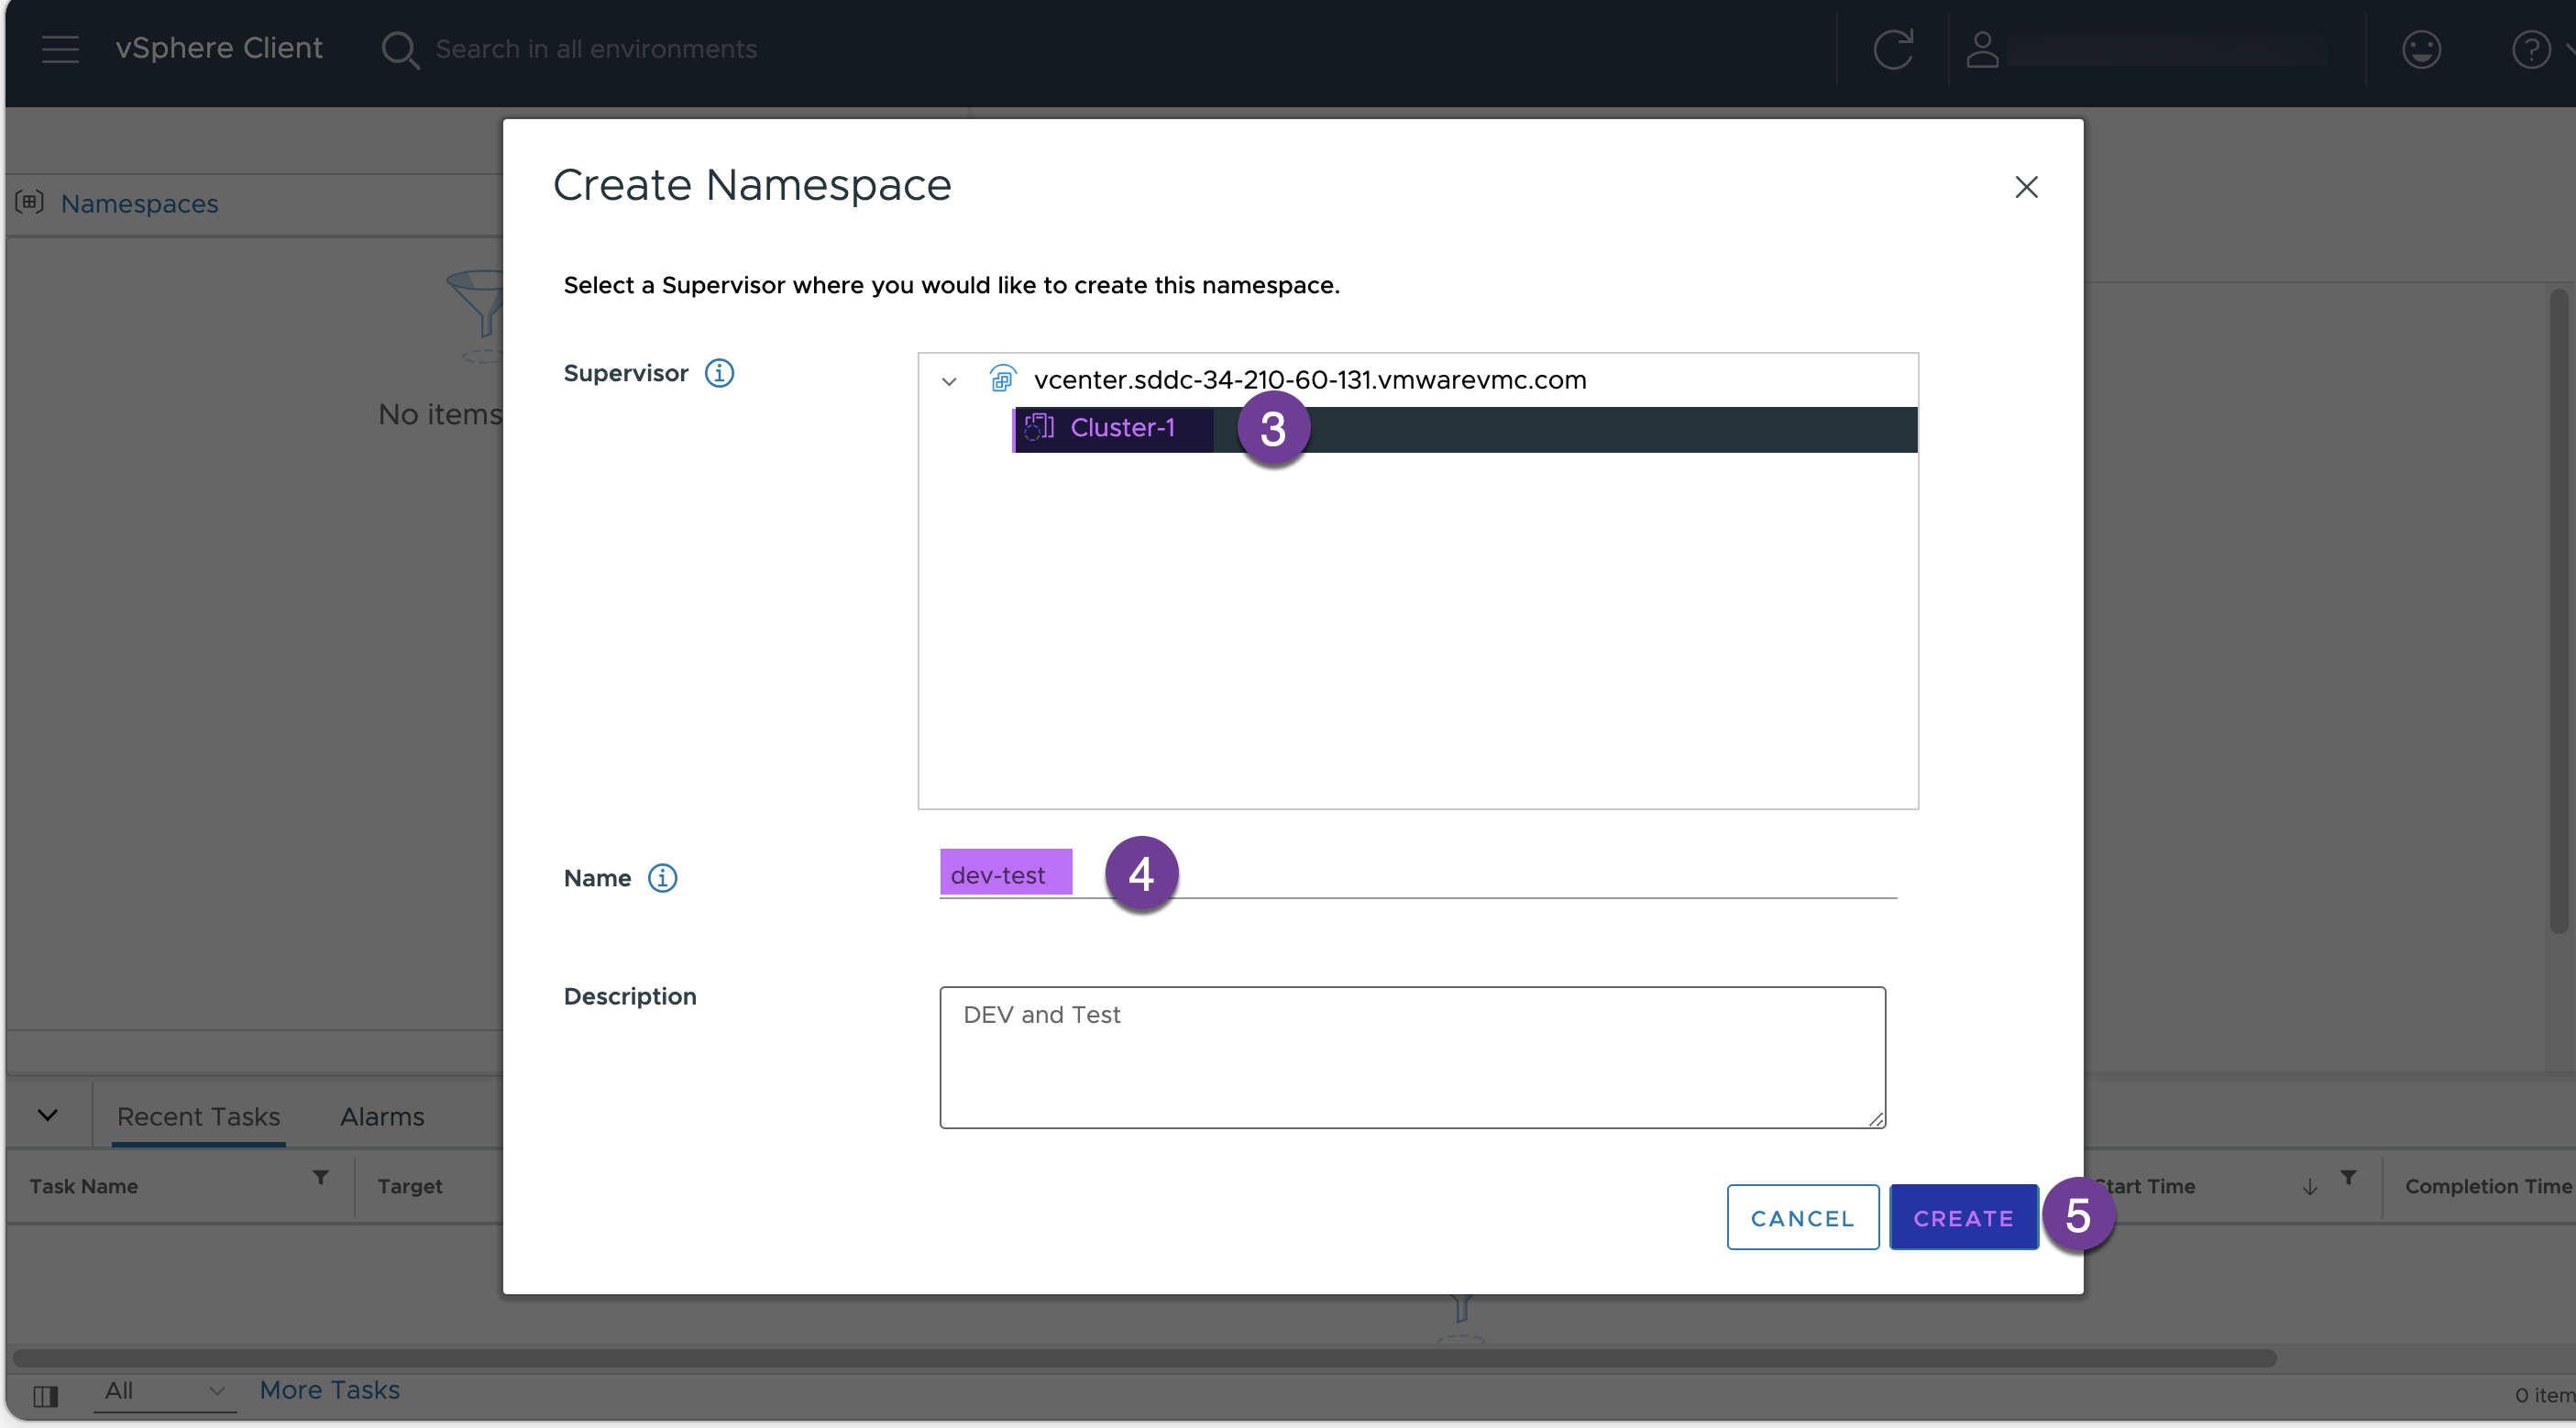
Go to Workload Management in vCenter and Click “CREATE NAMESPACE”
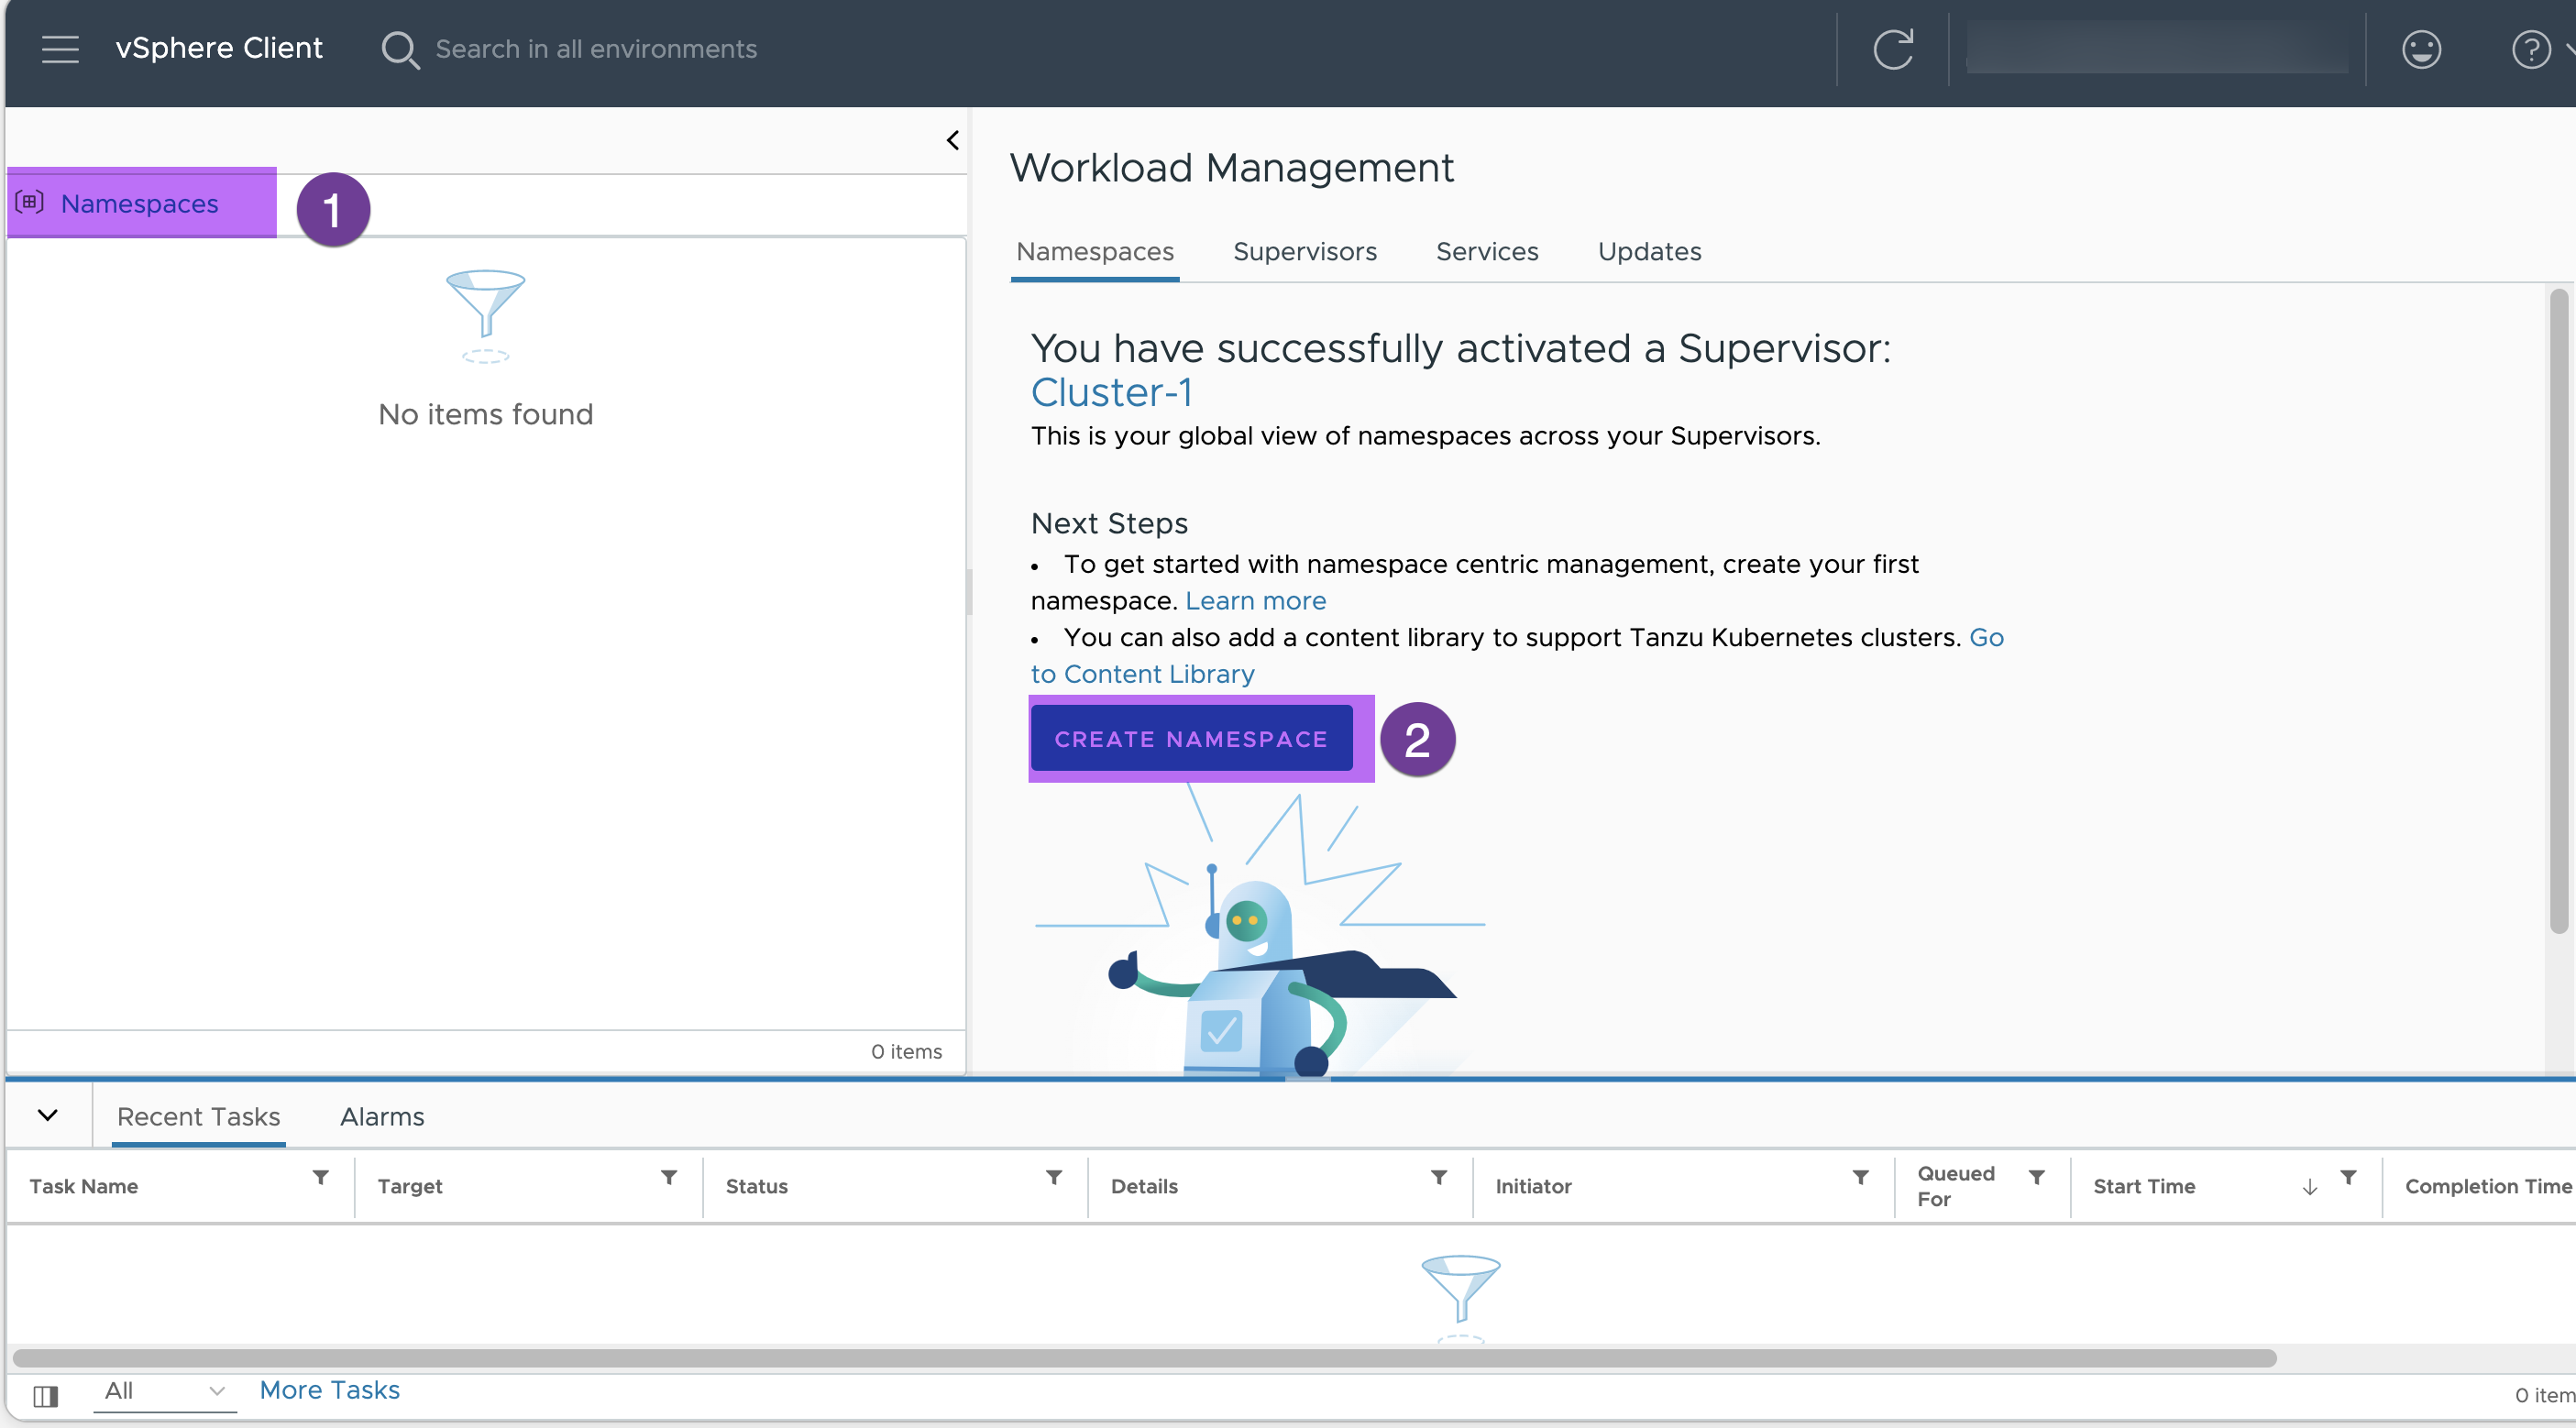
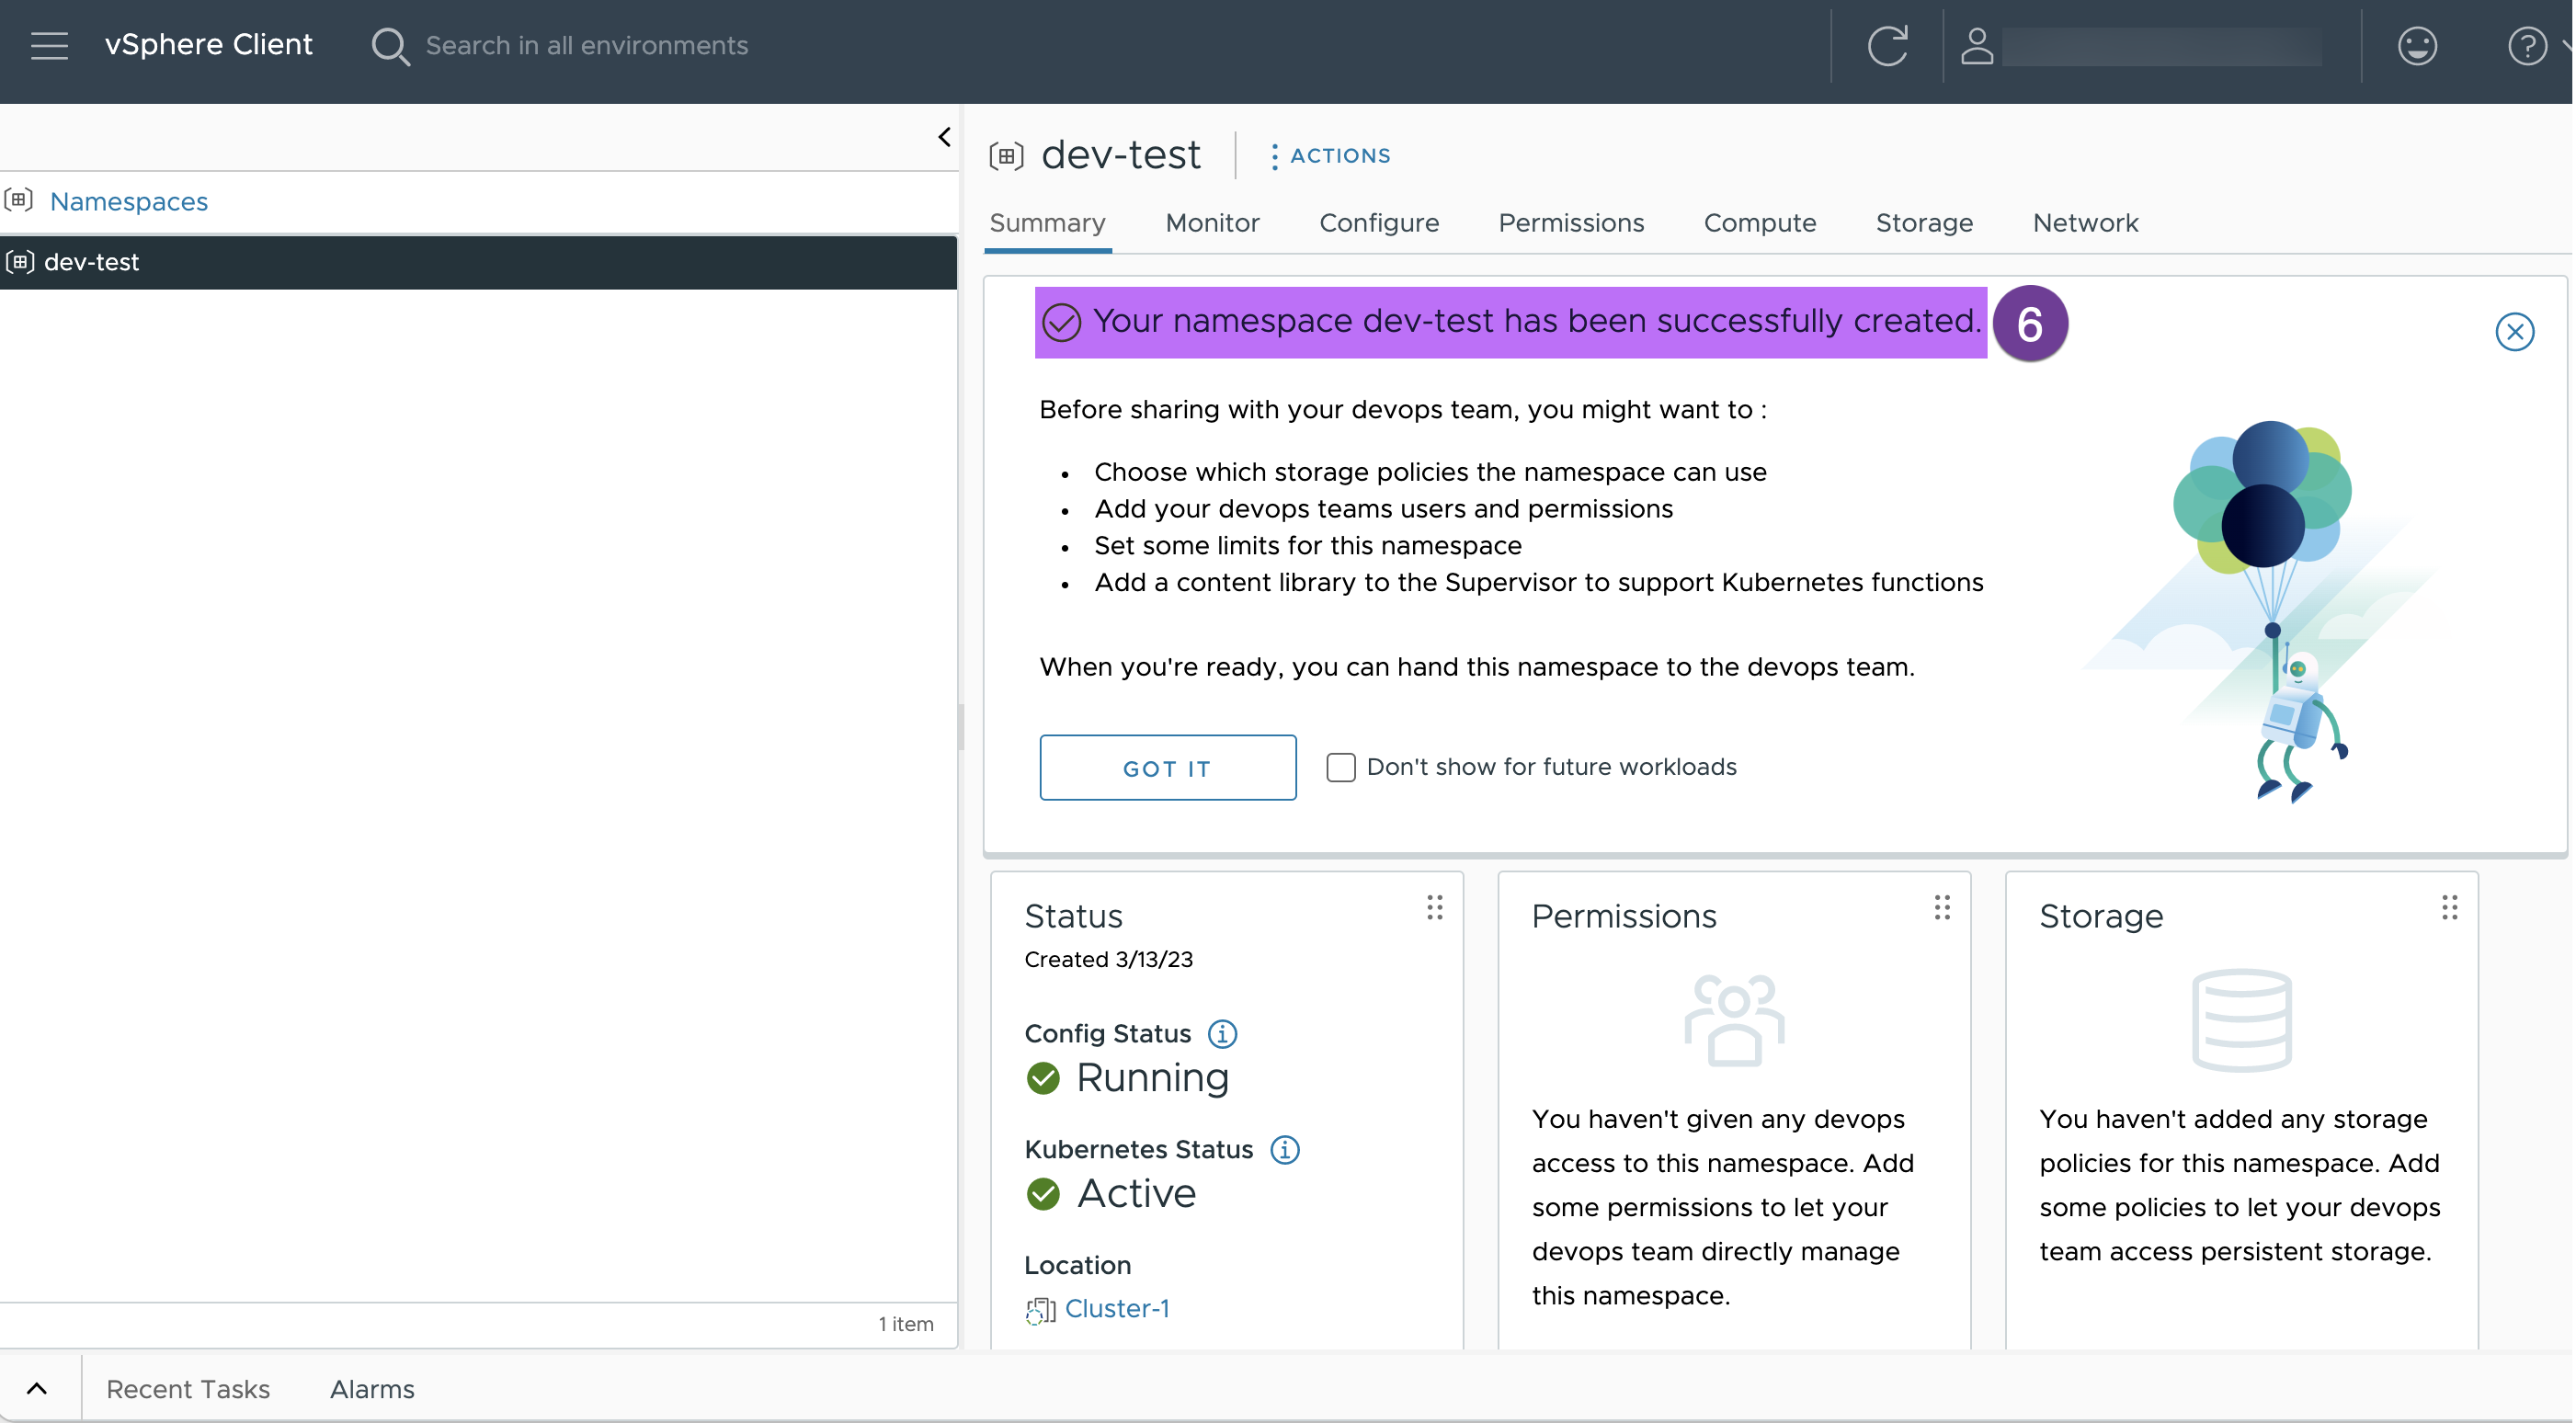
Enter a name for your namespace ( ‘dev-test’ in my env) and click “CREATE”
Verify the namespace you created
4. Assign the permission to your namespace.
Select your namespace (‘dev-test’ in my env. ) and click on ADD PERMISSION
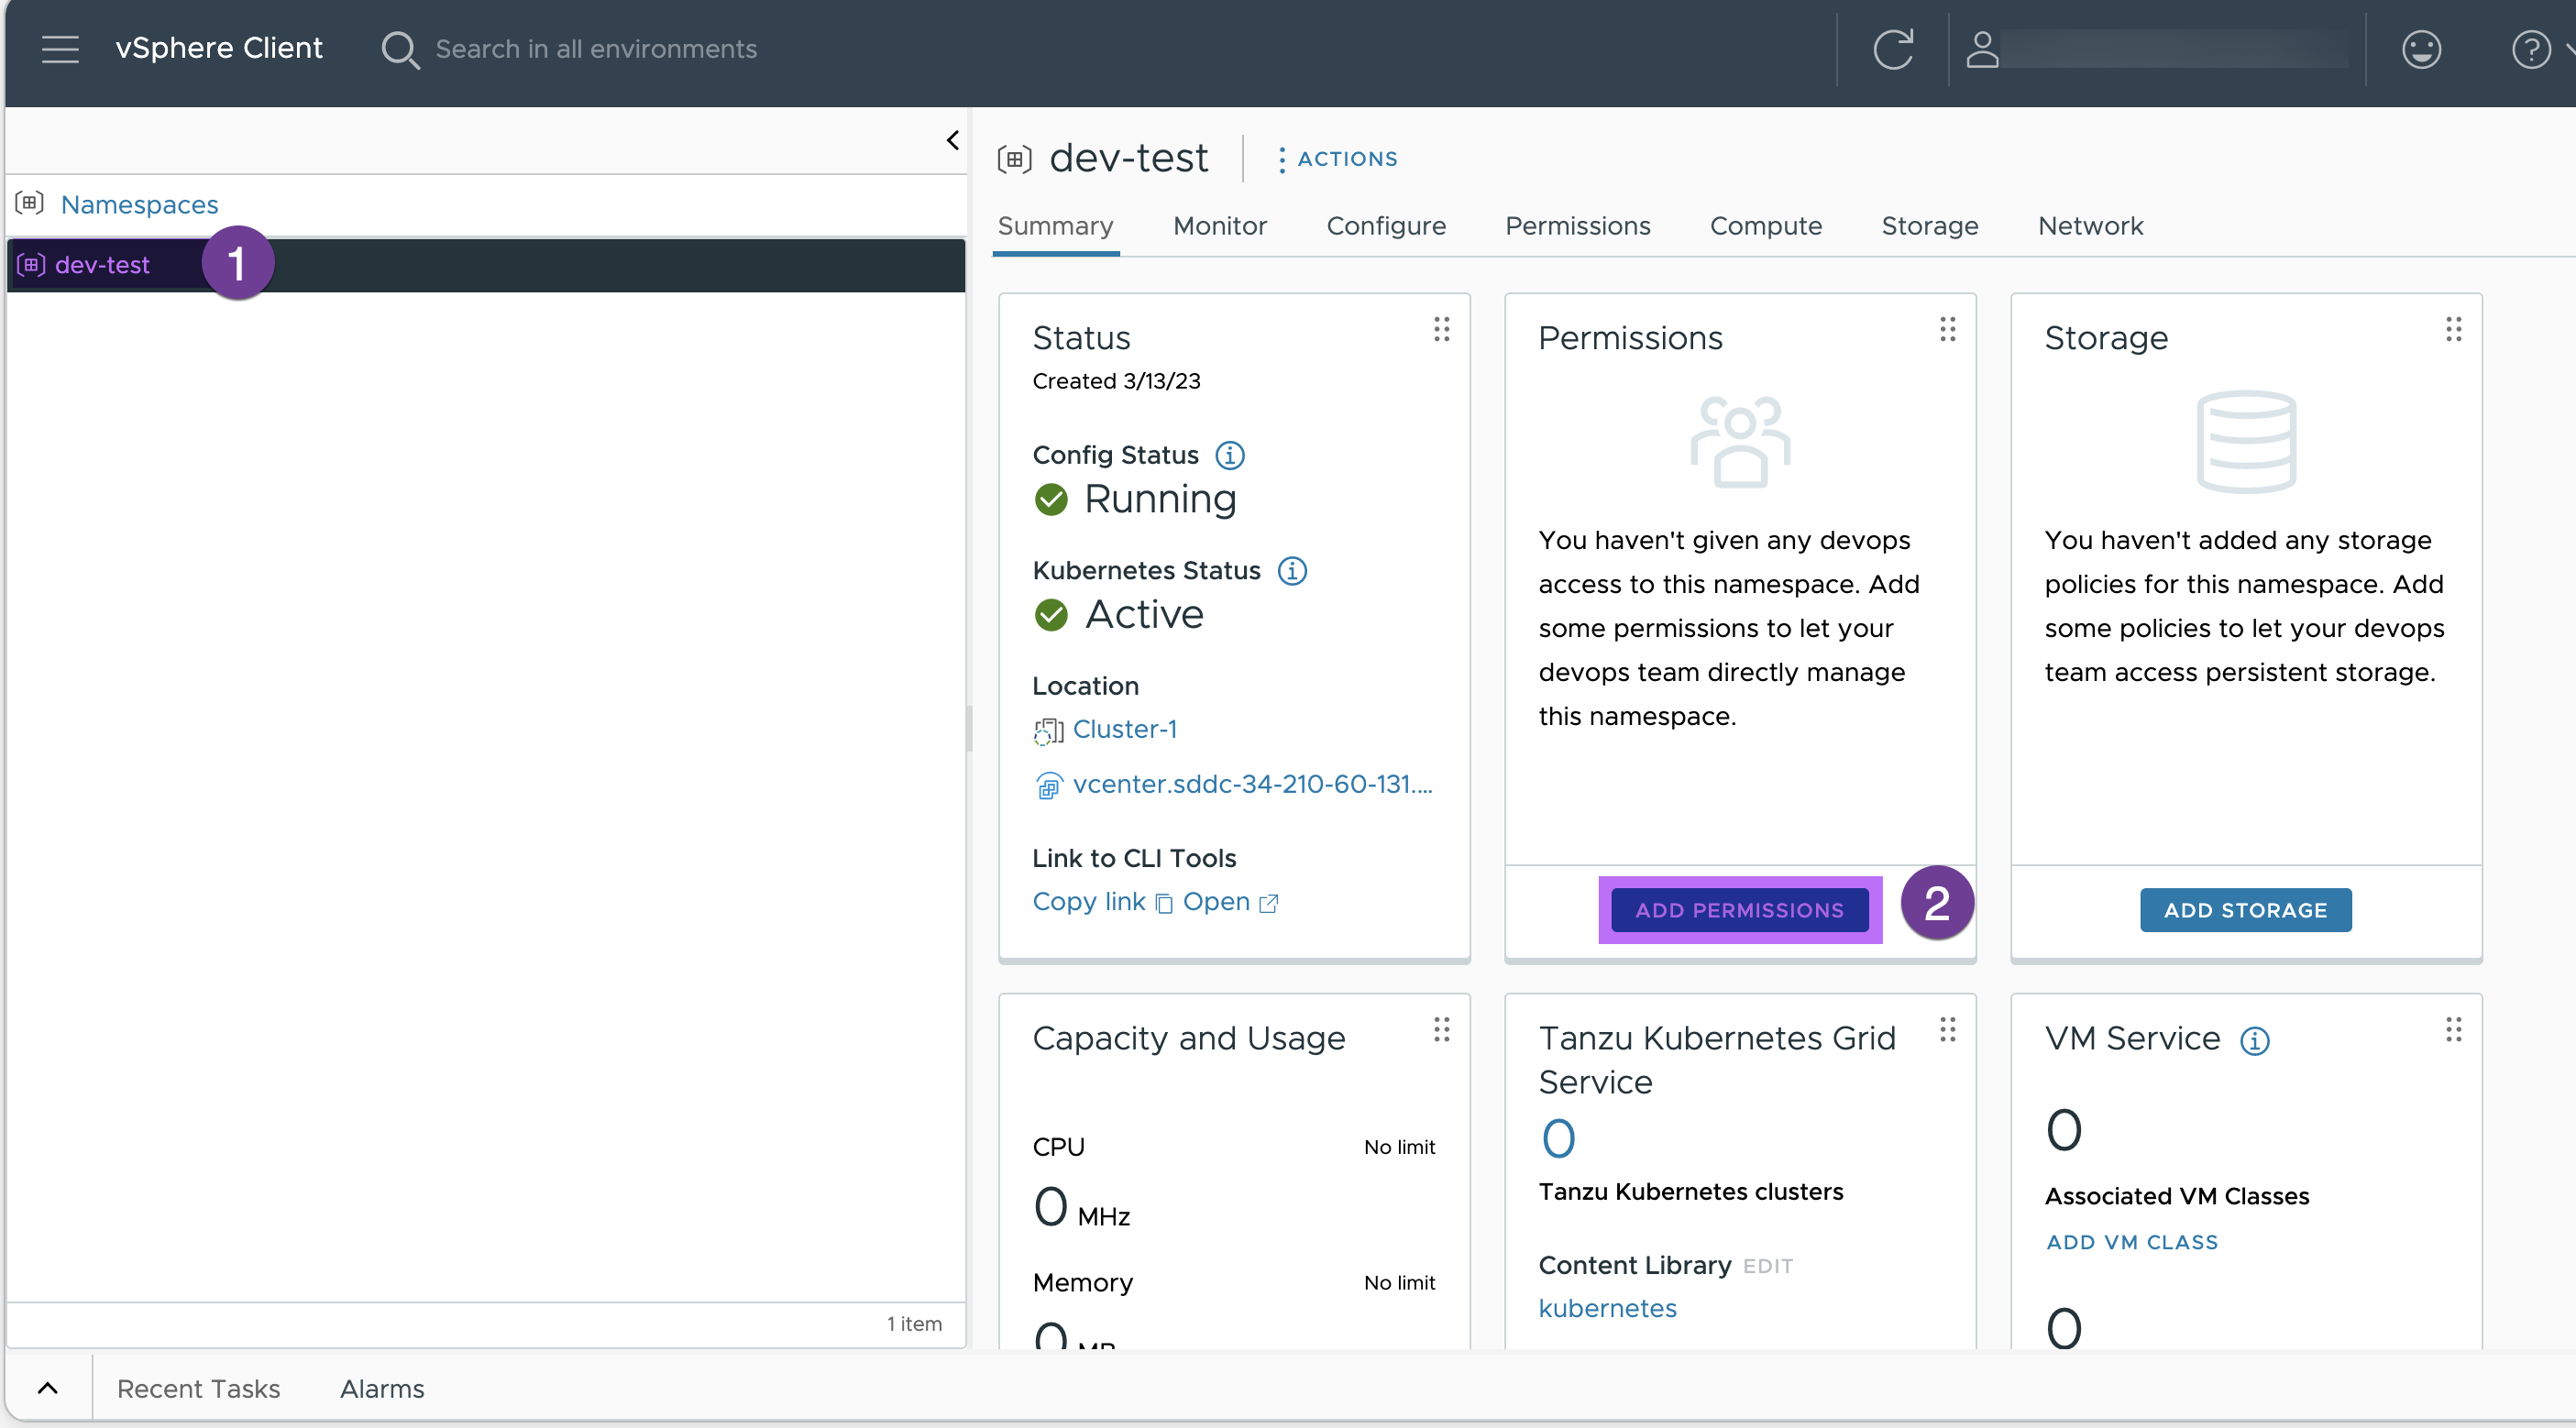
Add the cloudadmin from vmc.local as owner

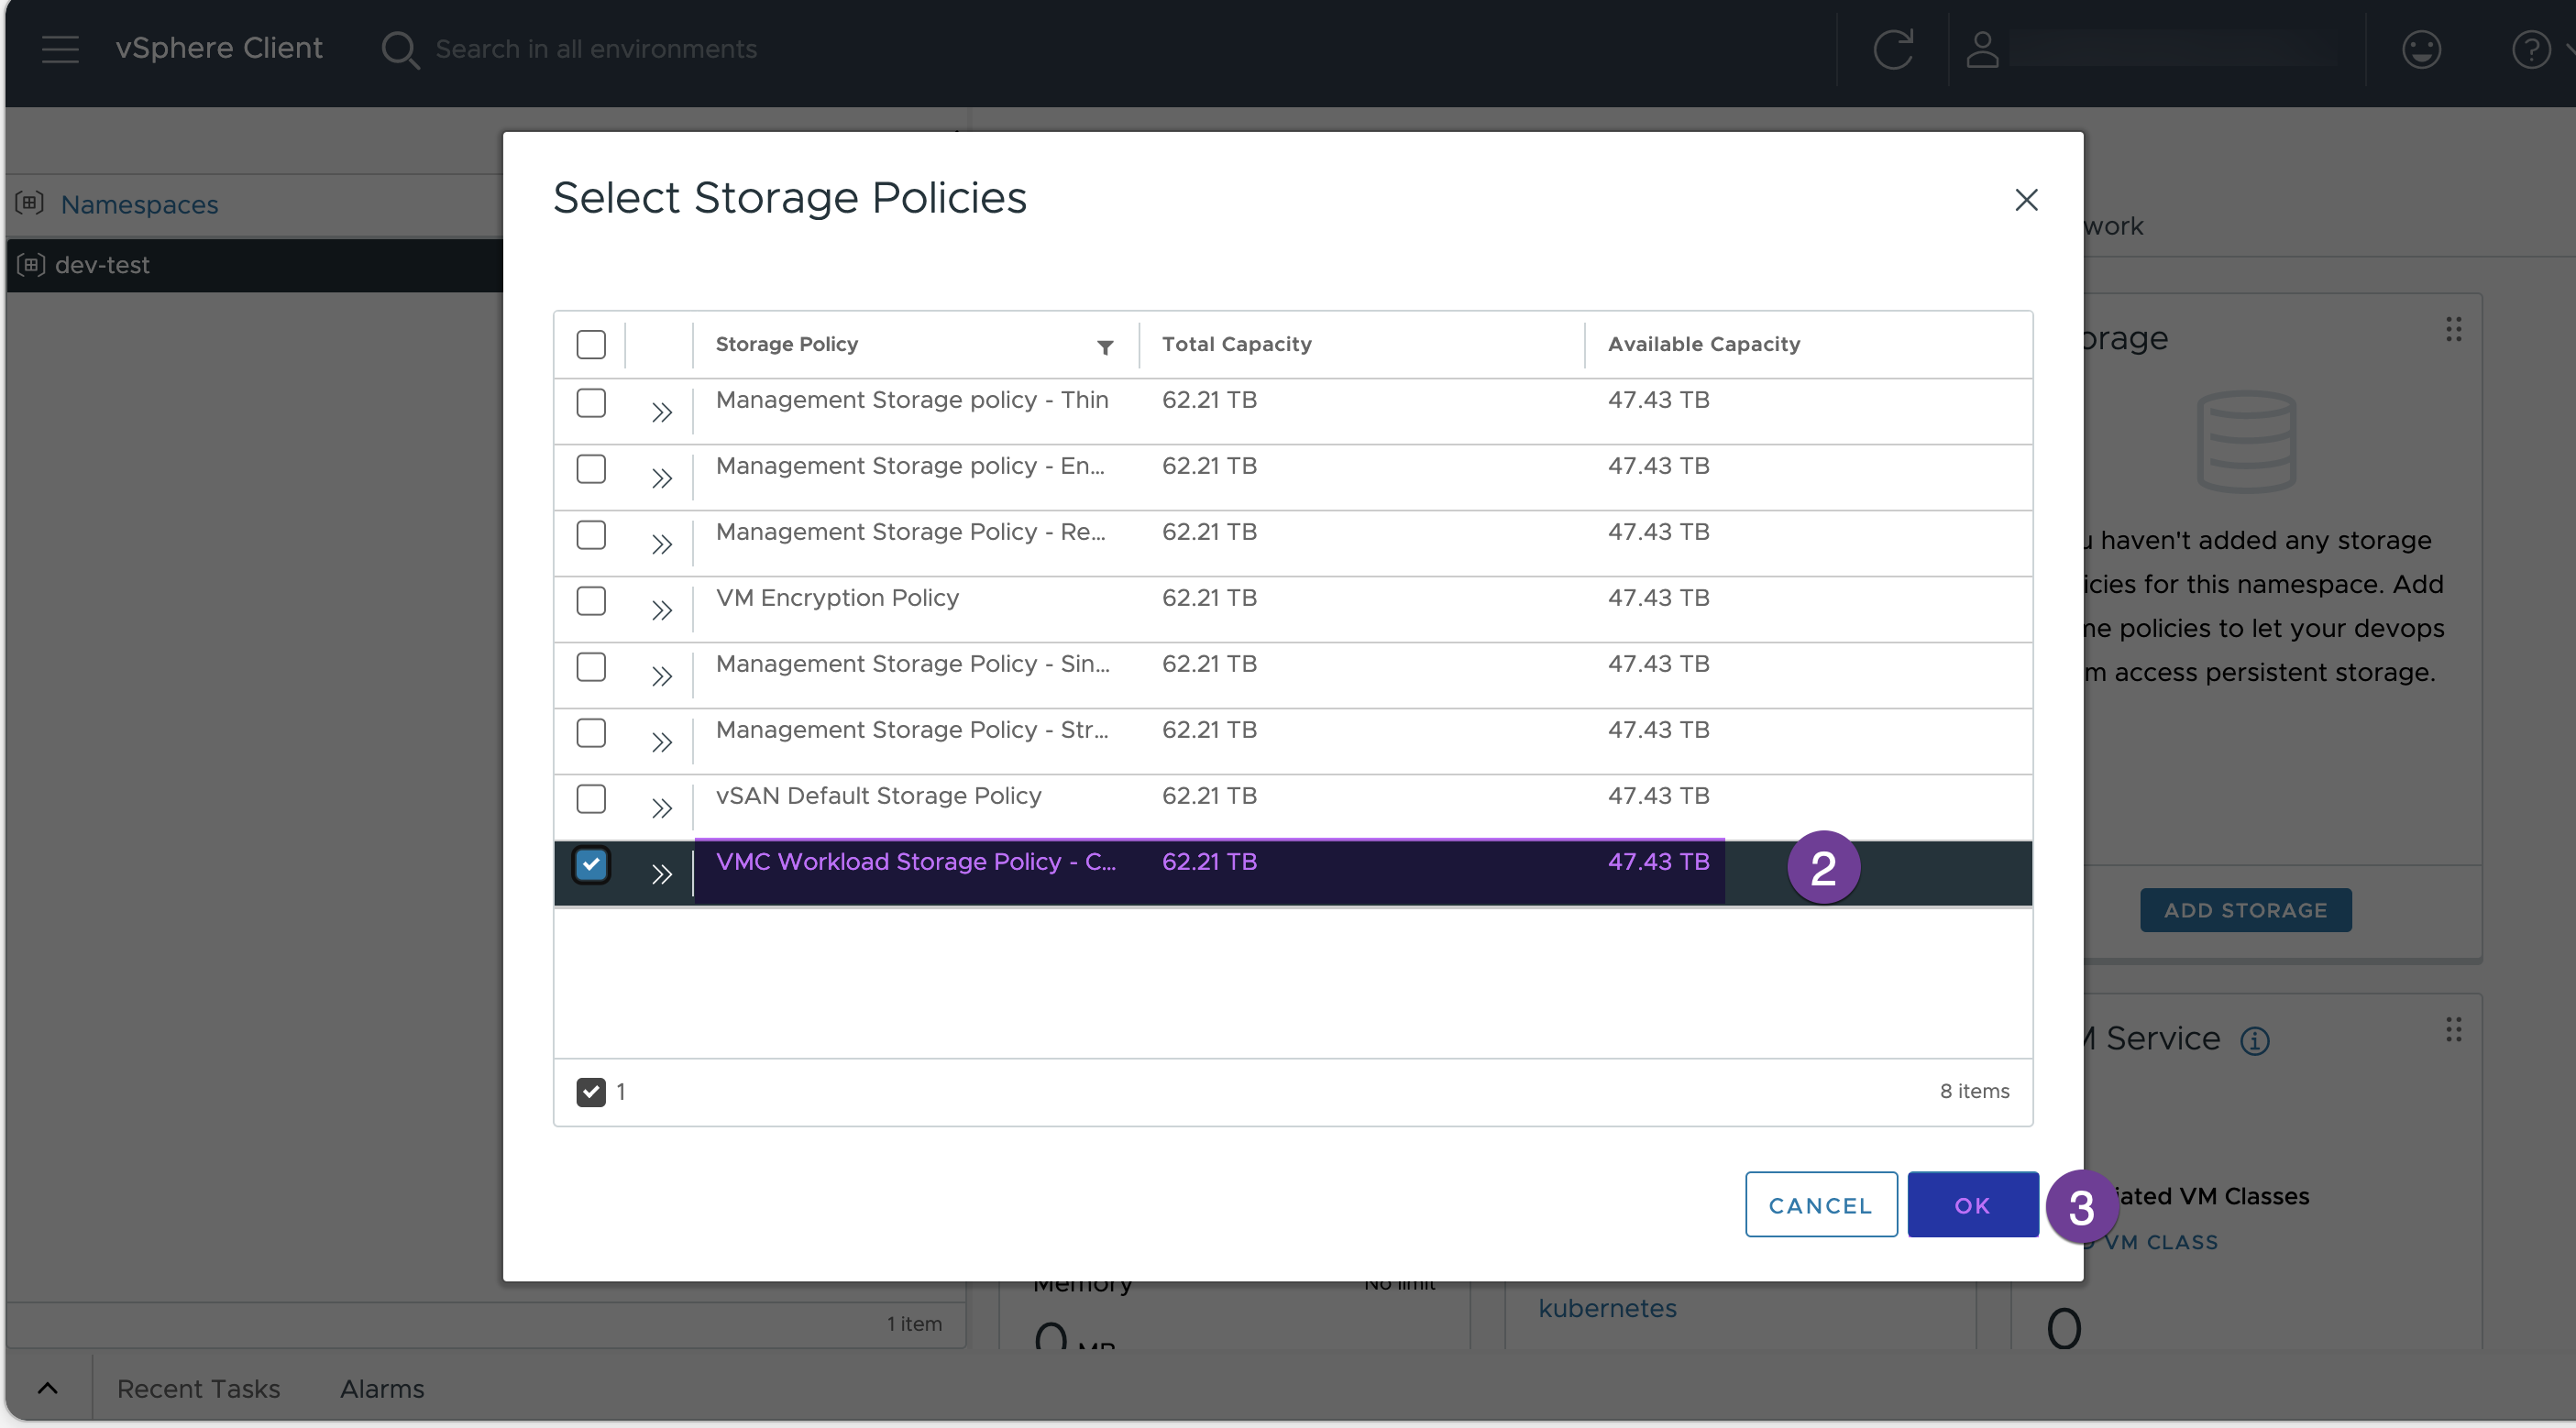
5. Assign the storage policy.
Click on “ADD STORAGE”
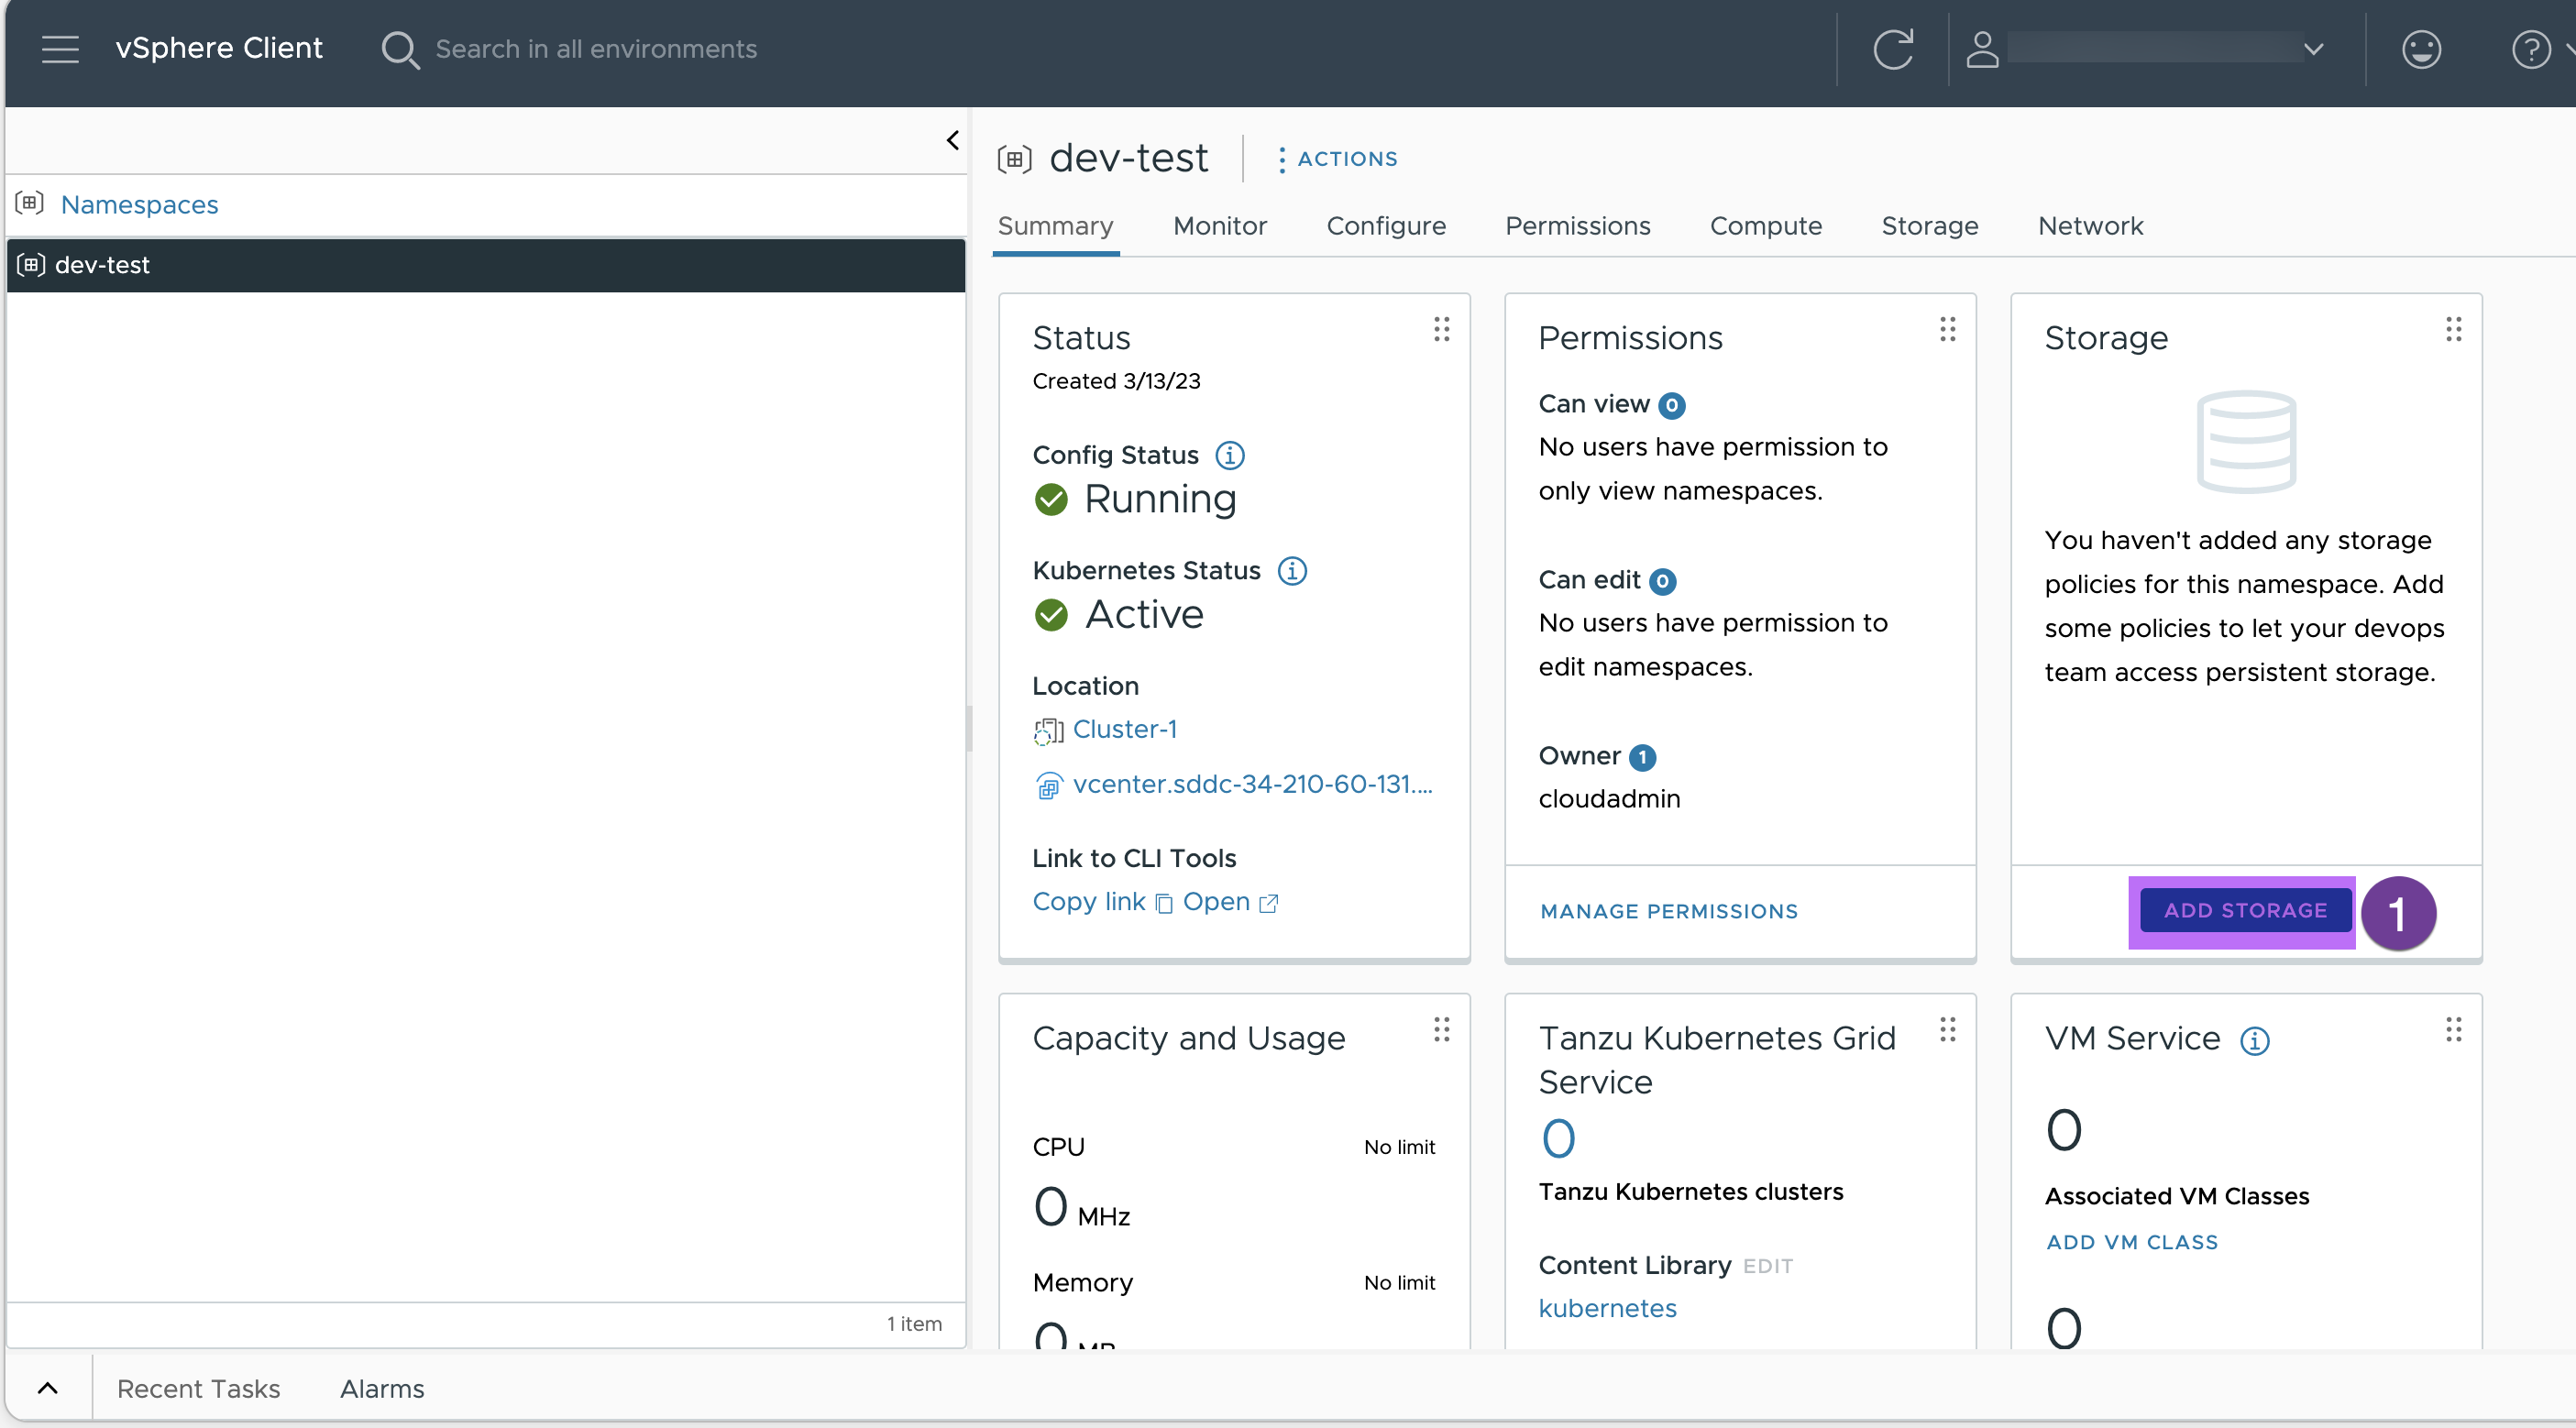
Select the VMC workload storage Policy
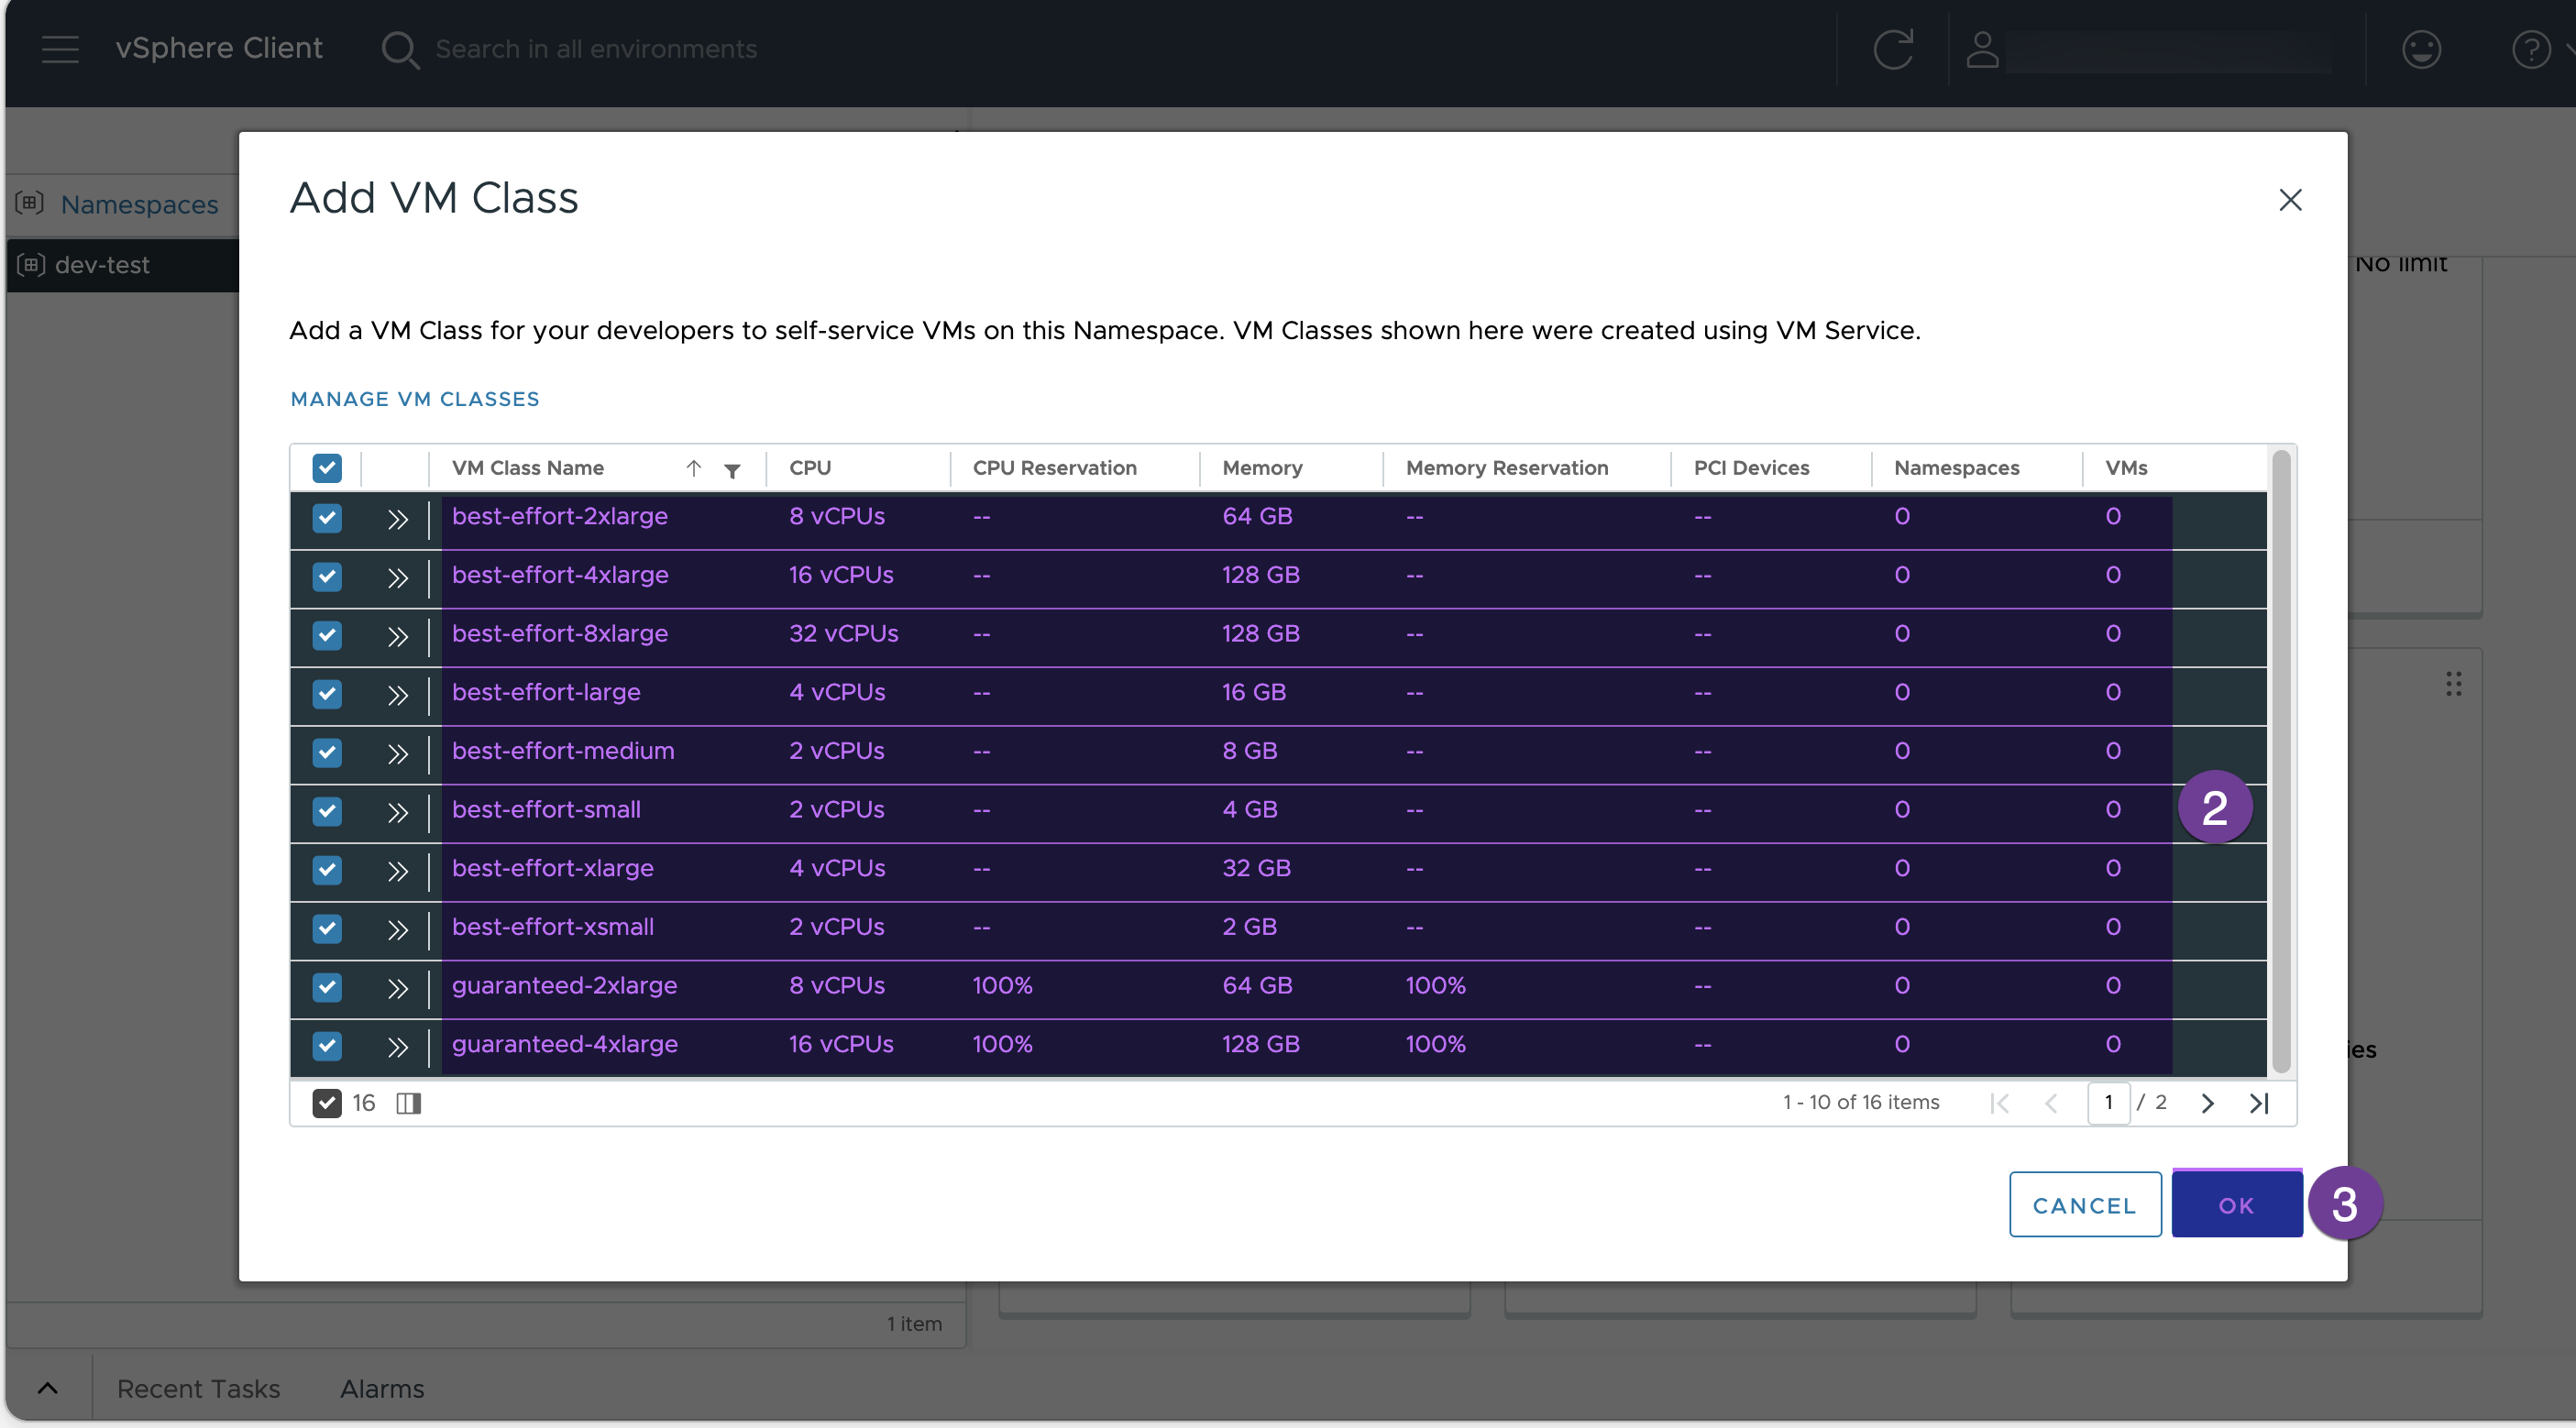
6. Associate VM Classes
Click to “ADD VM CLASS”
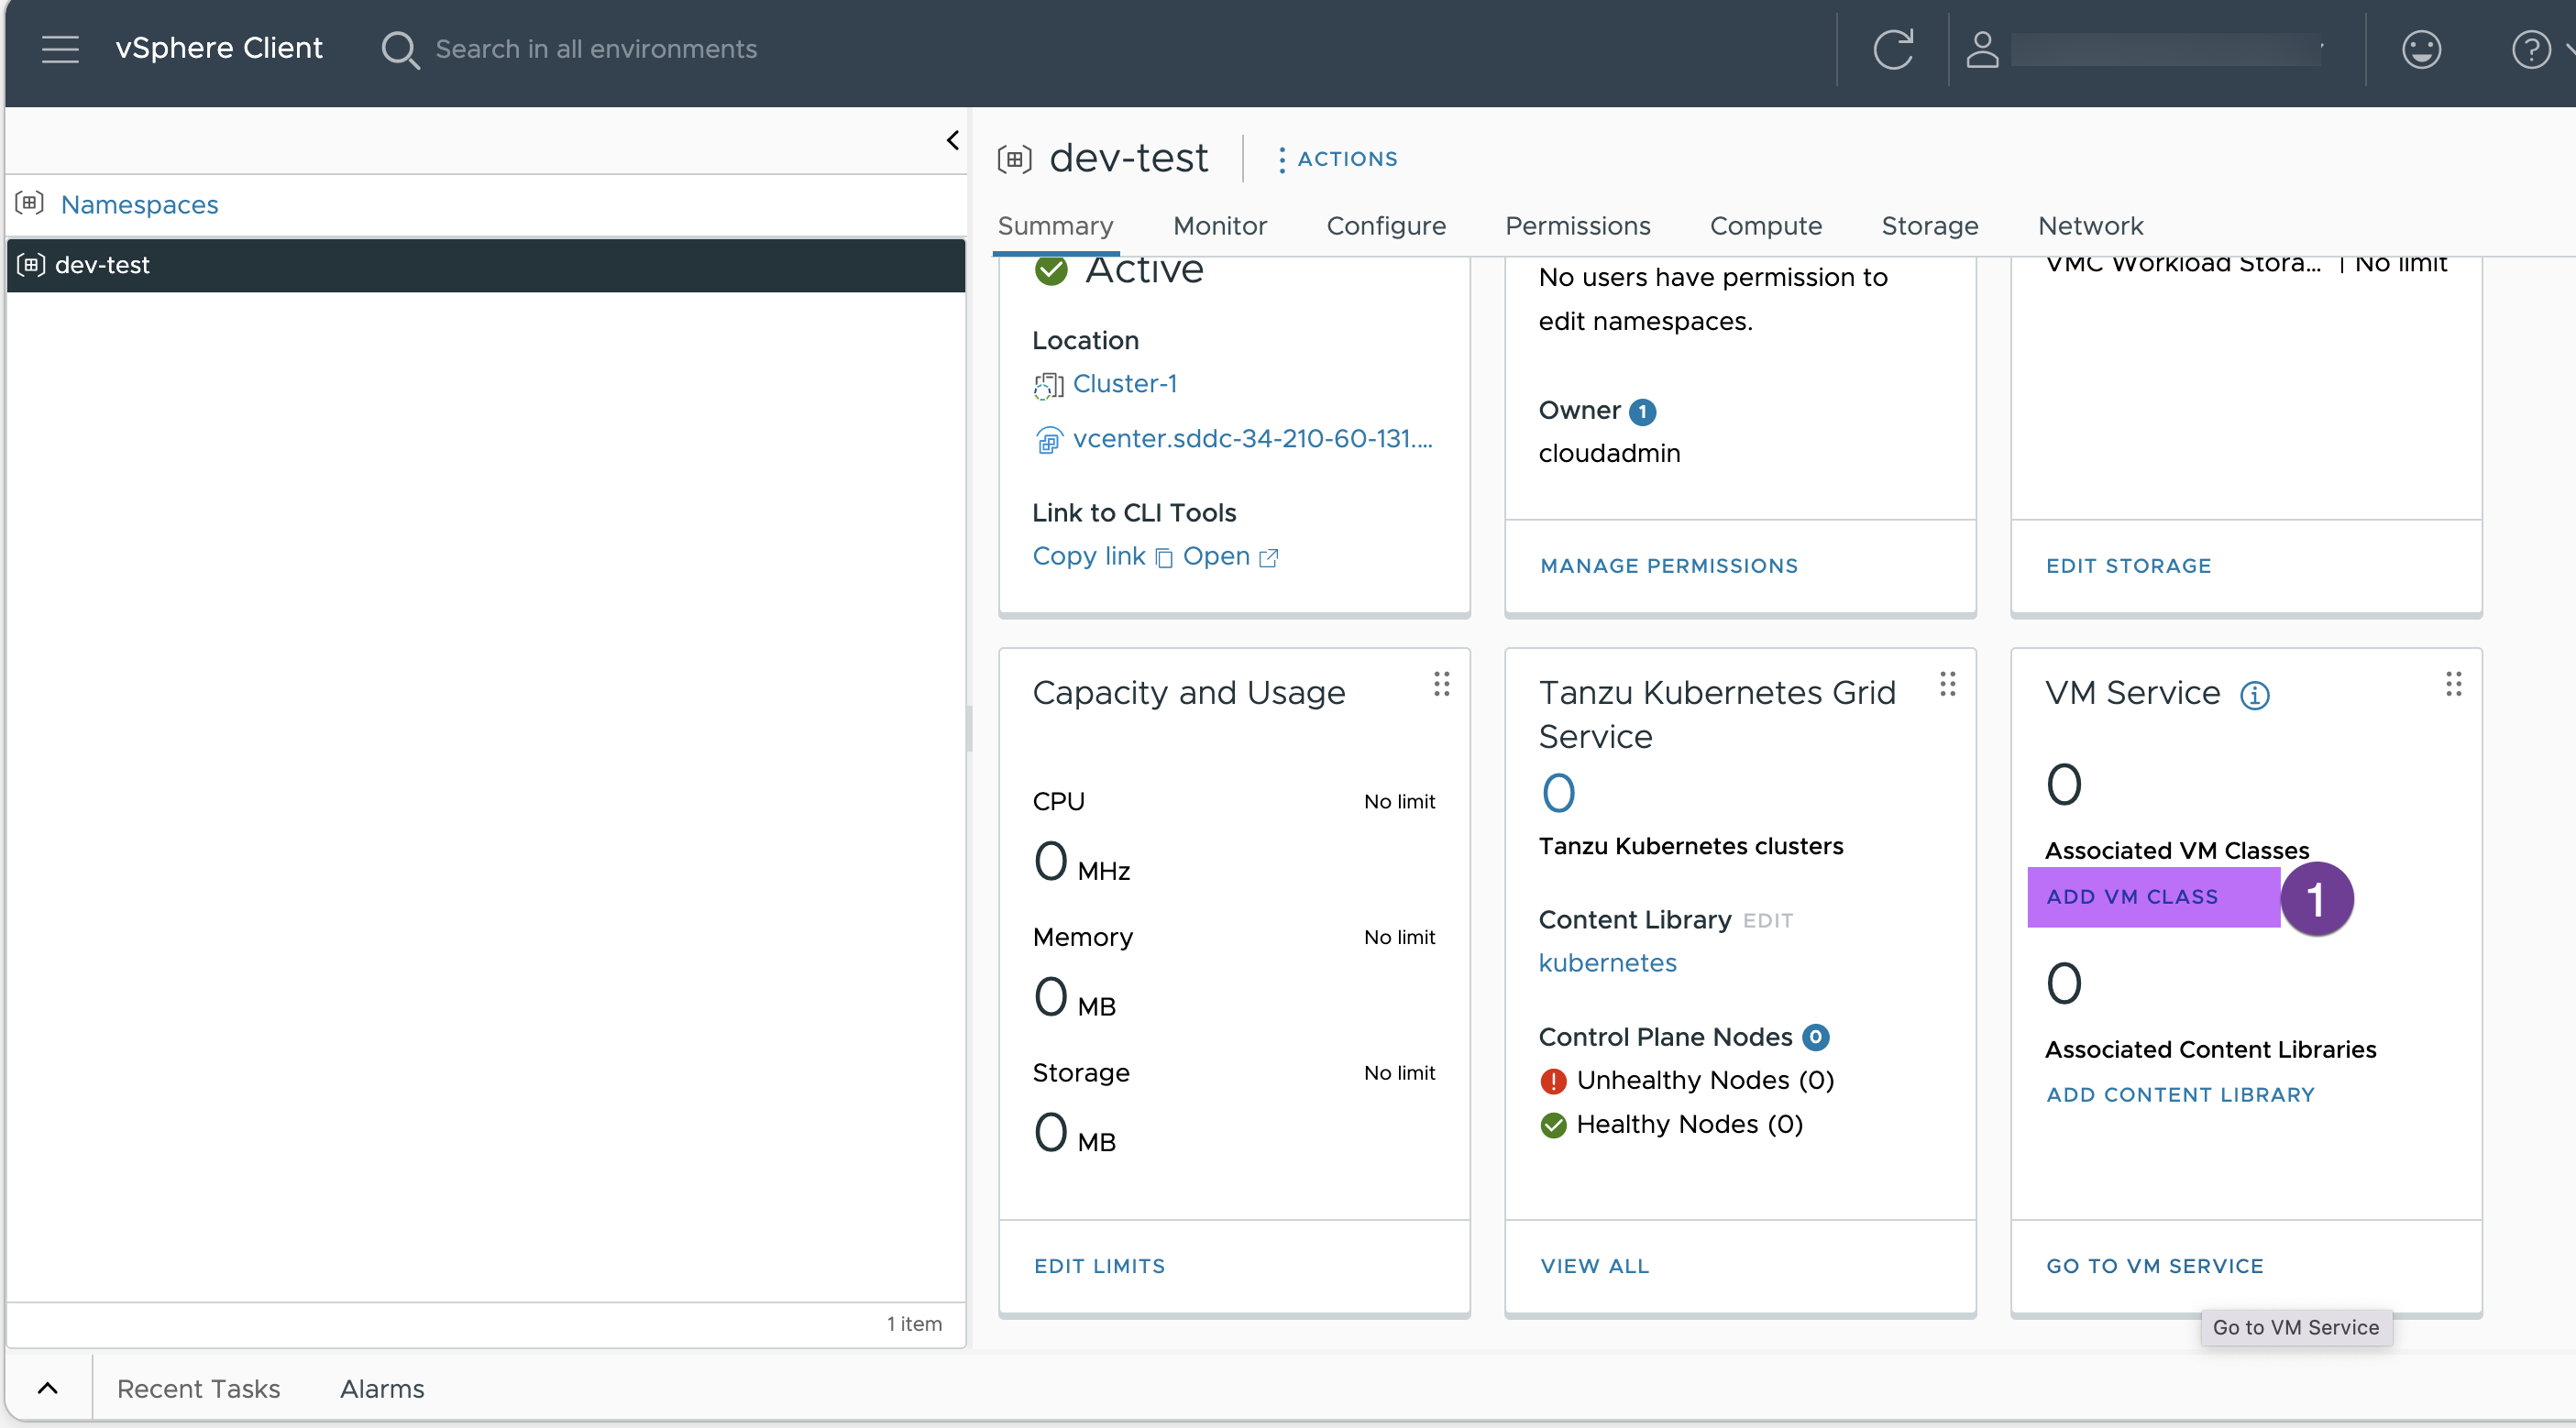
Select to all the VMs and click “OK”
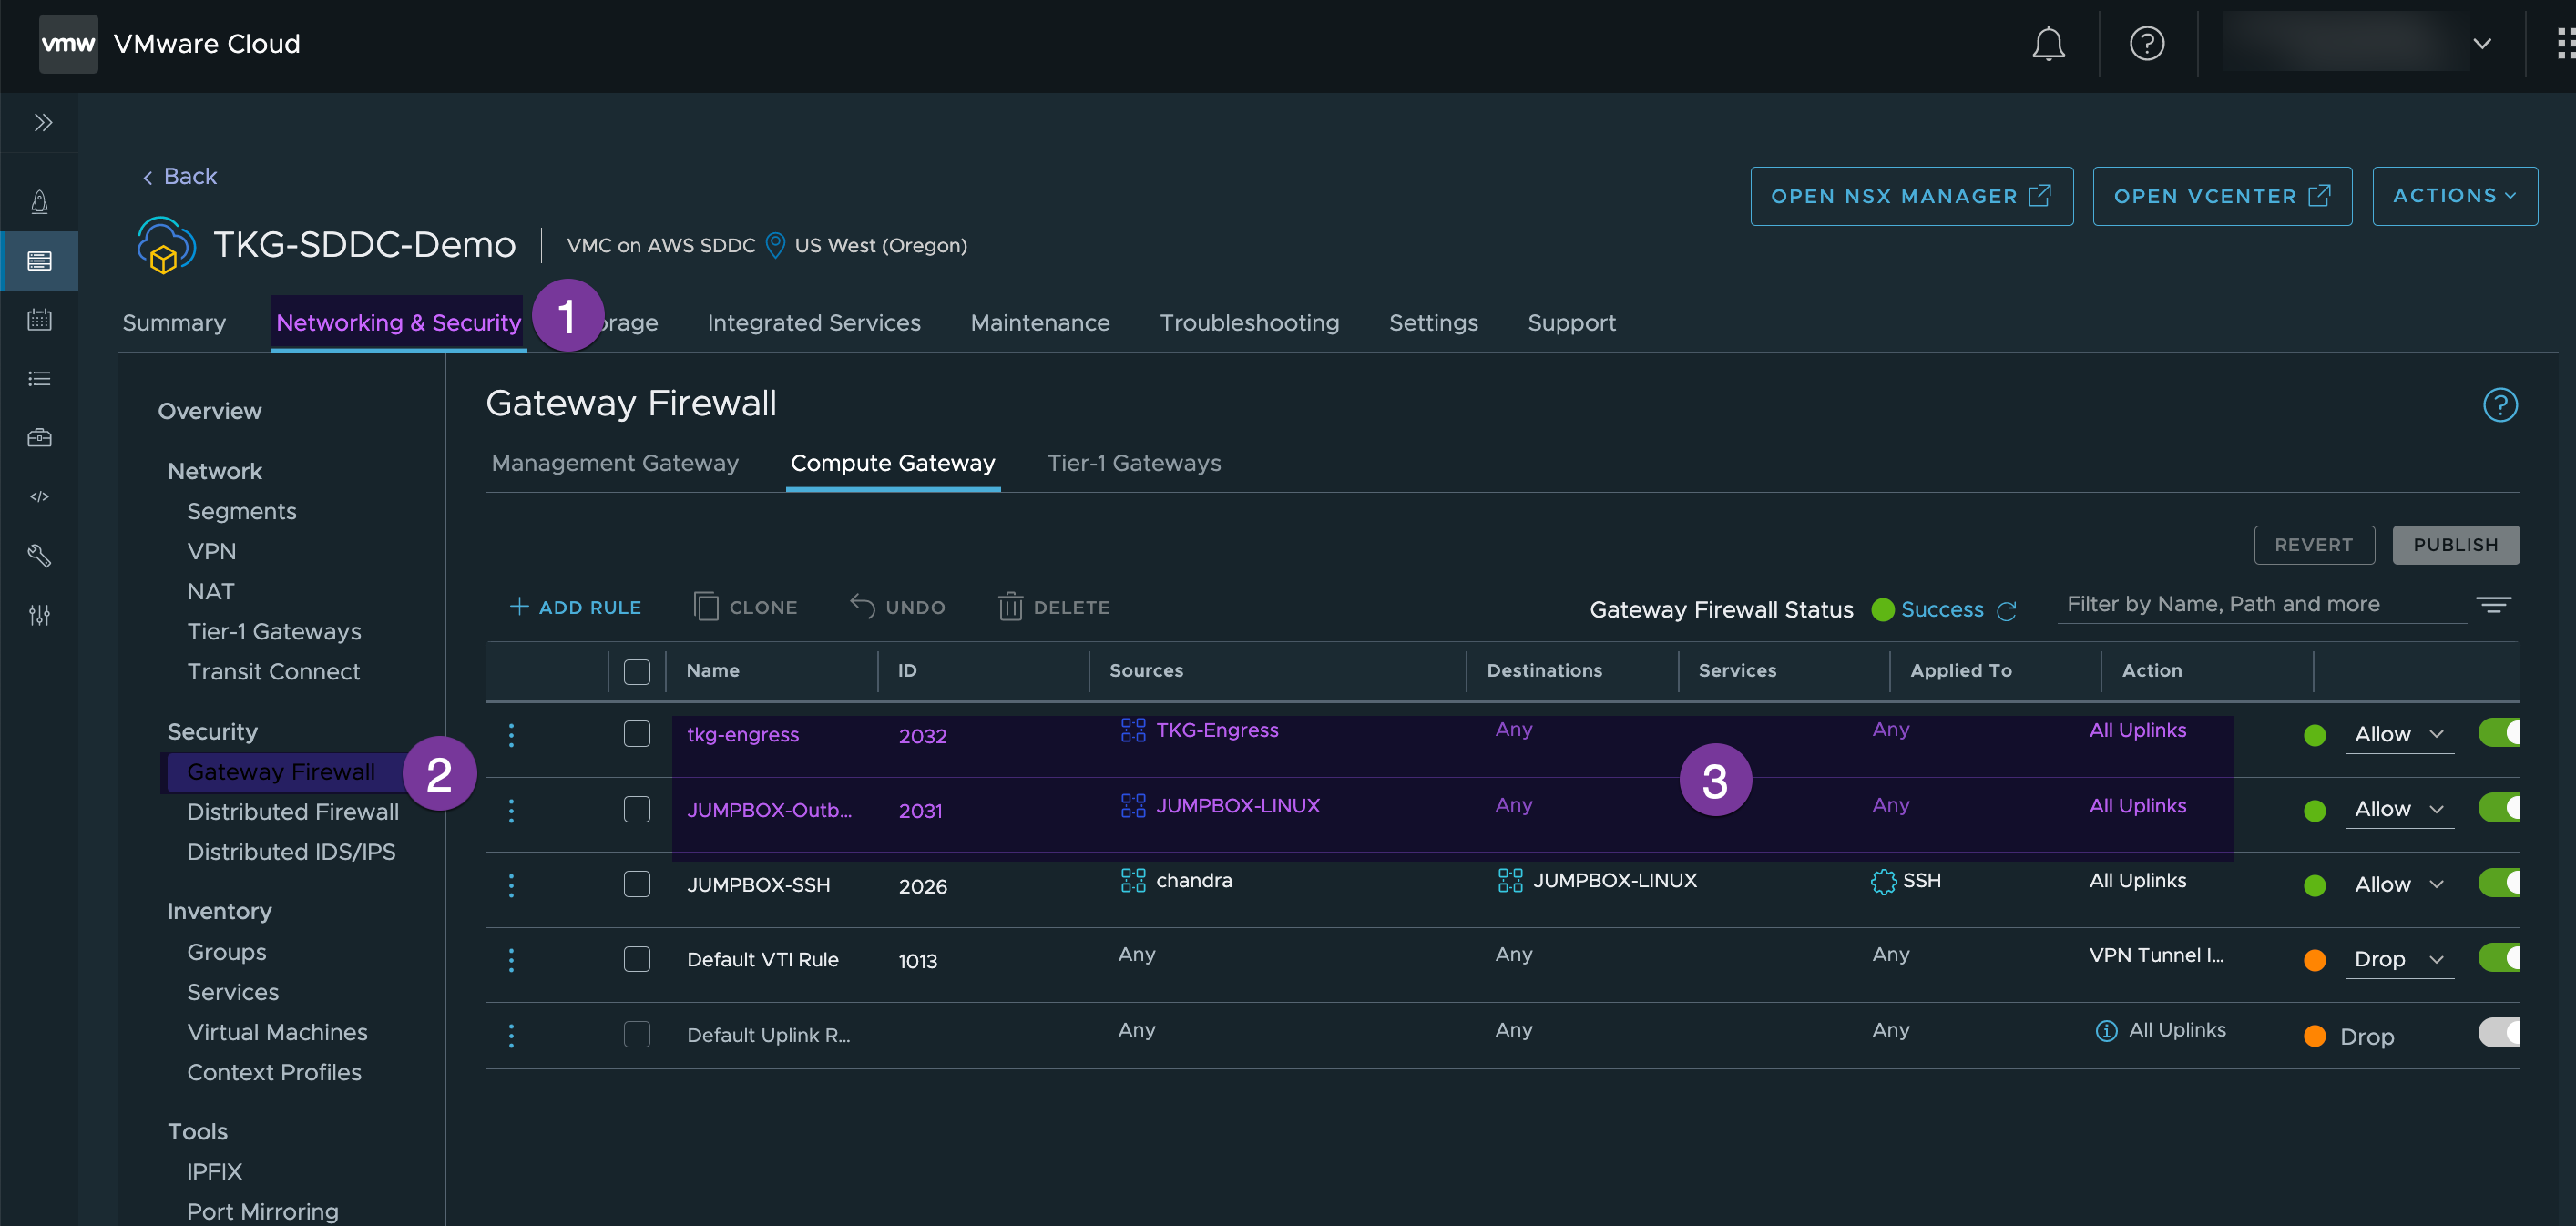
7. Configure proper Firewall rule.
In my environment, I have opened FW for Ingress CIDR and for my Jumpbox destination to ‘Any’. ( I recommend granular rules in the prod environment)
8. Download command line tools on your jump box
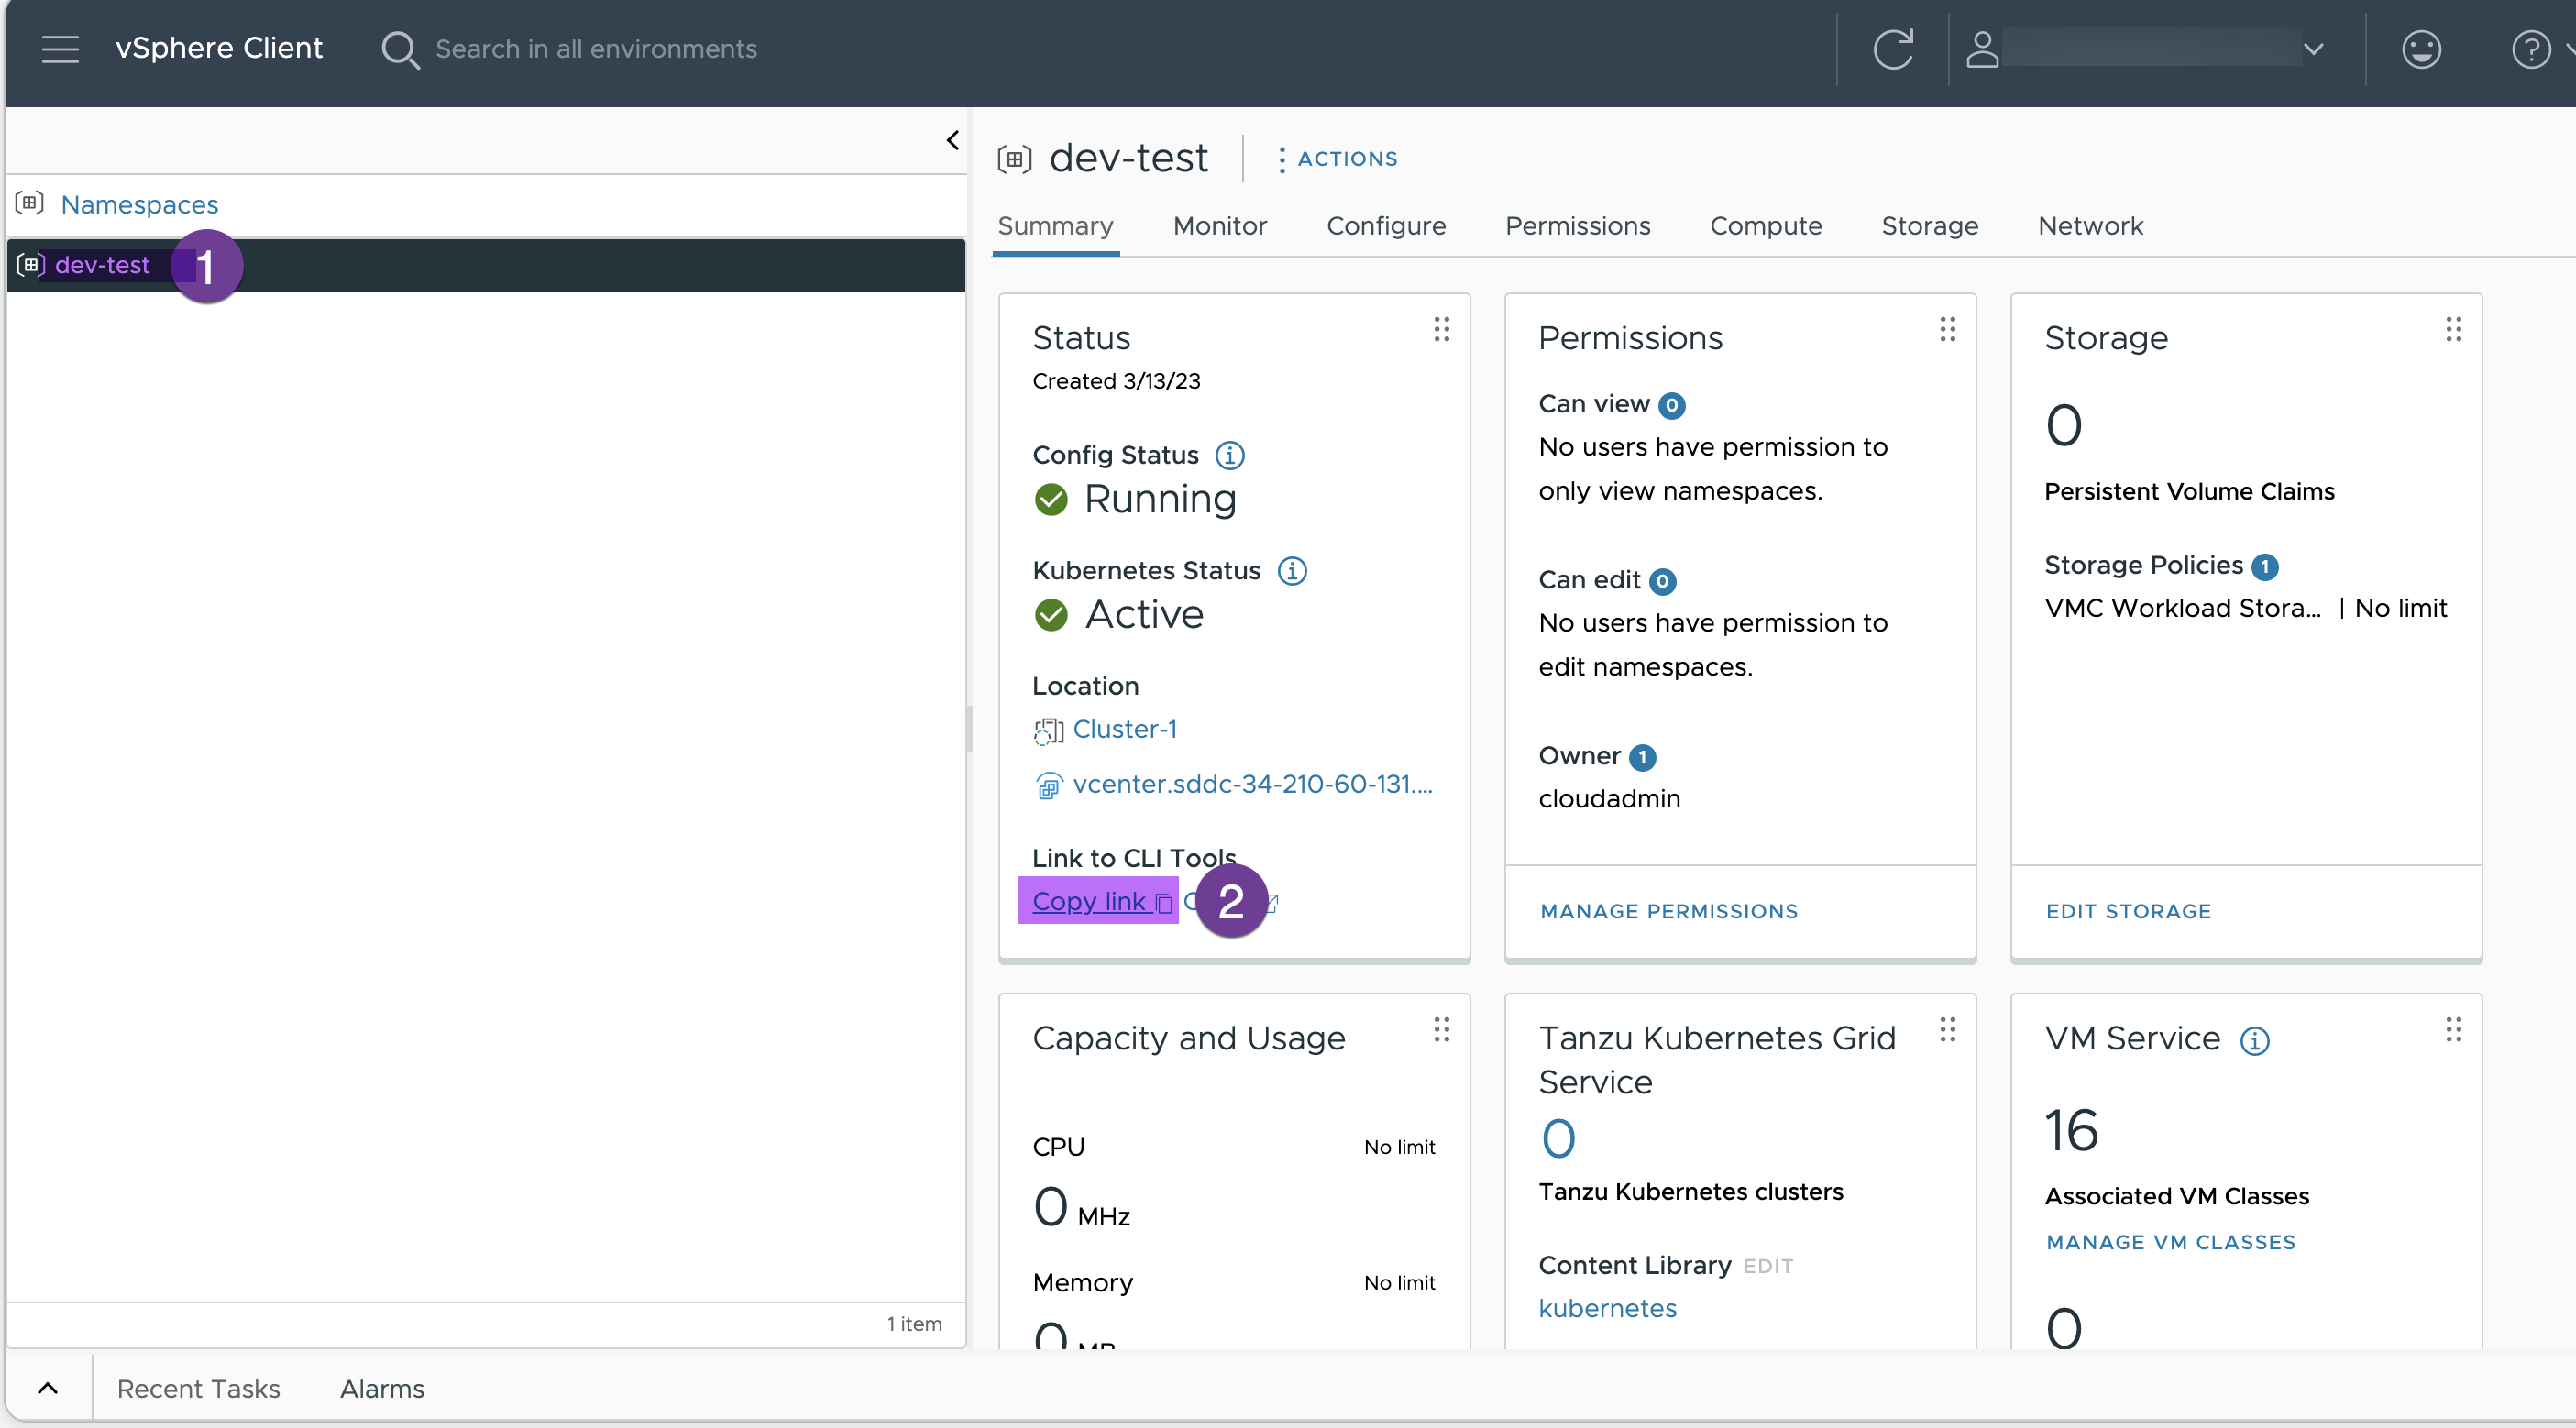
First of all, go to your namespace (dev-test), click on “Copy link” and paste it into notepad. We will use this link in the next step. The link should be something like this: https://k8s.Cluster-1.vcenter.sddc-34-210-60-131.vmwarevmc.com
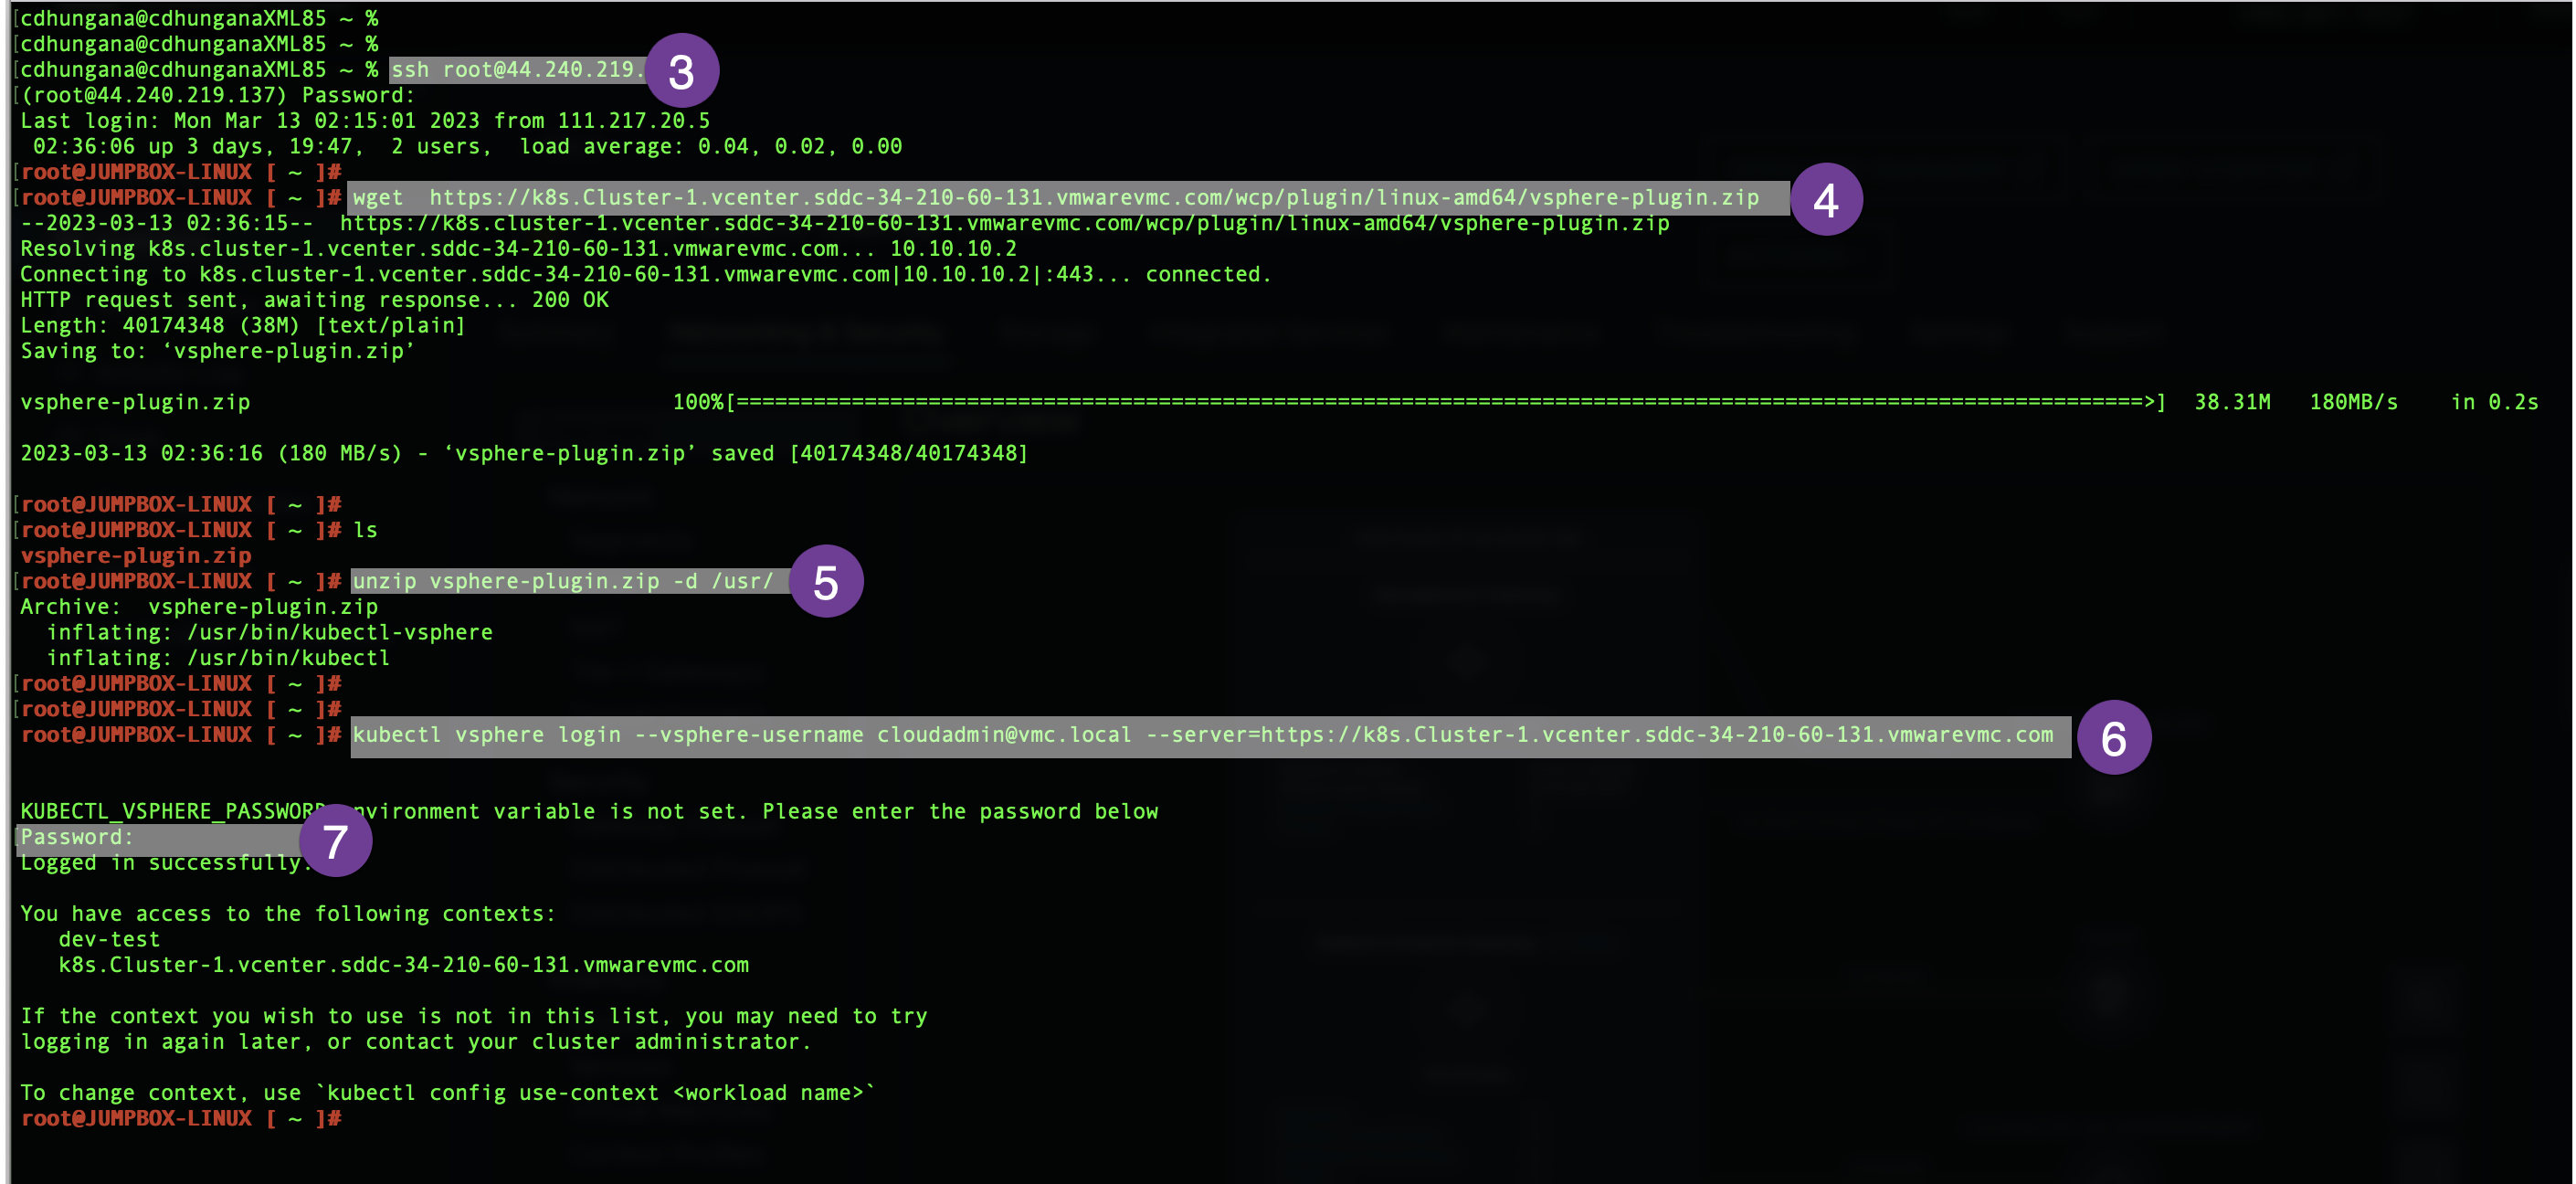
SSH to the JUMPHOST and download command line tools, unzip the downloaded file and log in to the supervisor cluster using vCenter credential. (the URL in color below is the same URL you copied from the earlier step)
root@JUMPBOX-LINUX [ ~ ]# wget https://k8s.Cluster-1.vcenter.sddc-34-210-60-131.vmwarevmc.com/wcp/plugin/linux-amd64/vsphere-plugin.zip
root@JUMPBOX-LINUX [ ~ ]# unzip vsphere-plugin.zip -d /usr/
root@JUMPBOX-LINUX [ ~ ]# kubectl vsphere login --vsphere-username cloudadmin@vmc.local --server=https://k8s.Cluster-1.vcenter.sddc-34-210-60-131.vmwarevmc.com
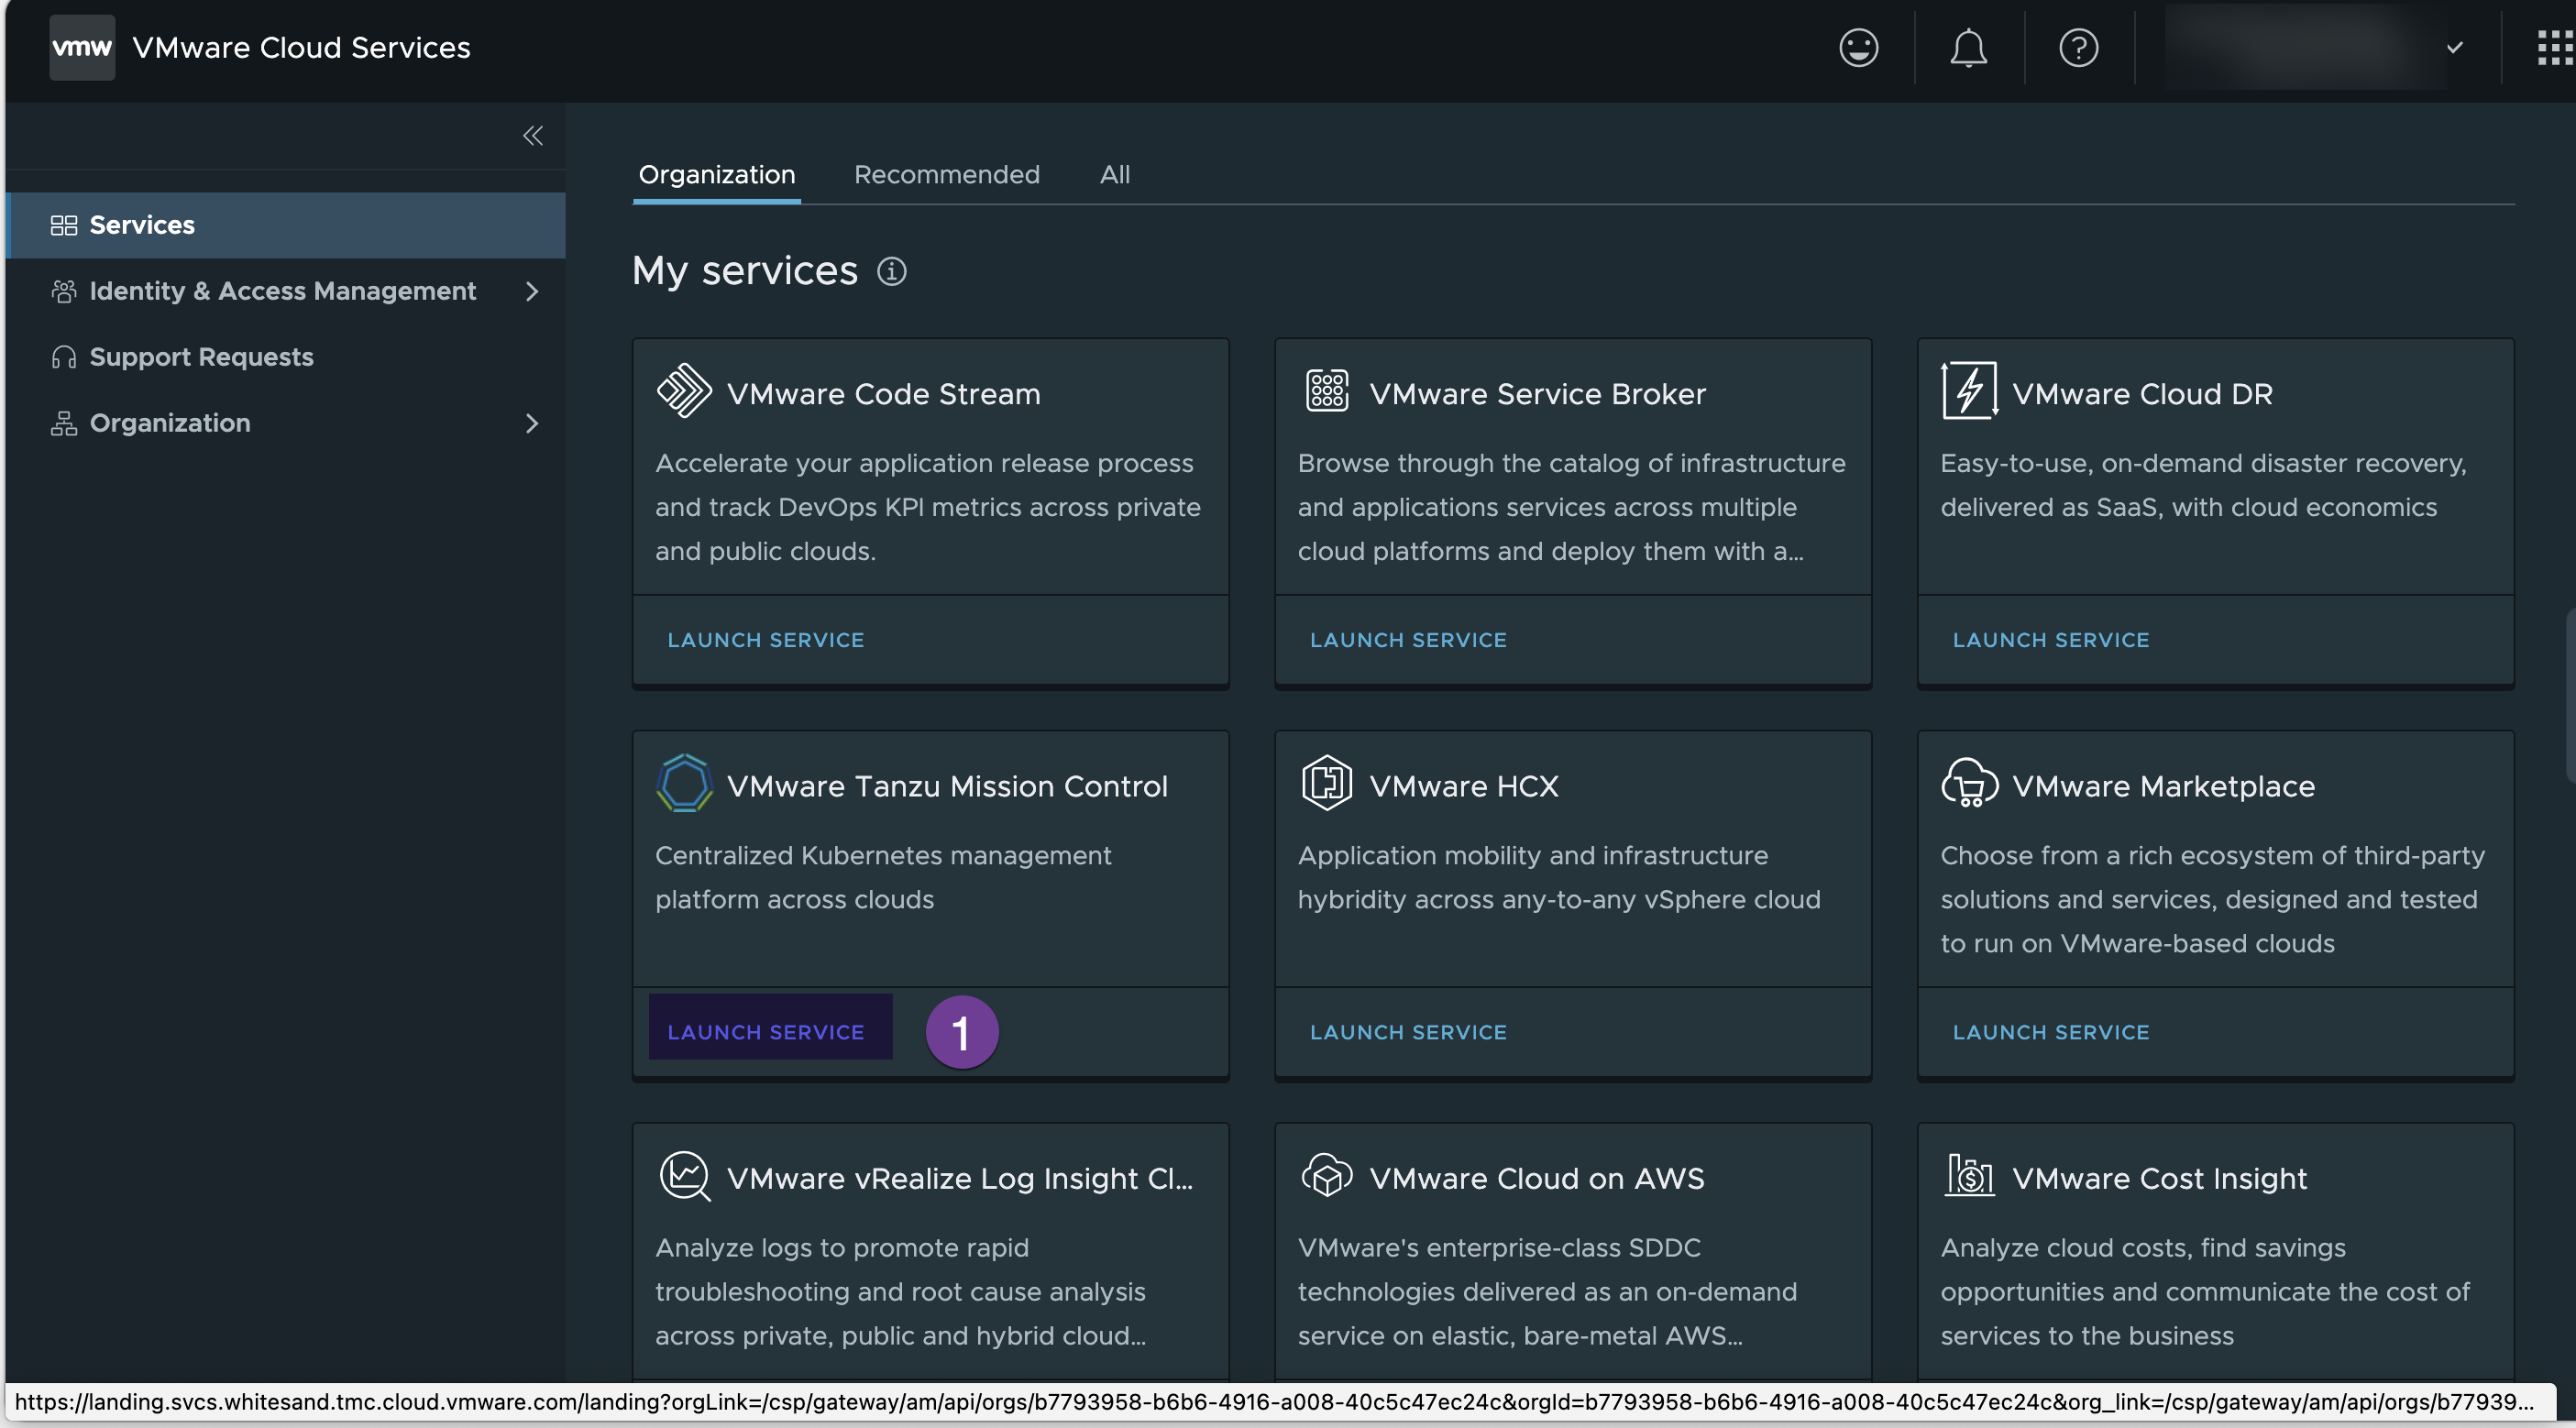
9. Register This Management Cluster with Tanzu Mission Control
Go to VMC console and under the services, select VMware Tanzu Mission Control and click “LUNCH SERVICE”
Select Administration -> Management Cluster -> REGISTER MANAGEMENT CLUSTER and select “vSphere with Tanzu”
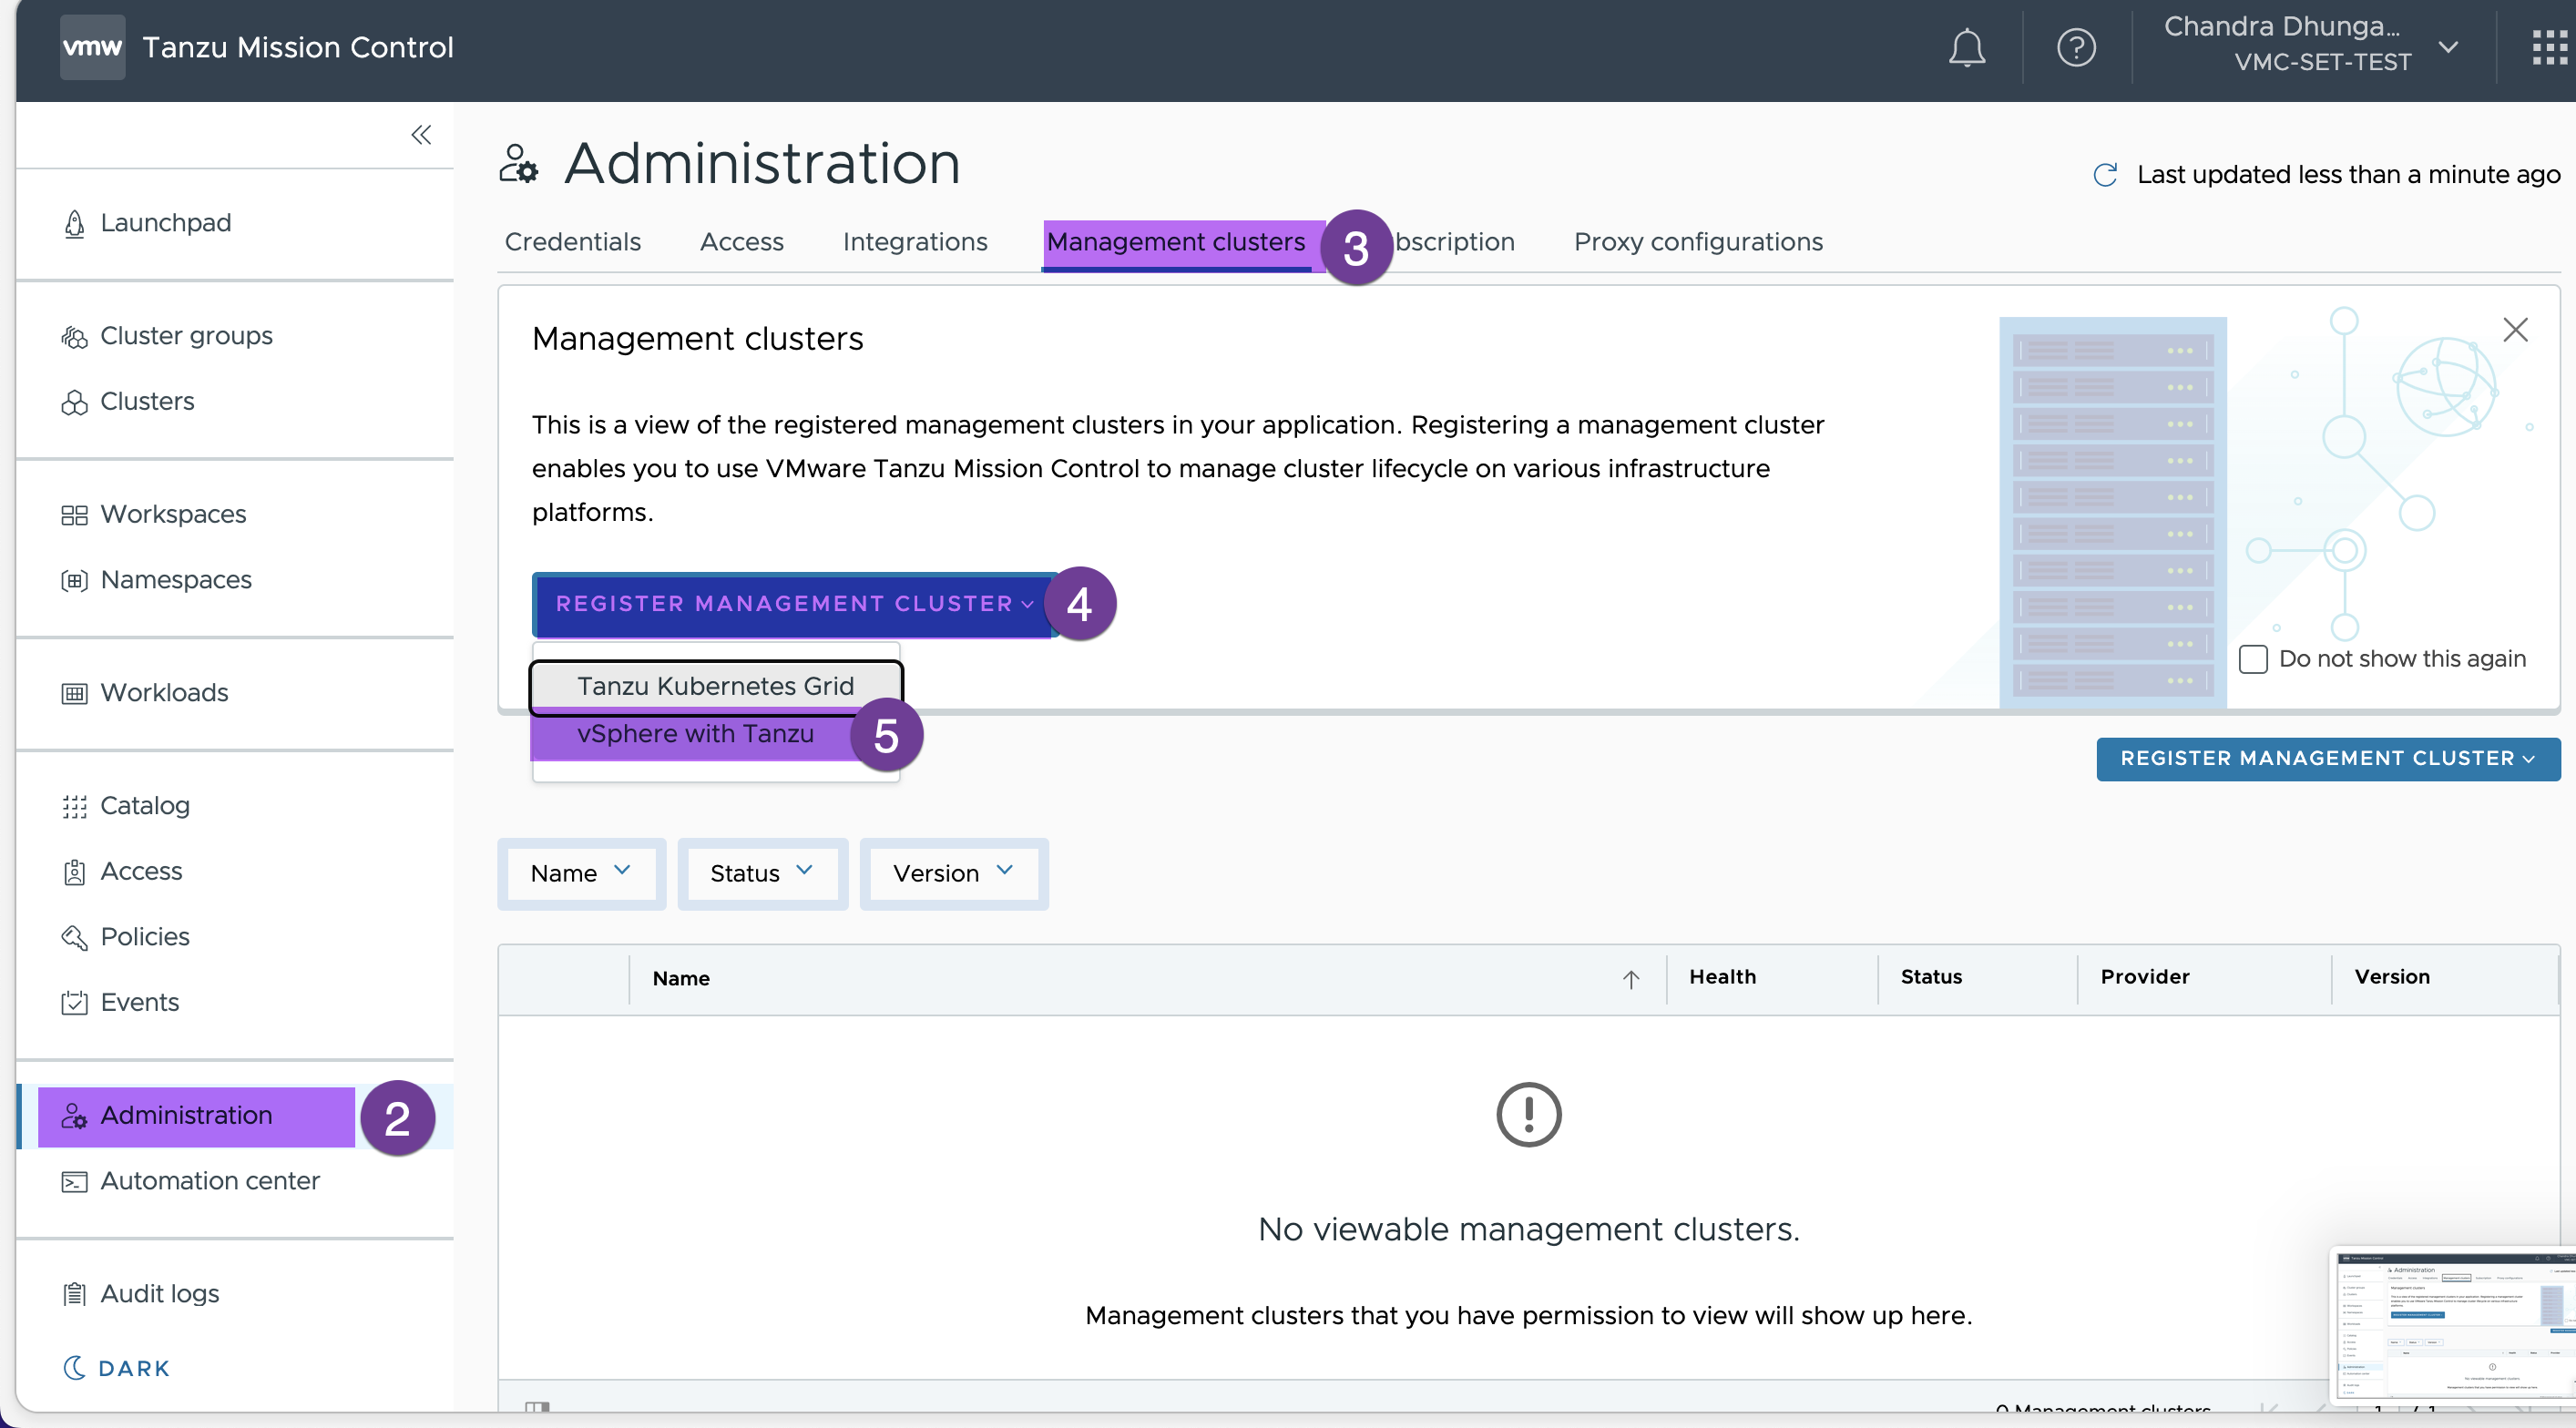
Enter the name for the management cluster (‘tkg-vmc-oregon’ in my case) and ‘default’ as cluster default group
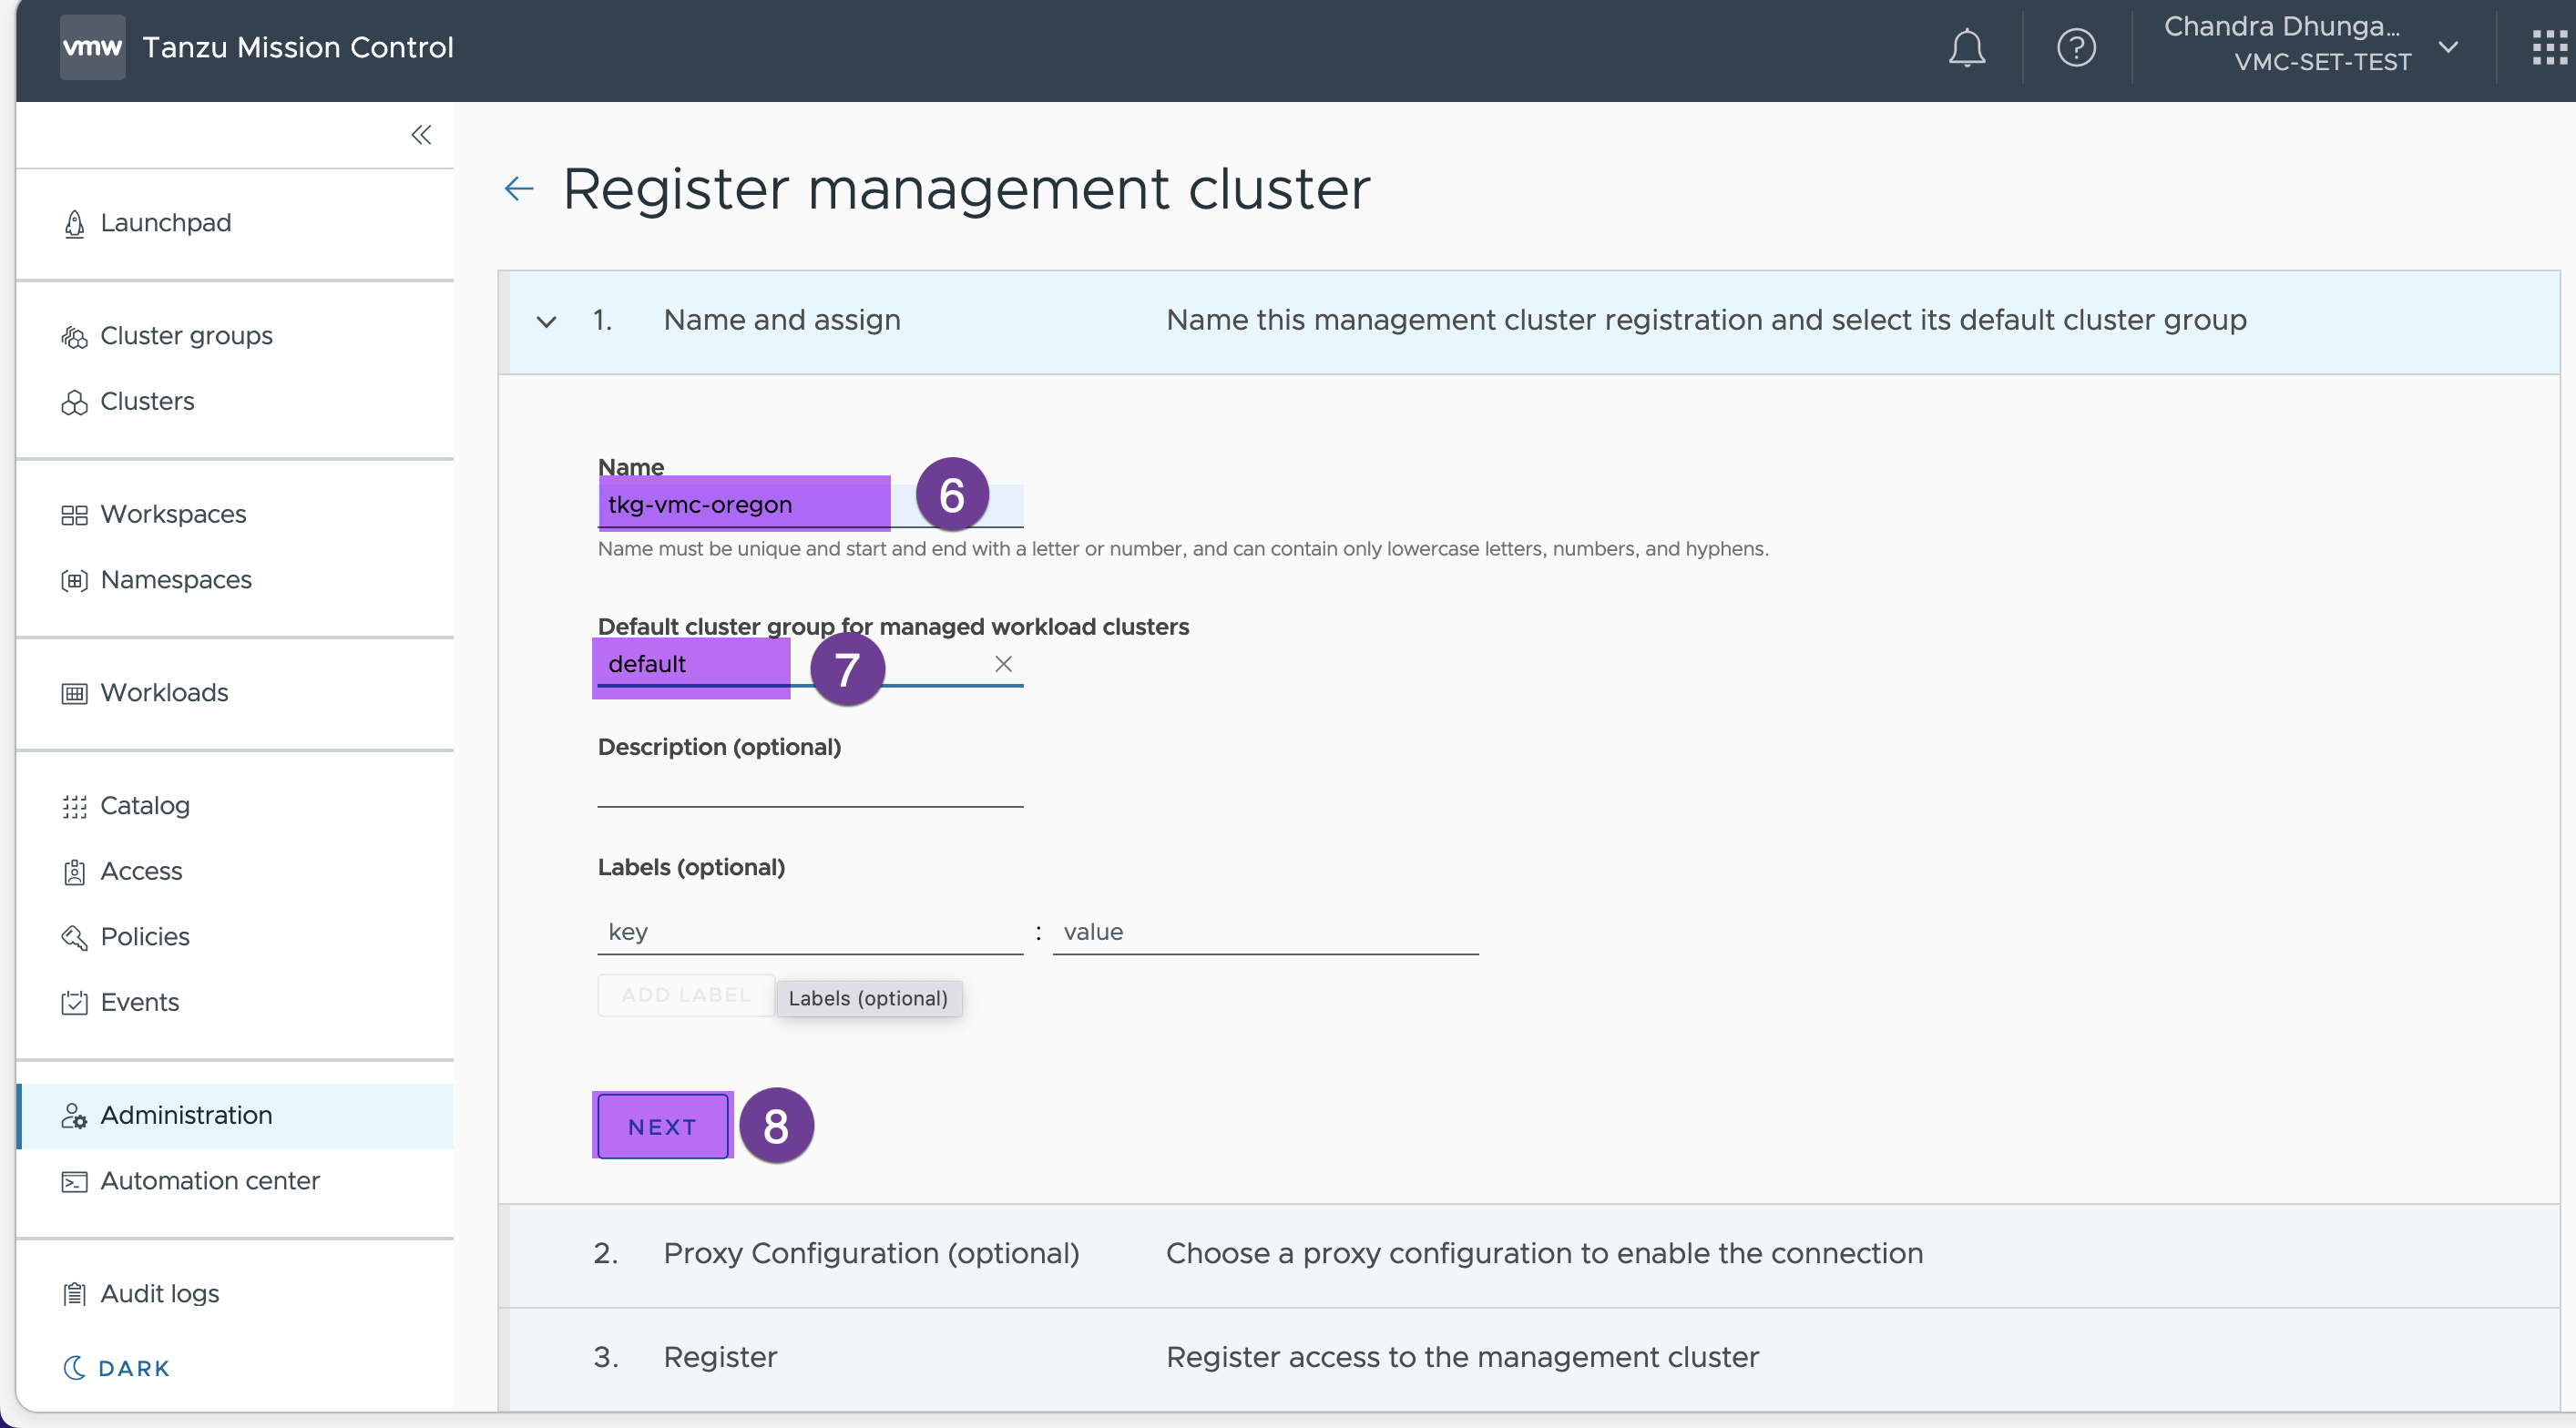
Click next
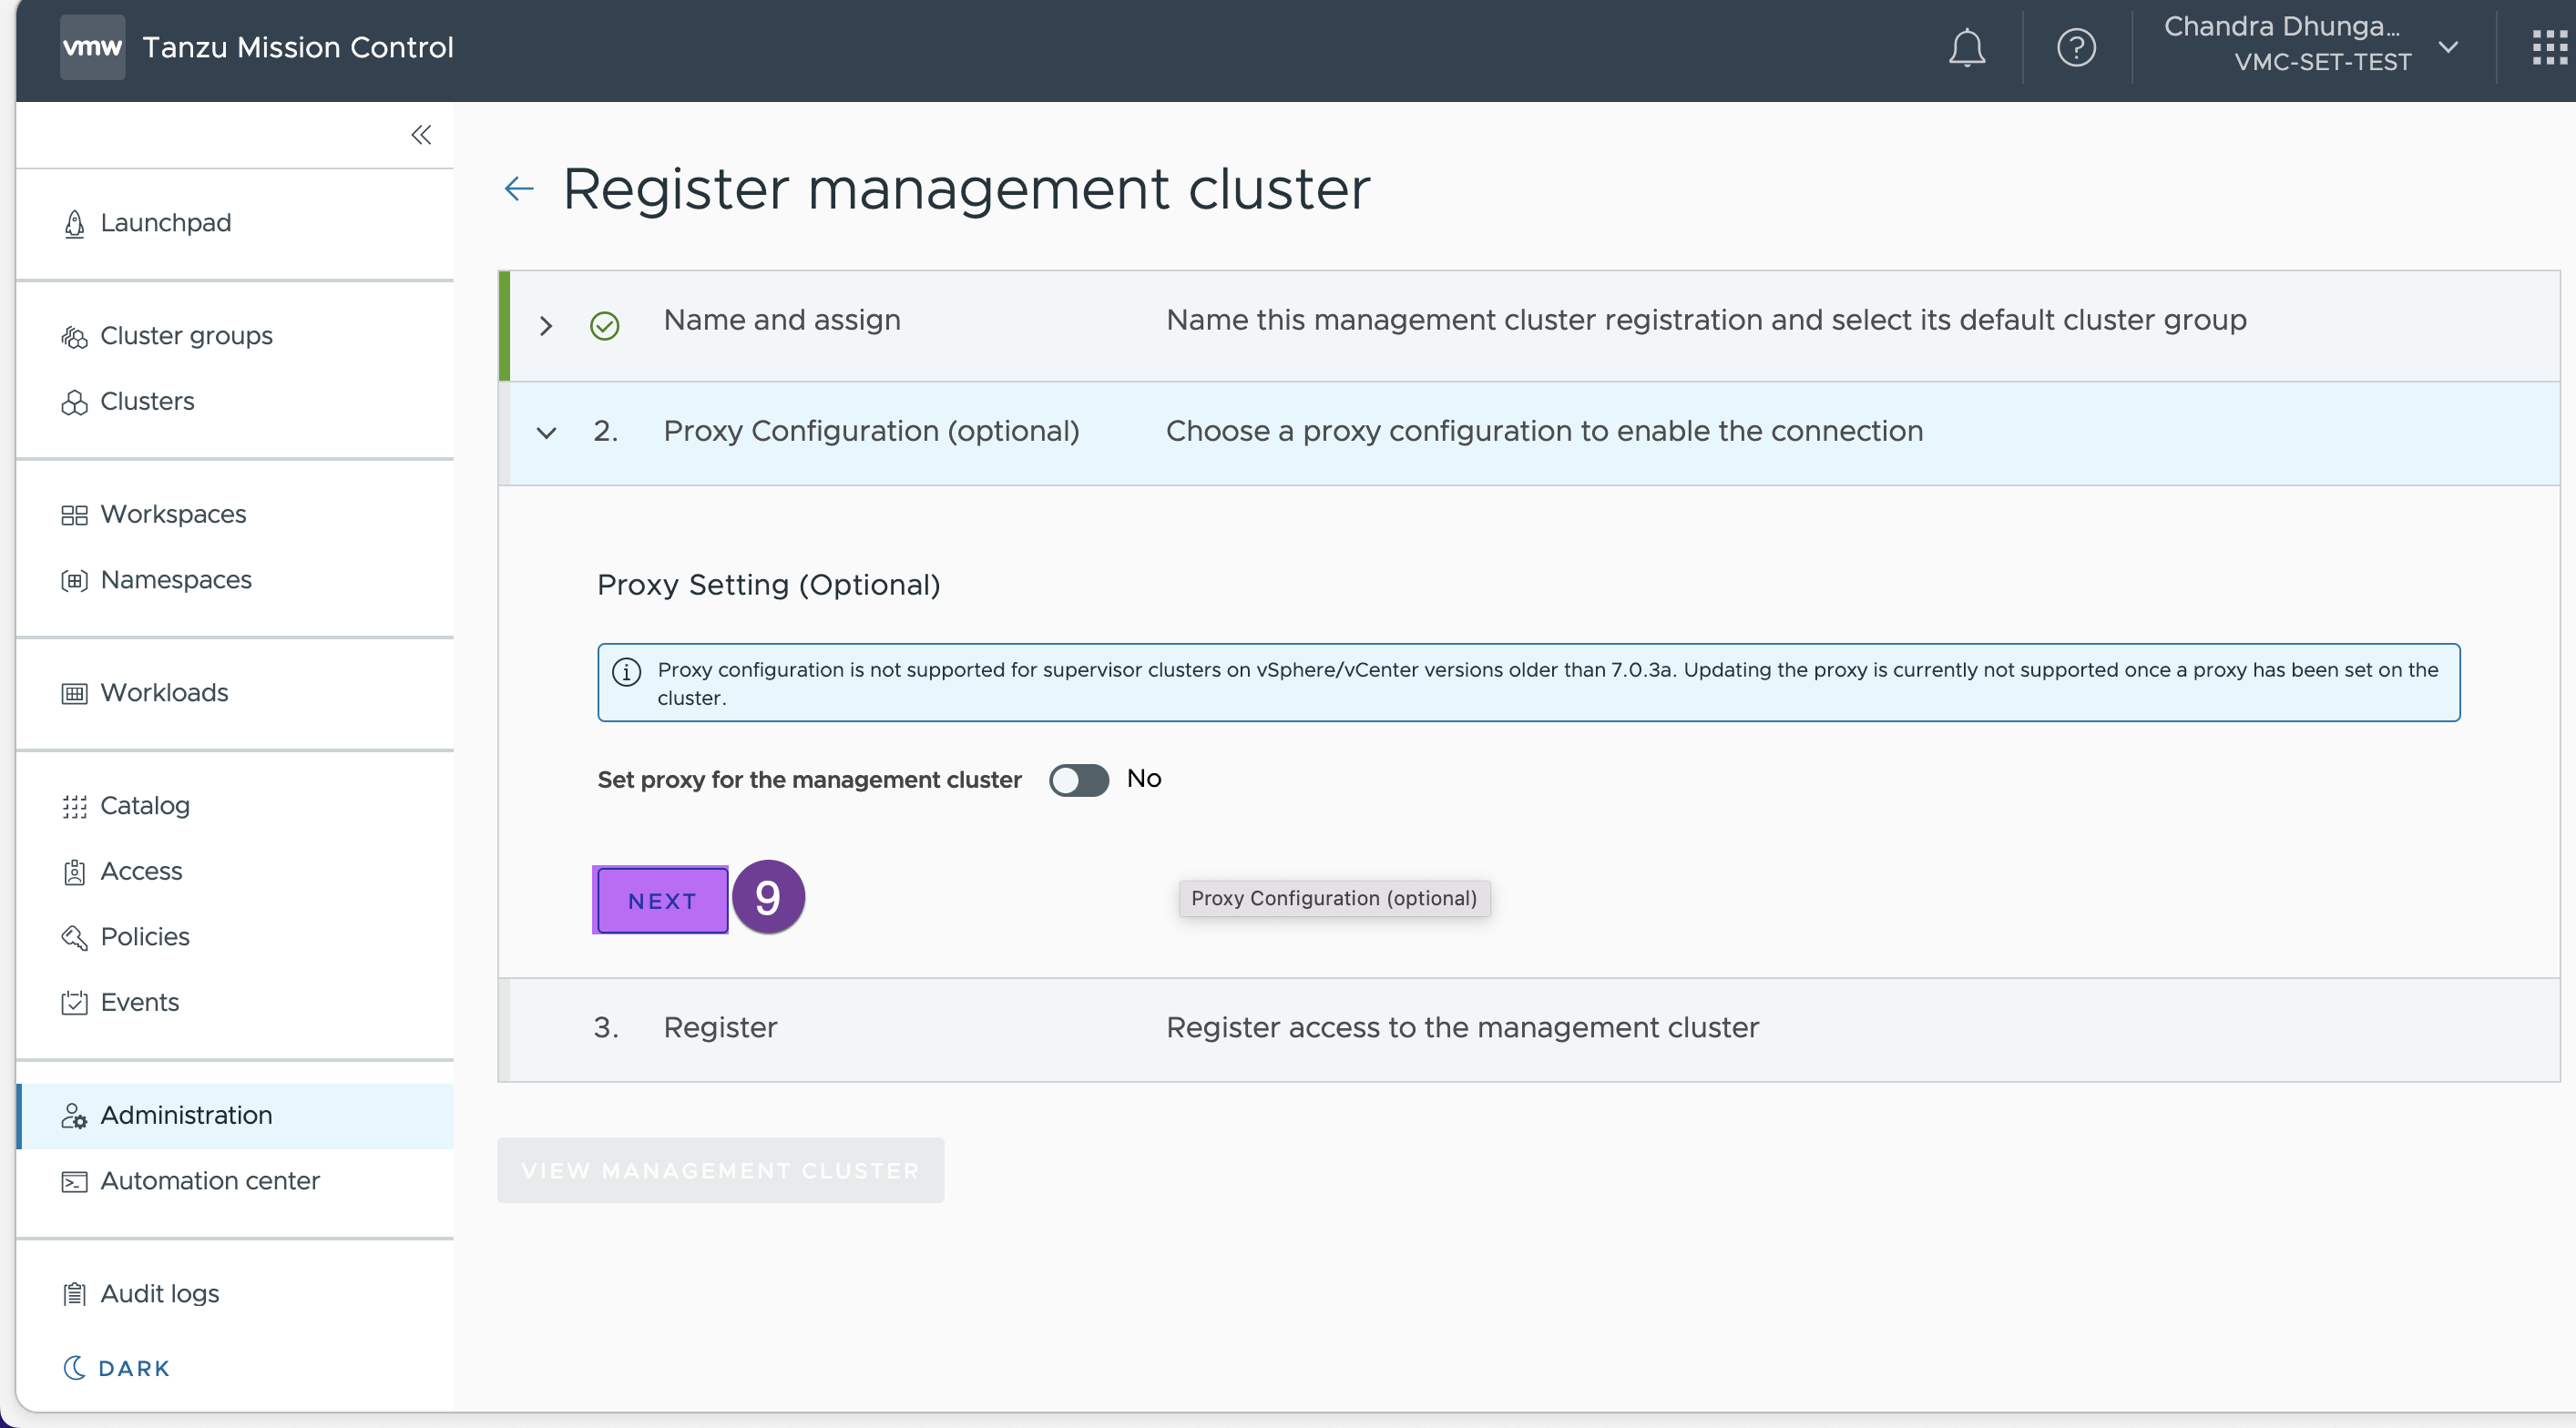
In this step copy the registration link and paste it into a notepad. We need this url to create .yaml file in next step

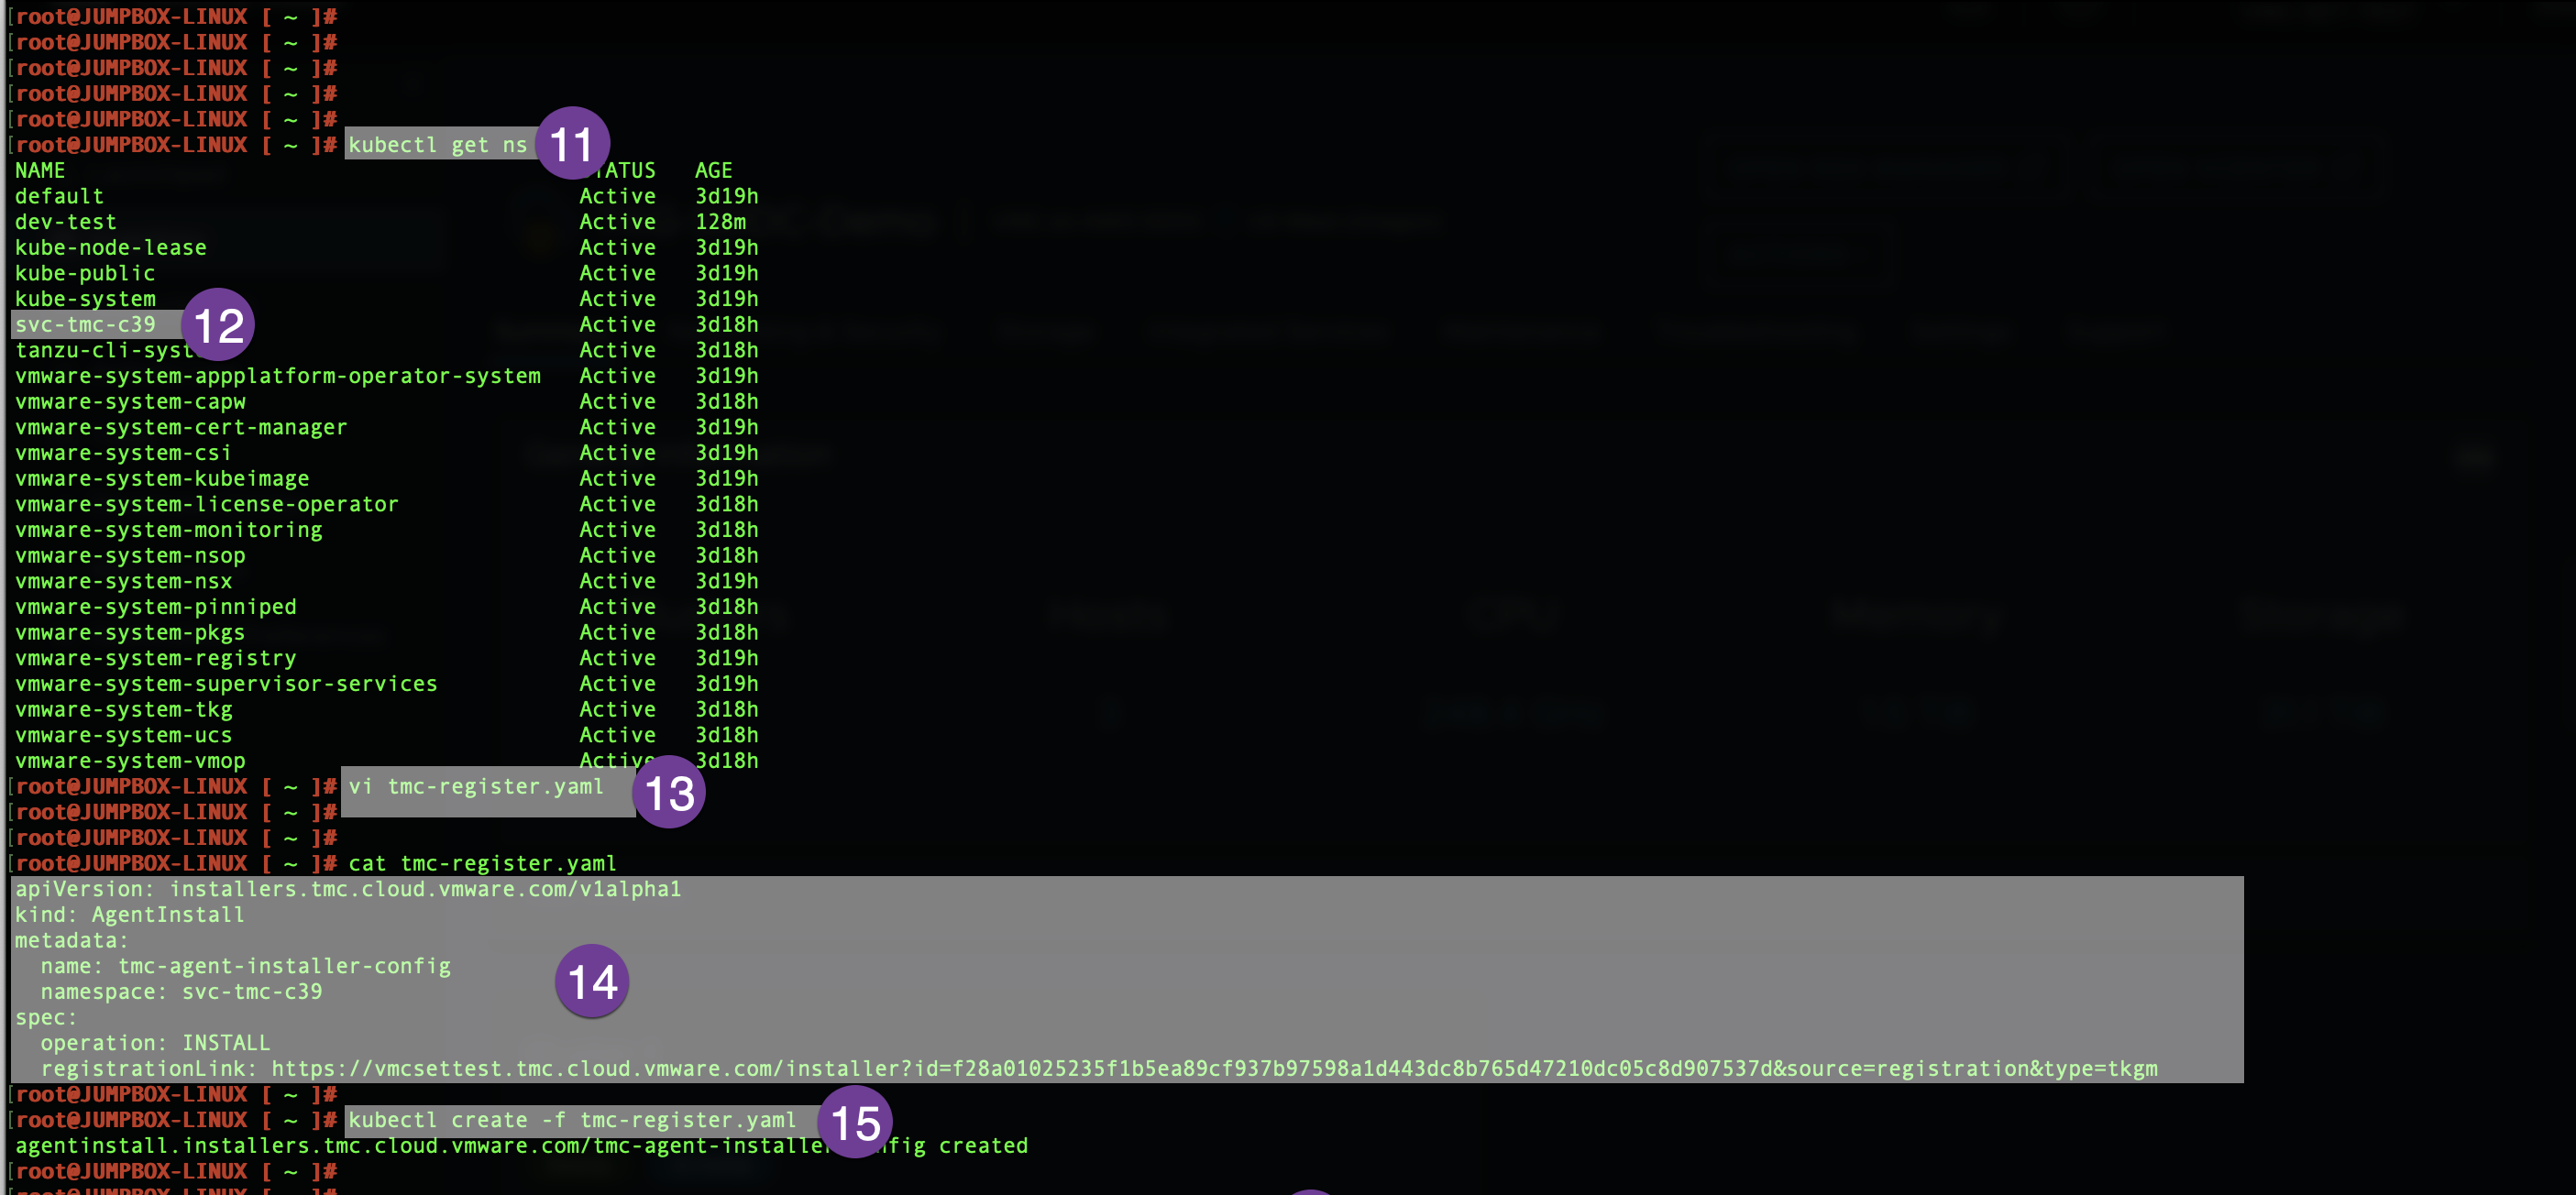
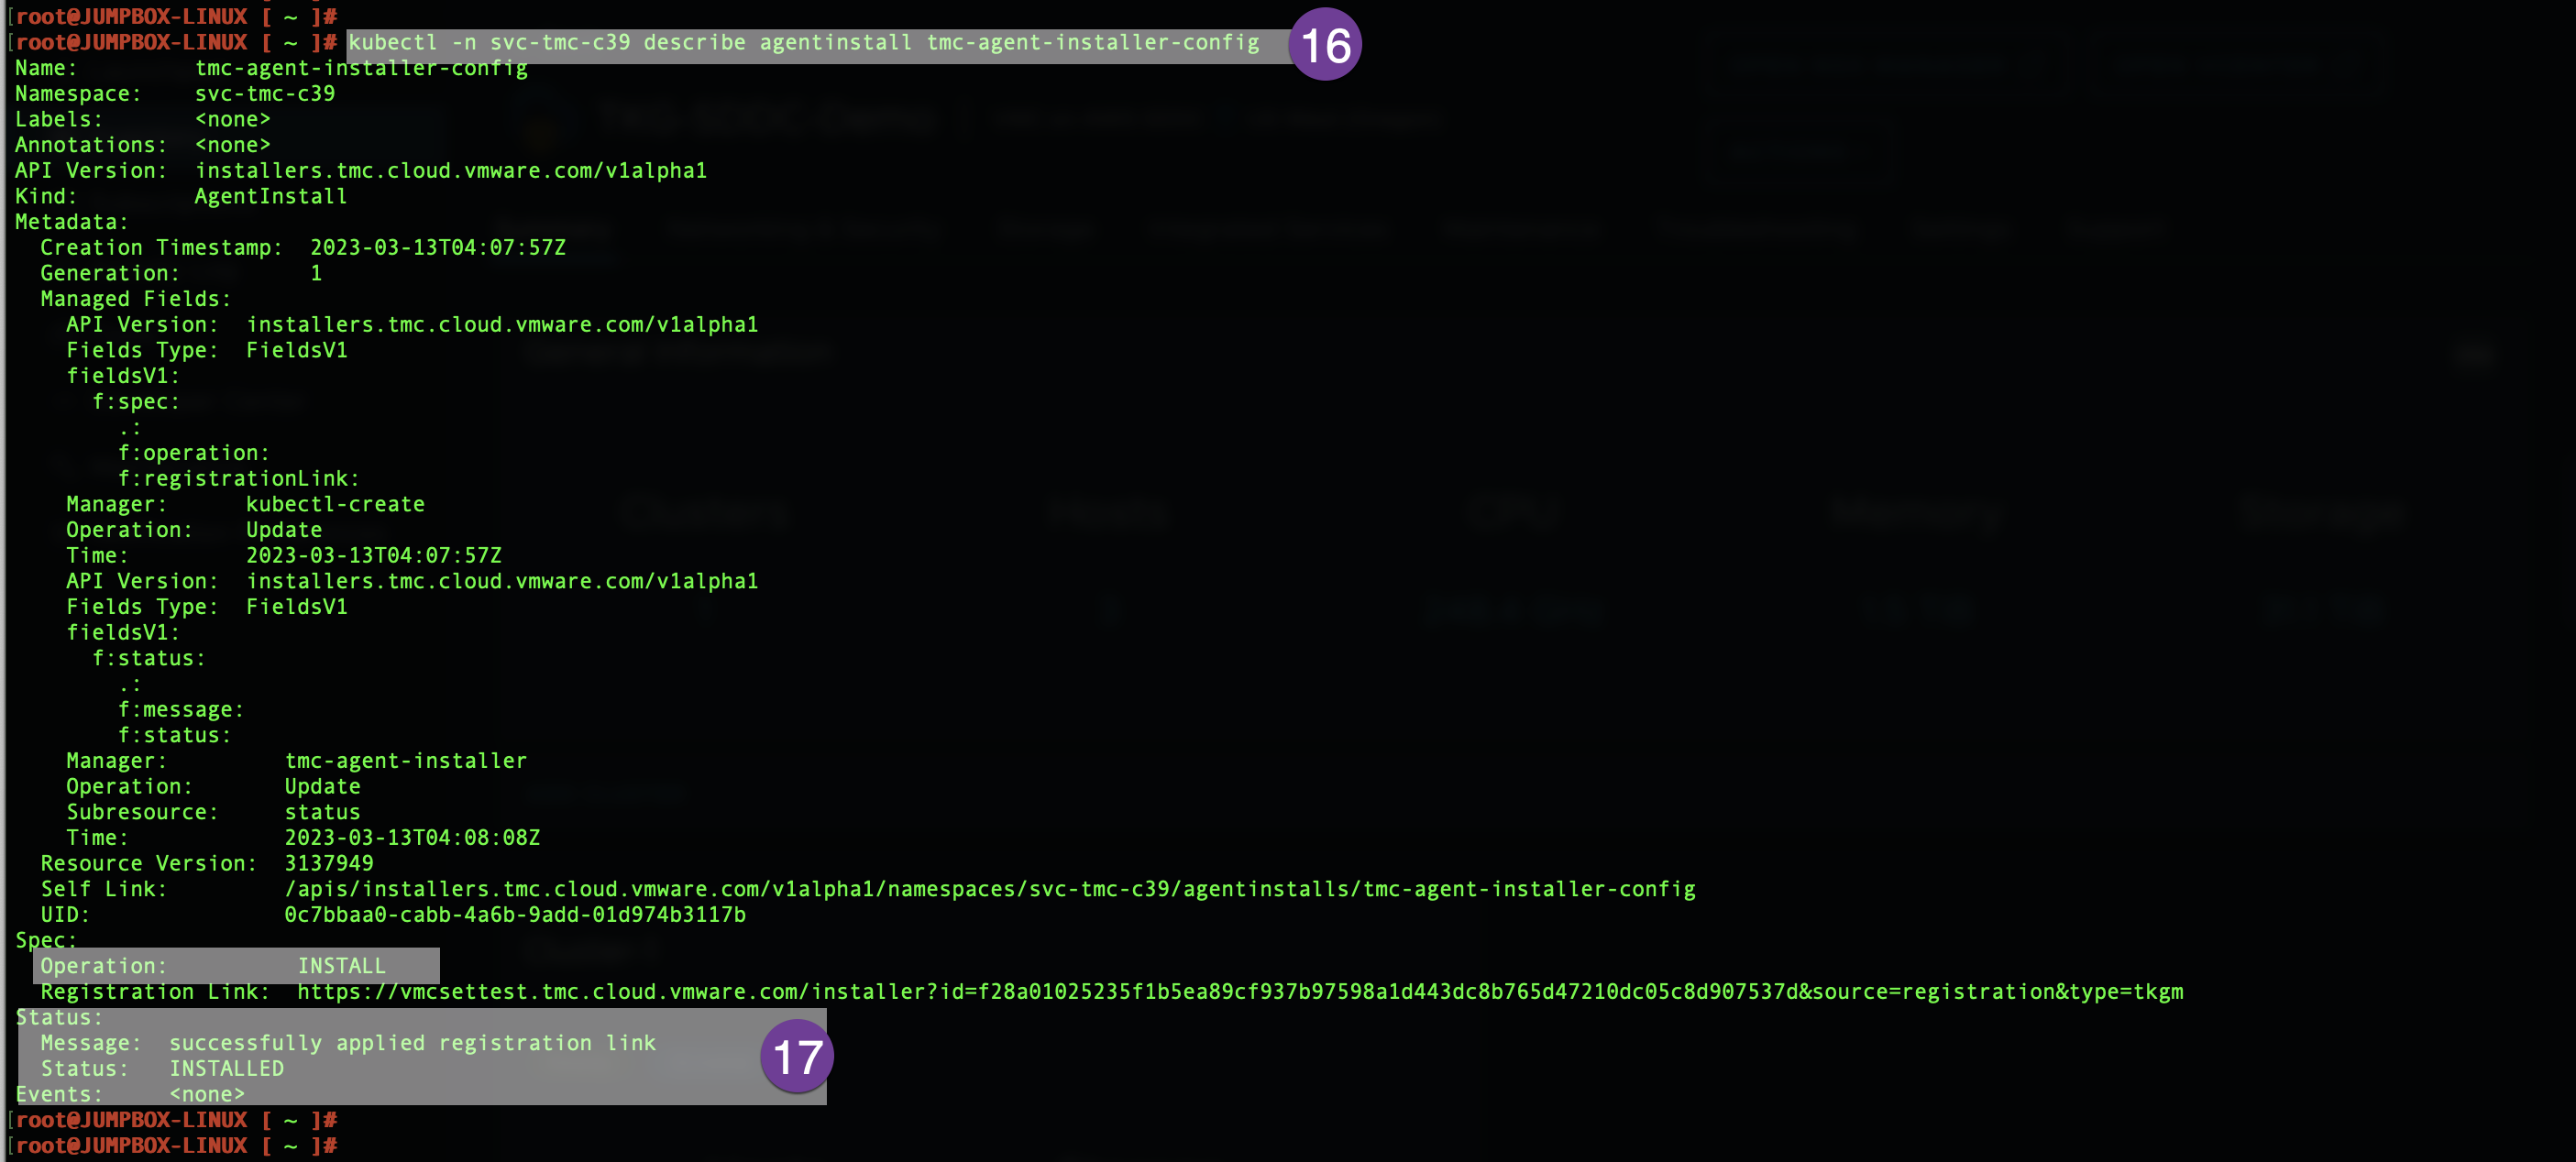
Go to your jump host, run the kubectl get ns, and find the namespace provided for Tanzu Mission Control. It starts with svc-tmc-cXX in my environment svc-tmc-c39. Create a .yaml file using vi command as below:
#vi tmc-register.yaml
apiVersion: installers.tmc.cloud.vmware.com/v1alpha1.
kind: AgentInstall
metadata:
name: tmc-agent-installer-config
namespace: svc-tmc-c39
spec:
operation: INSTALL
registrationLink: < Same URL Copied in previous Step>
once .yaml file is created run the following command.
# kubectl create -f tmc-register.yaml
Check the status, if status shows success you are good
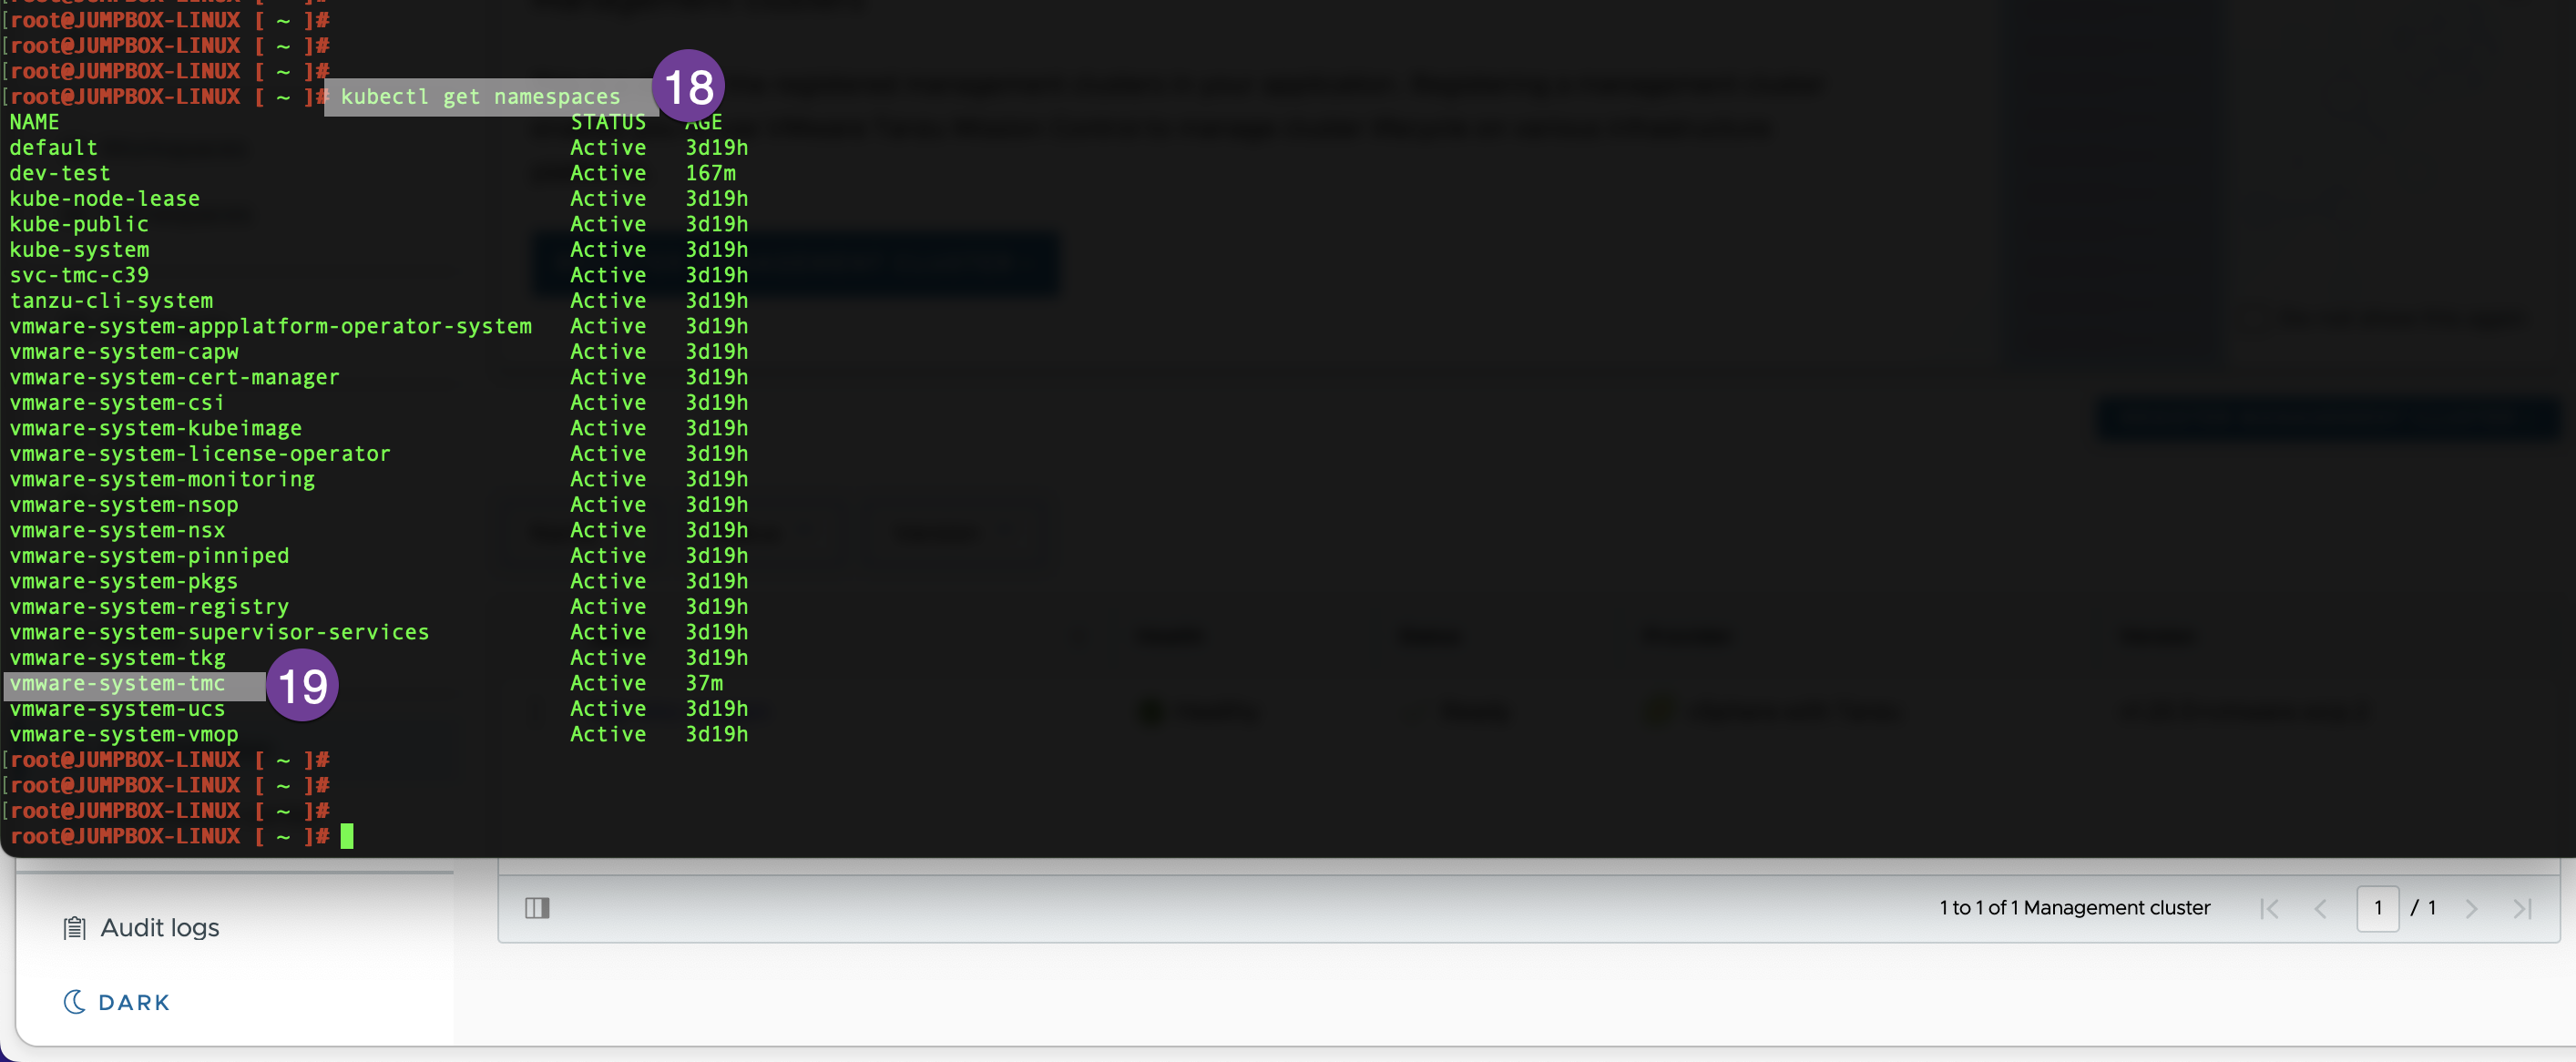
Run the kubectl get namespaces command and make sure vmware-system-tmc on the list.
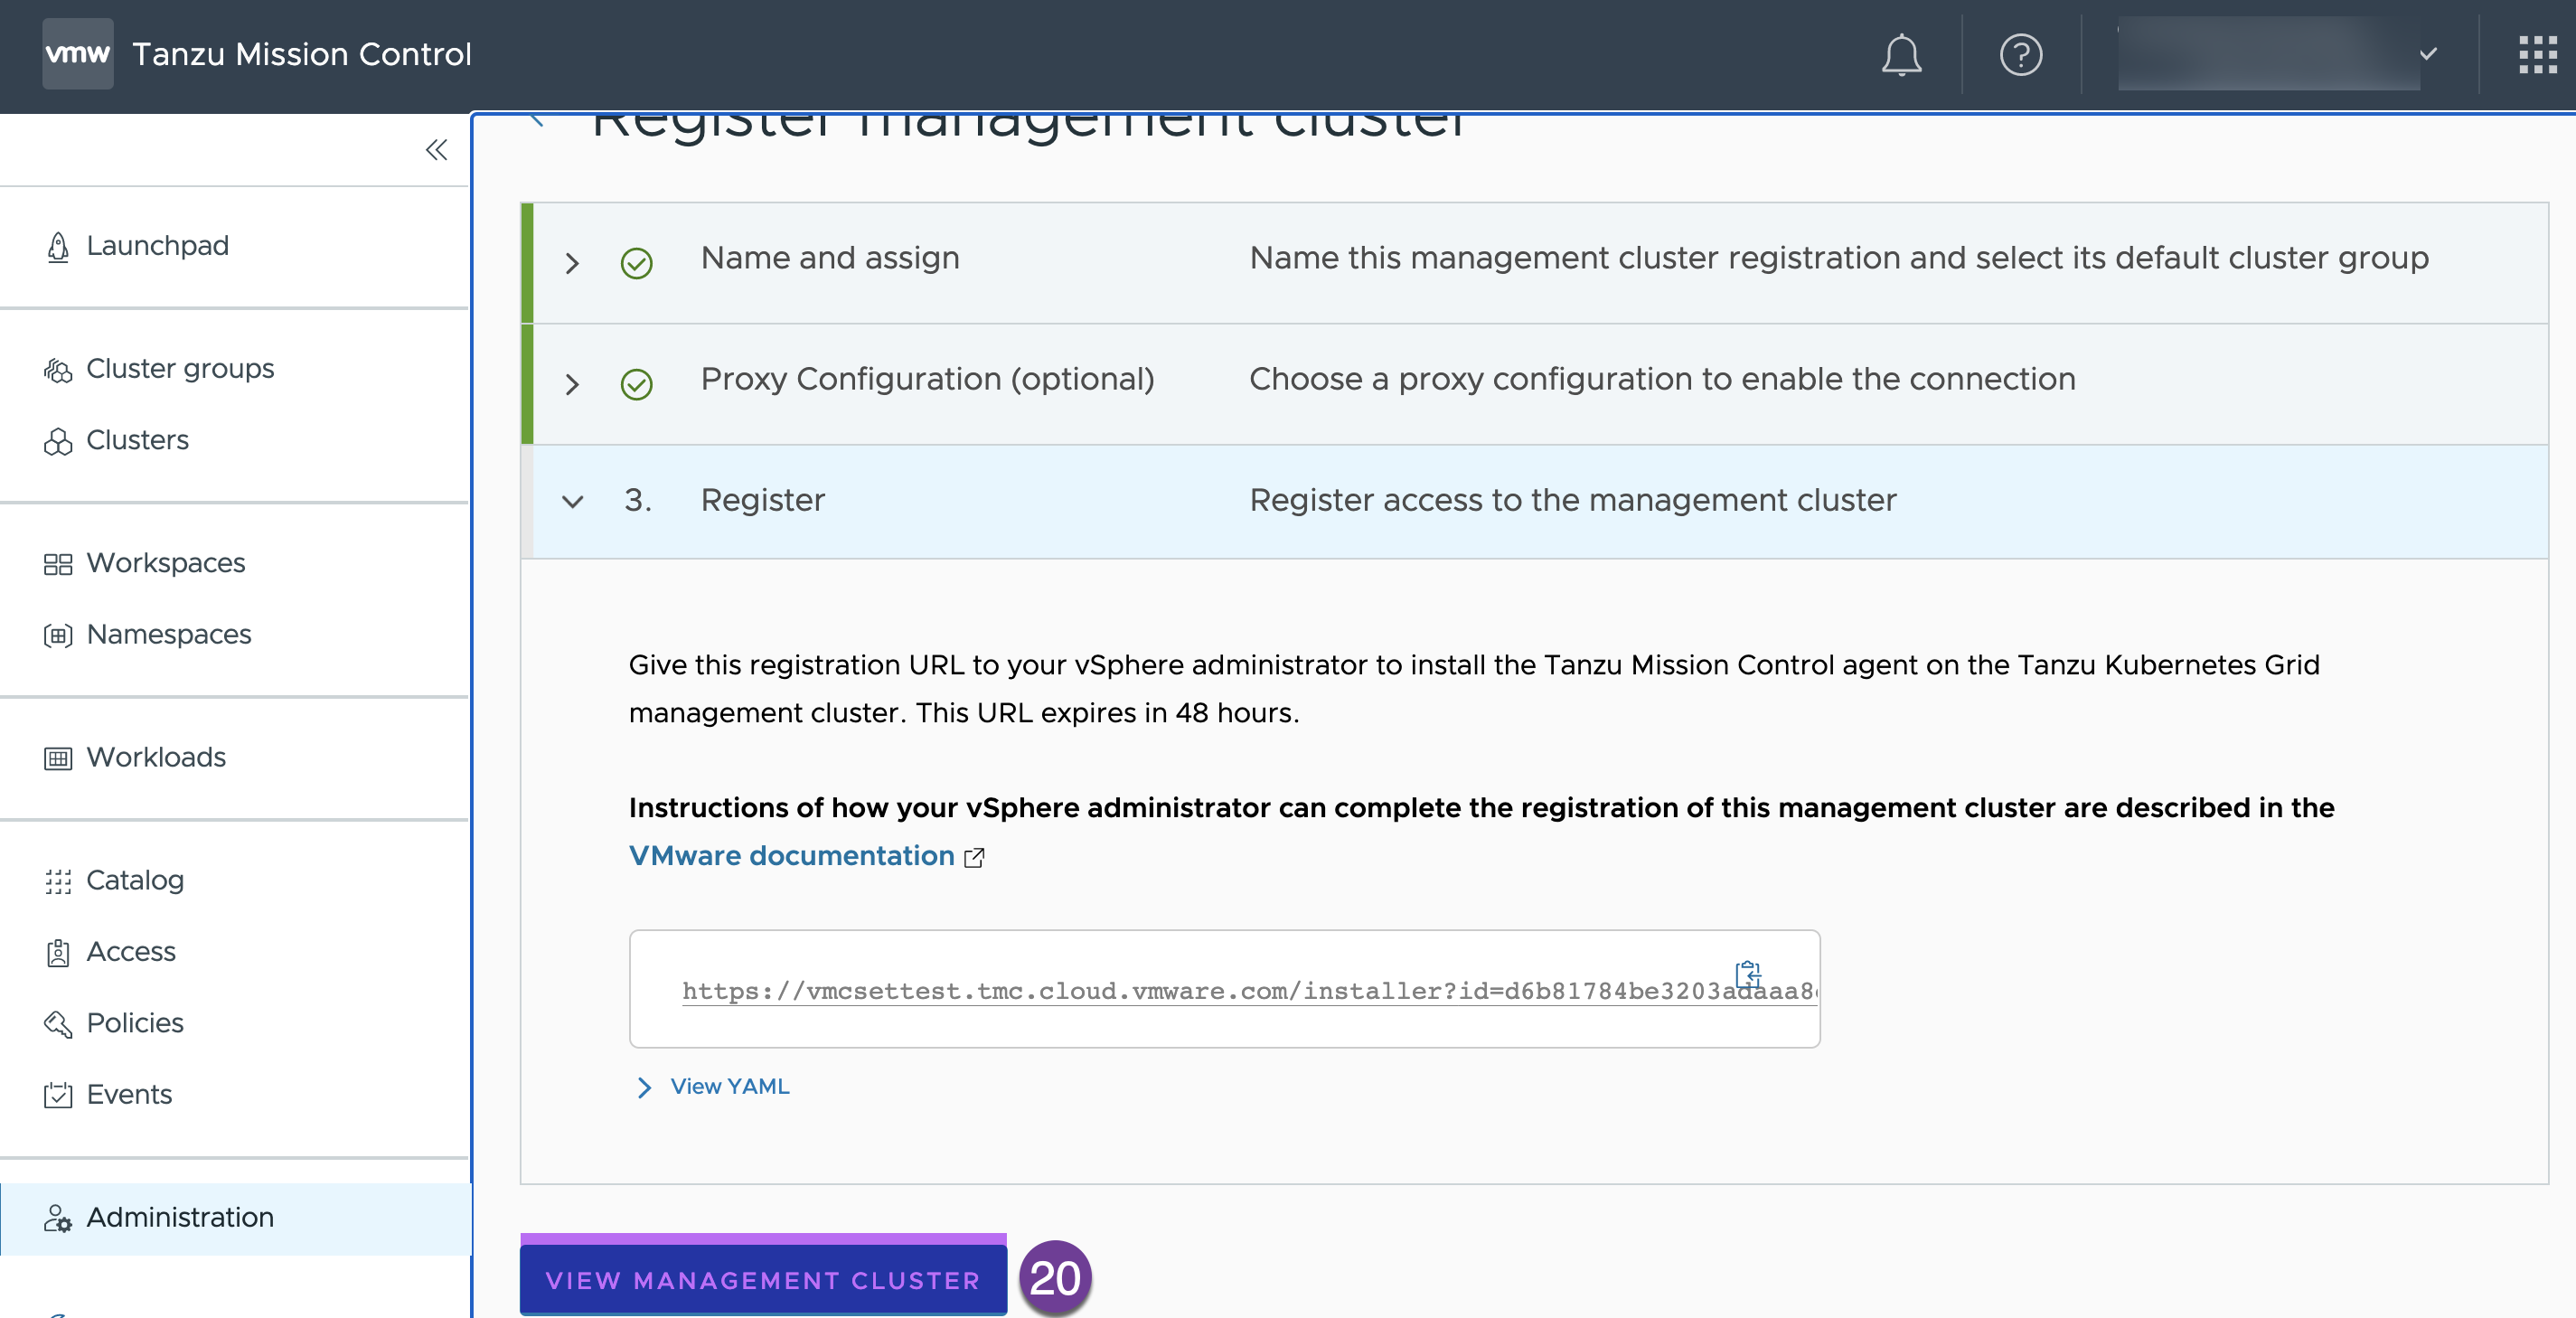
Go to TMC console and click on “VIEW MANAGEMENT CLUSTER”
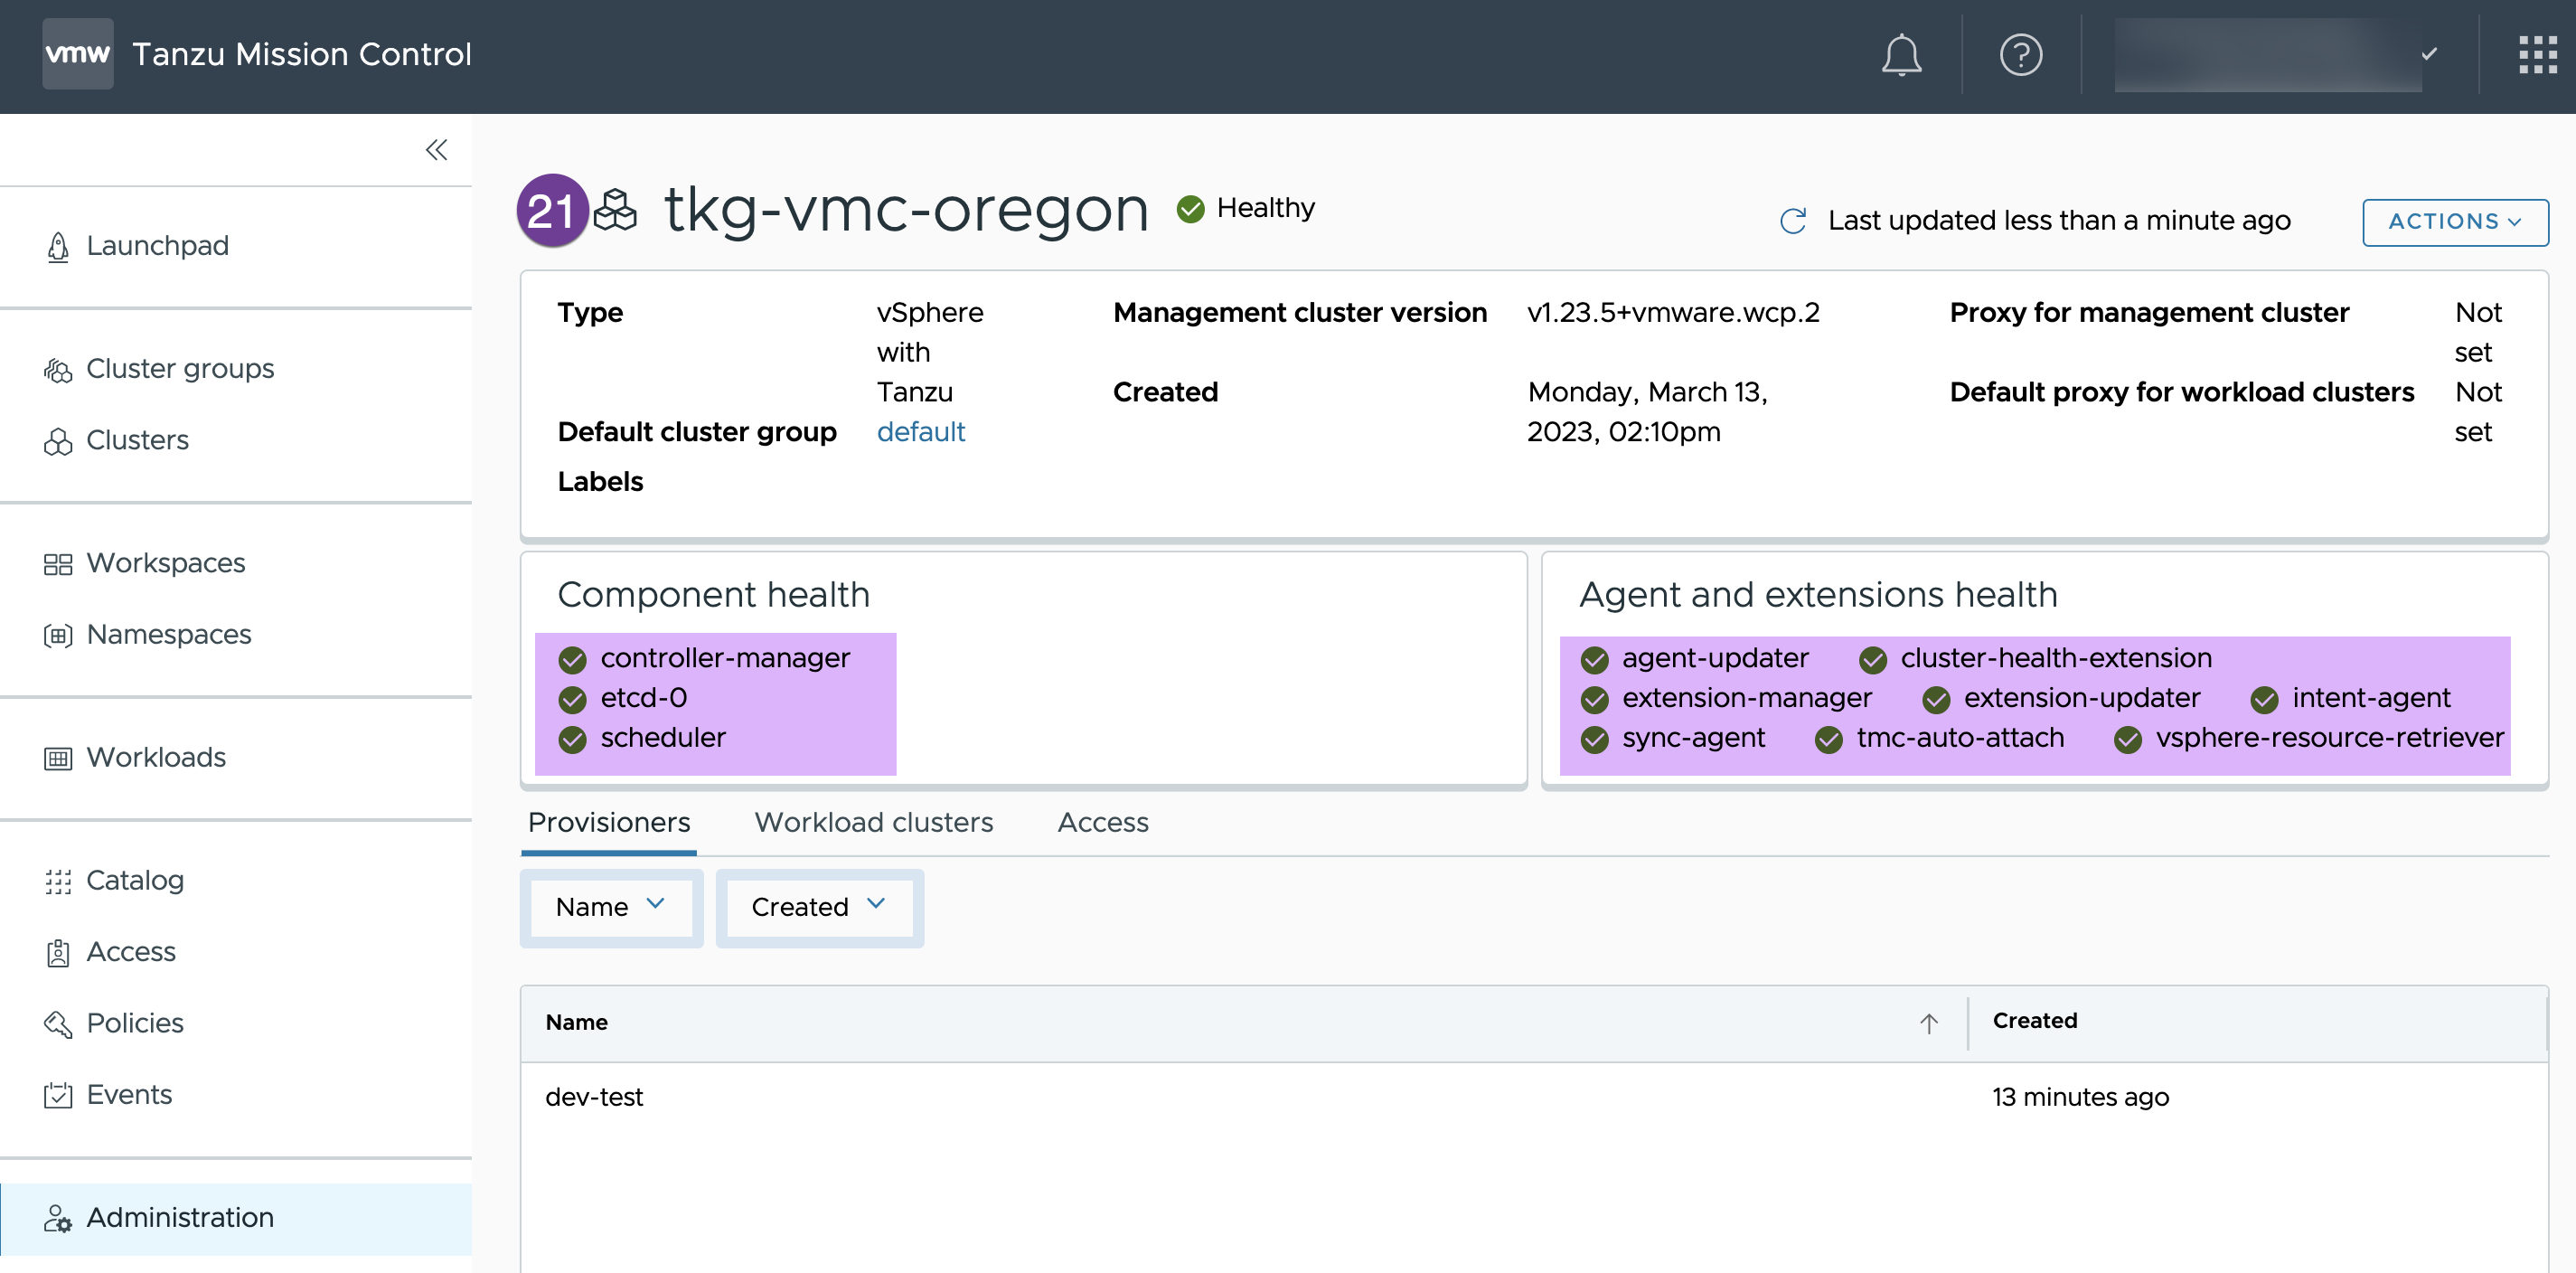
After few minutes you should see your supervisor status green
In this blog I have showed you how easy and straight forward to activate TKG on VMC and register to Tanzu Mission Control. And, you can leverage Tanzu Mission Control to manage your entire Kubernetes footprint, regardless of where your clusters reside (on-prem or cloud).
![]()